DIY Wire Trellis
Wire trellis can do wonders to your house and the best part is that this DIY project is super easy! Check it out!
I am so excited to share my DIY wire trellis with you today! These have been a part of my vision for the front of my house since we bought it! And this exterior has come a LONG way!
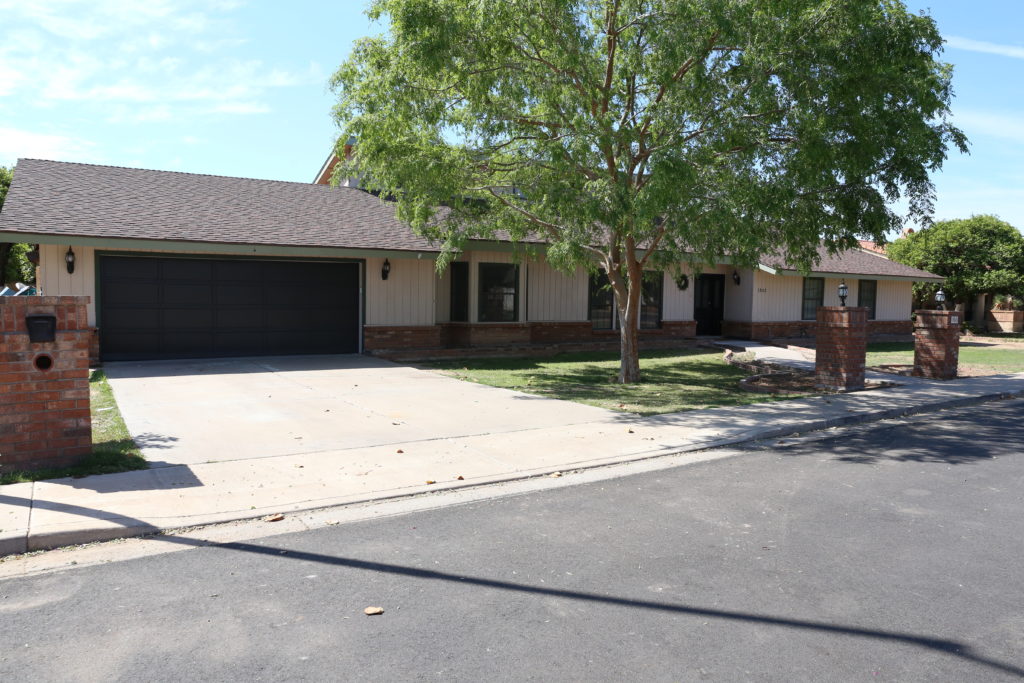
Check out how the to exterior has progressed!
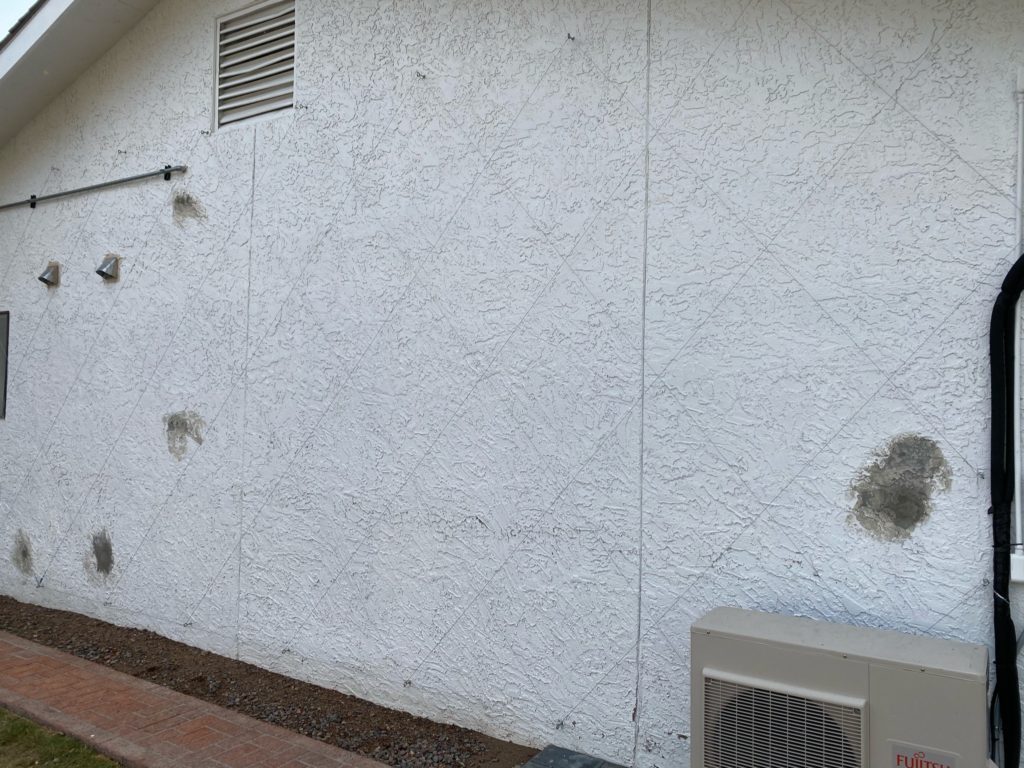
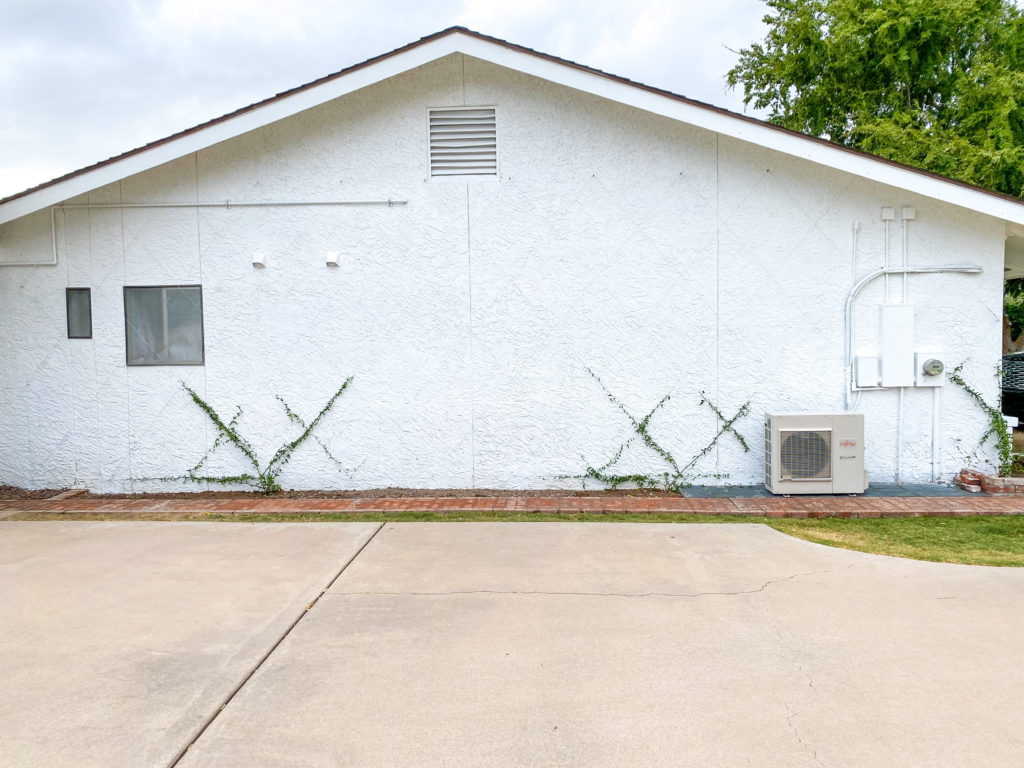
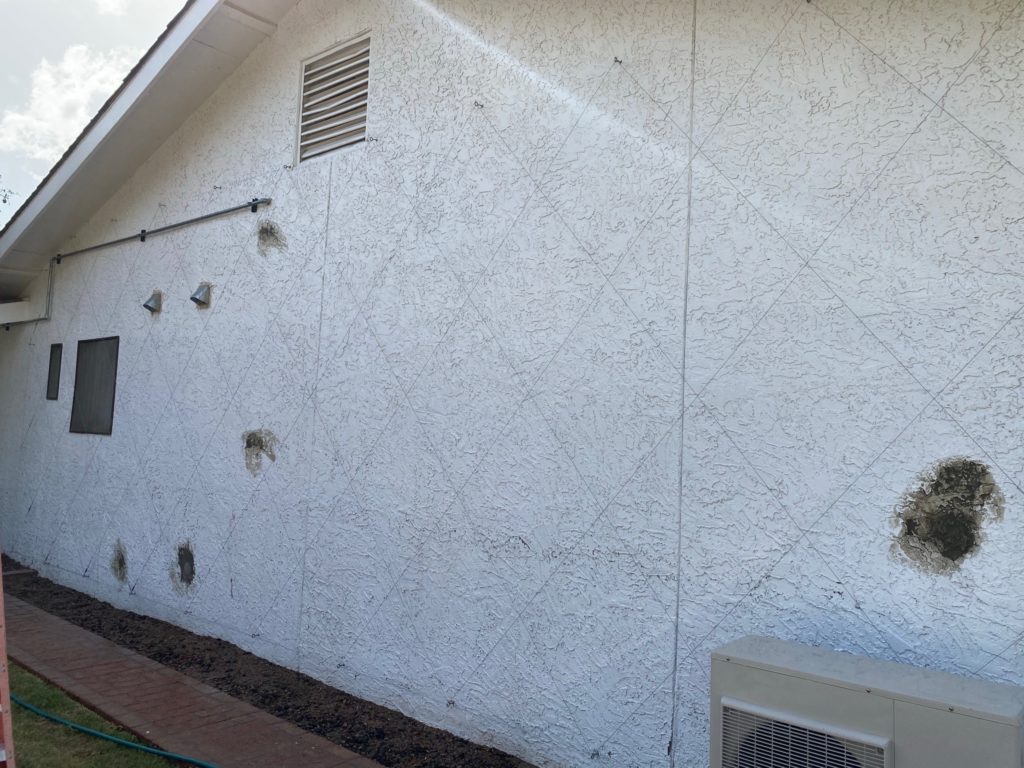
Before

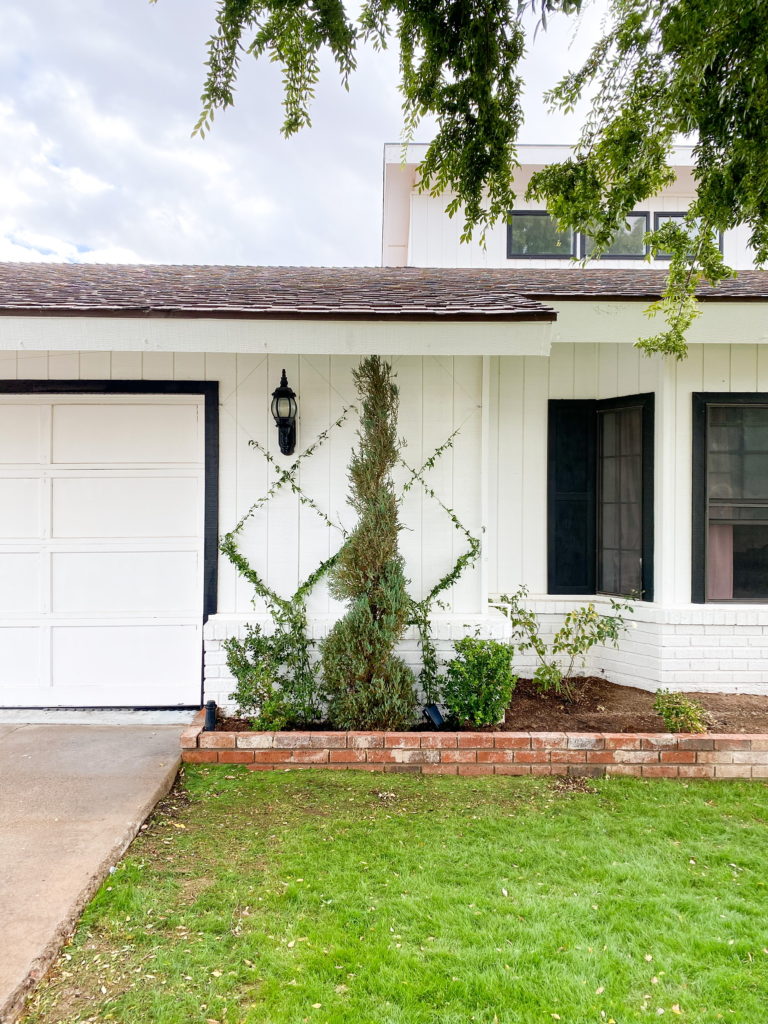
After
Kyle and I installed these ourselves and with a quick tutorial, it will be totally doable for you too!
Please keep in mind that these take many months to flourish and ours are still in the beginning stages! Just more to look forward to!
Materials for a Wire Trellis
- Chalk line
- Ladder
- Marker
- Hammer
- Drill Bit
- Hammer Drill
- Tape Measure
- Turnbuckle ( we used 10 of these) –
- Anchors ( we used about 25 of these, you need them if drilling into stucco, masonry, stone, concrete if you are drilling into wood you don’t need anchors- just use a wood drill bit slightly smaller then the eye screw)-
- Eye Screws– how many you need will depend on how big your space is
- Nose Pliers
- Swaging Tool
- Cable Cutters
- Wire Rope
- Ferrules ( we used 2 per wire end loop) –
How to DIY Wire Trellis
- Prep your area.
Measure the area you want to place the wires and choose how big you want to make the squares. Also decide where to place the eyebolts!
- Install eyebolts.
Once you are finished mapping out where you want to place everything, start installing them.
- Choose your pattern.
There are many different patterns you can create but it is important to plan it out before you start! Once it is decided, start placing the wire.
- Secure the wire.
You can secure the wire in a lot of different ways but we found that attaching a turnbuckle is easiest! Once secure, enjoy watching your house flourish!
Step-By-Step Directions
Step 1
Measure the area of the install and decide how big you would like your squares. We knew we wanted fairly large squares so the top of our pattern started at about 10 feet off the ground.
Step 2
Determine where you should place your eyebolts. We installed our eyebolts top and bottom at 3 feet apart. This allowed us to have larger squares that are about 28 inches.
Step 3
Mark out the location of your eyebolts and then install them accordingly. We had to drill through stucco and so we used vinyl anchors in the stucco to then thread the eyebolts into. Depending on what kind of material you are drilling into, you may or may not need this.
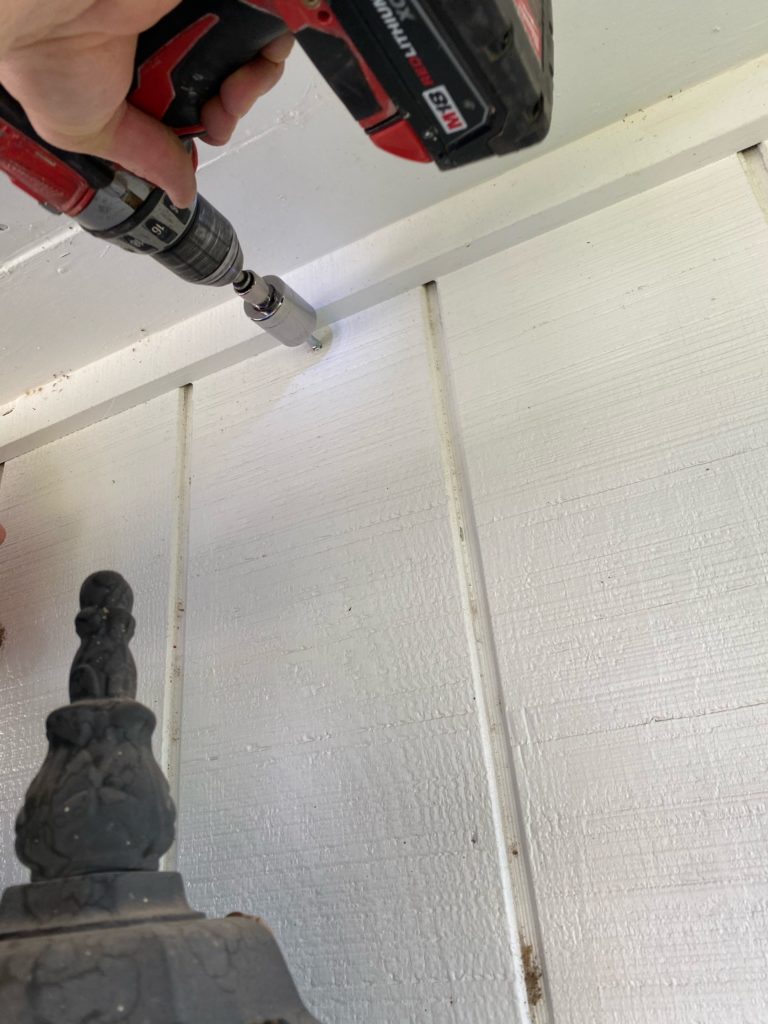
Keep in mind that the eyebolts need to be able to support the wire as well as the weight of the vine which overtime can be quite heavy as it continues to grow.
Step 4
Determine how you want to string your wire to create the pattern you want. For us, we started at a bottom corner, pulled the wire to a top bolt that was 6 feet away, this “skipping” two bolts on top. we then ran the wire down again skipping two bolts on bottom, or another 6 feet away. Continue doing that until you have Ran the wire to the opposite side of the wall you are working on. Go back to where you started to the next bolt on the bottom and repeat this process until all the bolts and wire is ran.
Step 5
There will be several wires at the end of either side of the pattern that will need to land on eyebolts somewhere other than the bottom or top of the wall.The easiest way we determine where these bolts will land is to take the loose end of the wire at the end of the pattern, and pull it tight until it is parallel to the wire adjacent to it. Mark where you want the last eye bolt to be and then install the last eye bolt.
Step 6
You will need to use a turnbuckle at the end of each section of string. We chose to put our turn buckles at the bottom of the pattern where ever possible to keep them hidden. It’s best to loosen the turnbuckle as far as you can before installing the loops at the end of each wire.
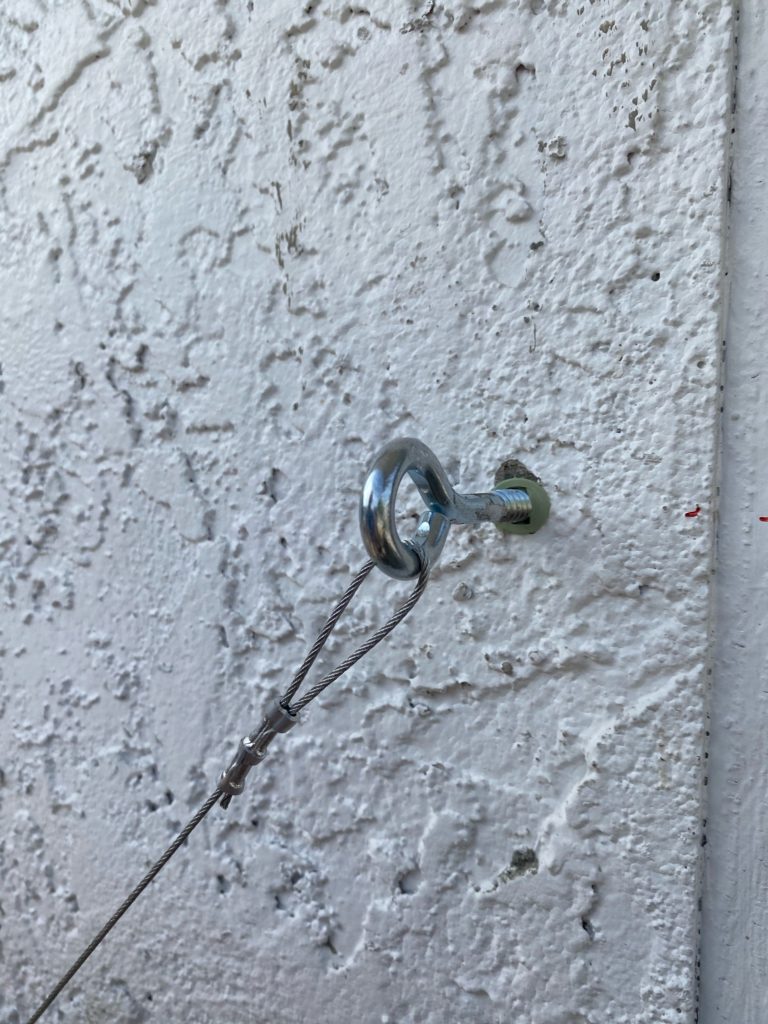
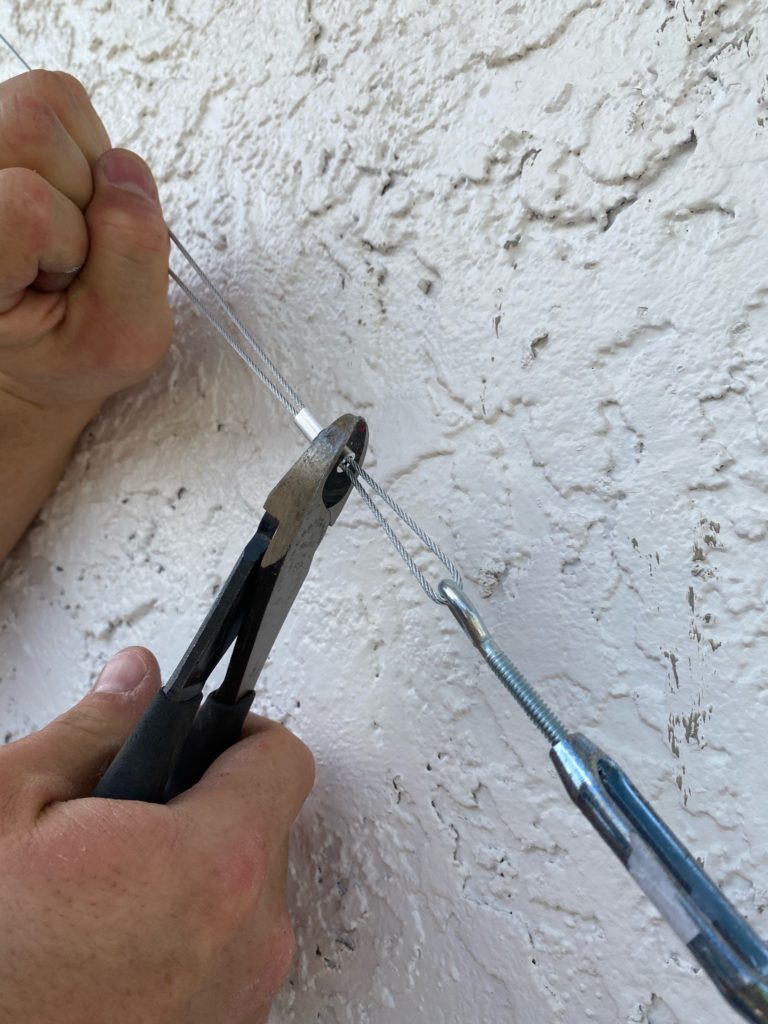
Step 7
At the beginning and end of each section of wire you will use aluminum ferrules to create a loop to attach either an eyebolt or a turnbuckle. I found it easiest to attach a turnbuckle to an eyebolt at the start of each section of wire, then to attach a loop at the end of the wire to the other end of the turnbuckle.This then allowed me to pull the wire tight at the opposite end of the wire. I then installed a loop at the End of the wire onto the final eyebolt. Once both ends of the wire are installed onto the turnbuckle and final eyebolt, you can tighten the turnbuckle and pull the slack out of the wire.
Repeat this for each section of wire you install.
I already can’t wait to write another post when it is full and growing beautifully! If you have any questions, send me a DM or email me and I will do my best to help!