
Modern Ranch Reno: Laundry Room Part 4 The Backsplash
This is a sponsored conversation written by me on behalf of Floor & Decor. The opinions and text are all mine.
I am excited that I get to show you the final part of my Modern Ranch Reno Laundry Room. My laundry room has been a major undertaking. If you have been following this laundry room renovation then you know that we came across some very unplanned things during this project. The Laundry Room has been in the works since July. But now that this space is done I can honestly say it has turned out even better then I thought it would. If you are new to this series you can see the laundry room Part 1: The Demo HERE, Part 2: Appliances HERE and Part 3: All the details on this stunning flooring HERE. After the flooring was installed I really fell in love this space! It was so beautiful and functional, but I felt like something was missing. I decided that I wanted another fun pattern and element in this laundry room and a decided a backsplash was the perfect thing to add. To add the backsplash around our laundry room window was a simple and affordable place to add that missing element. So today I want to share Part 4 of this laundry room renovation, the backsplash and the completed Laundry Room.
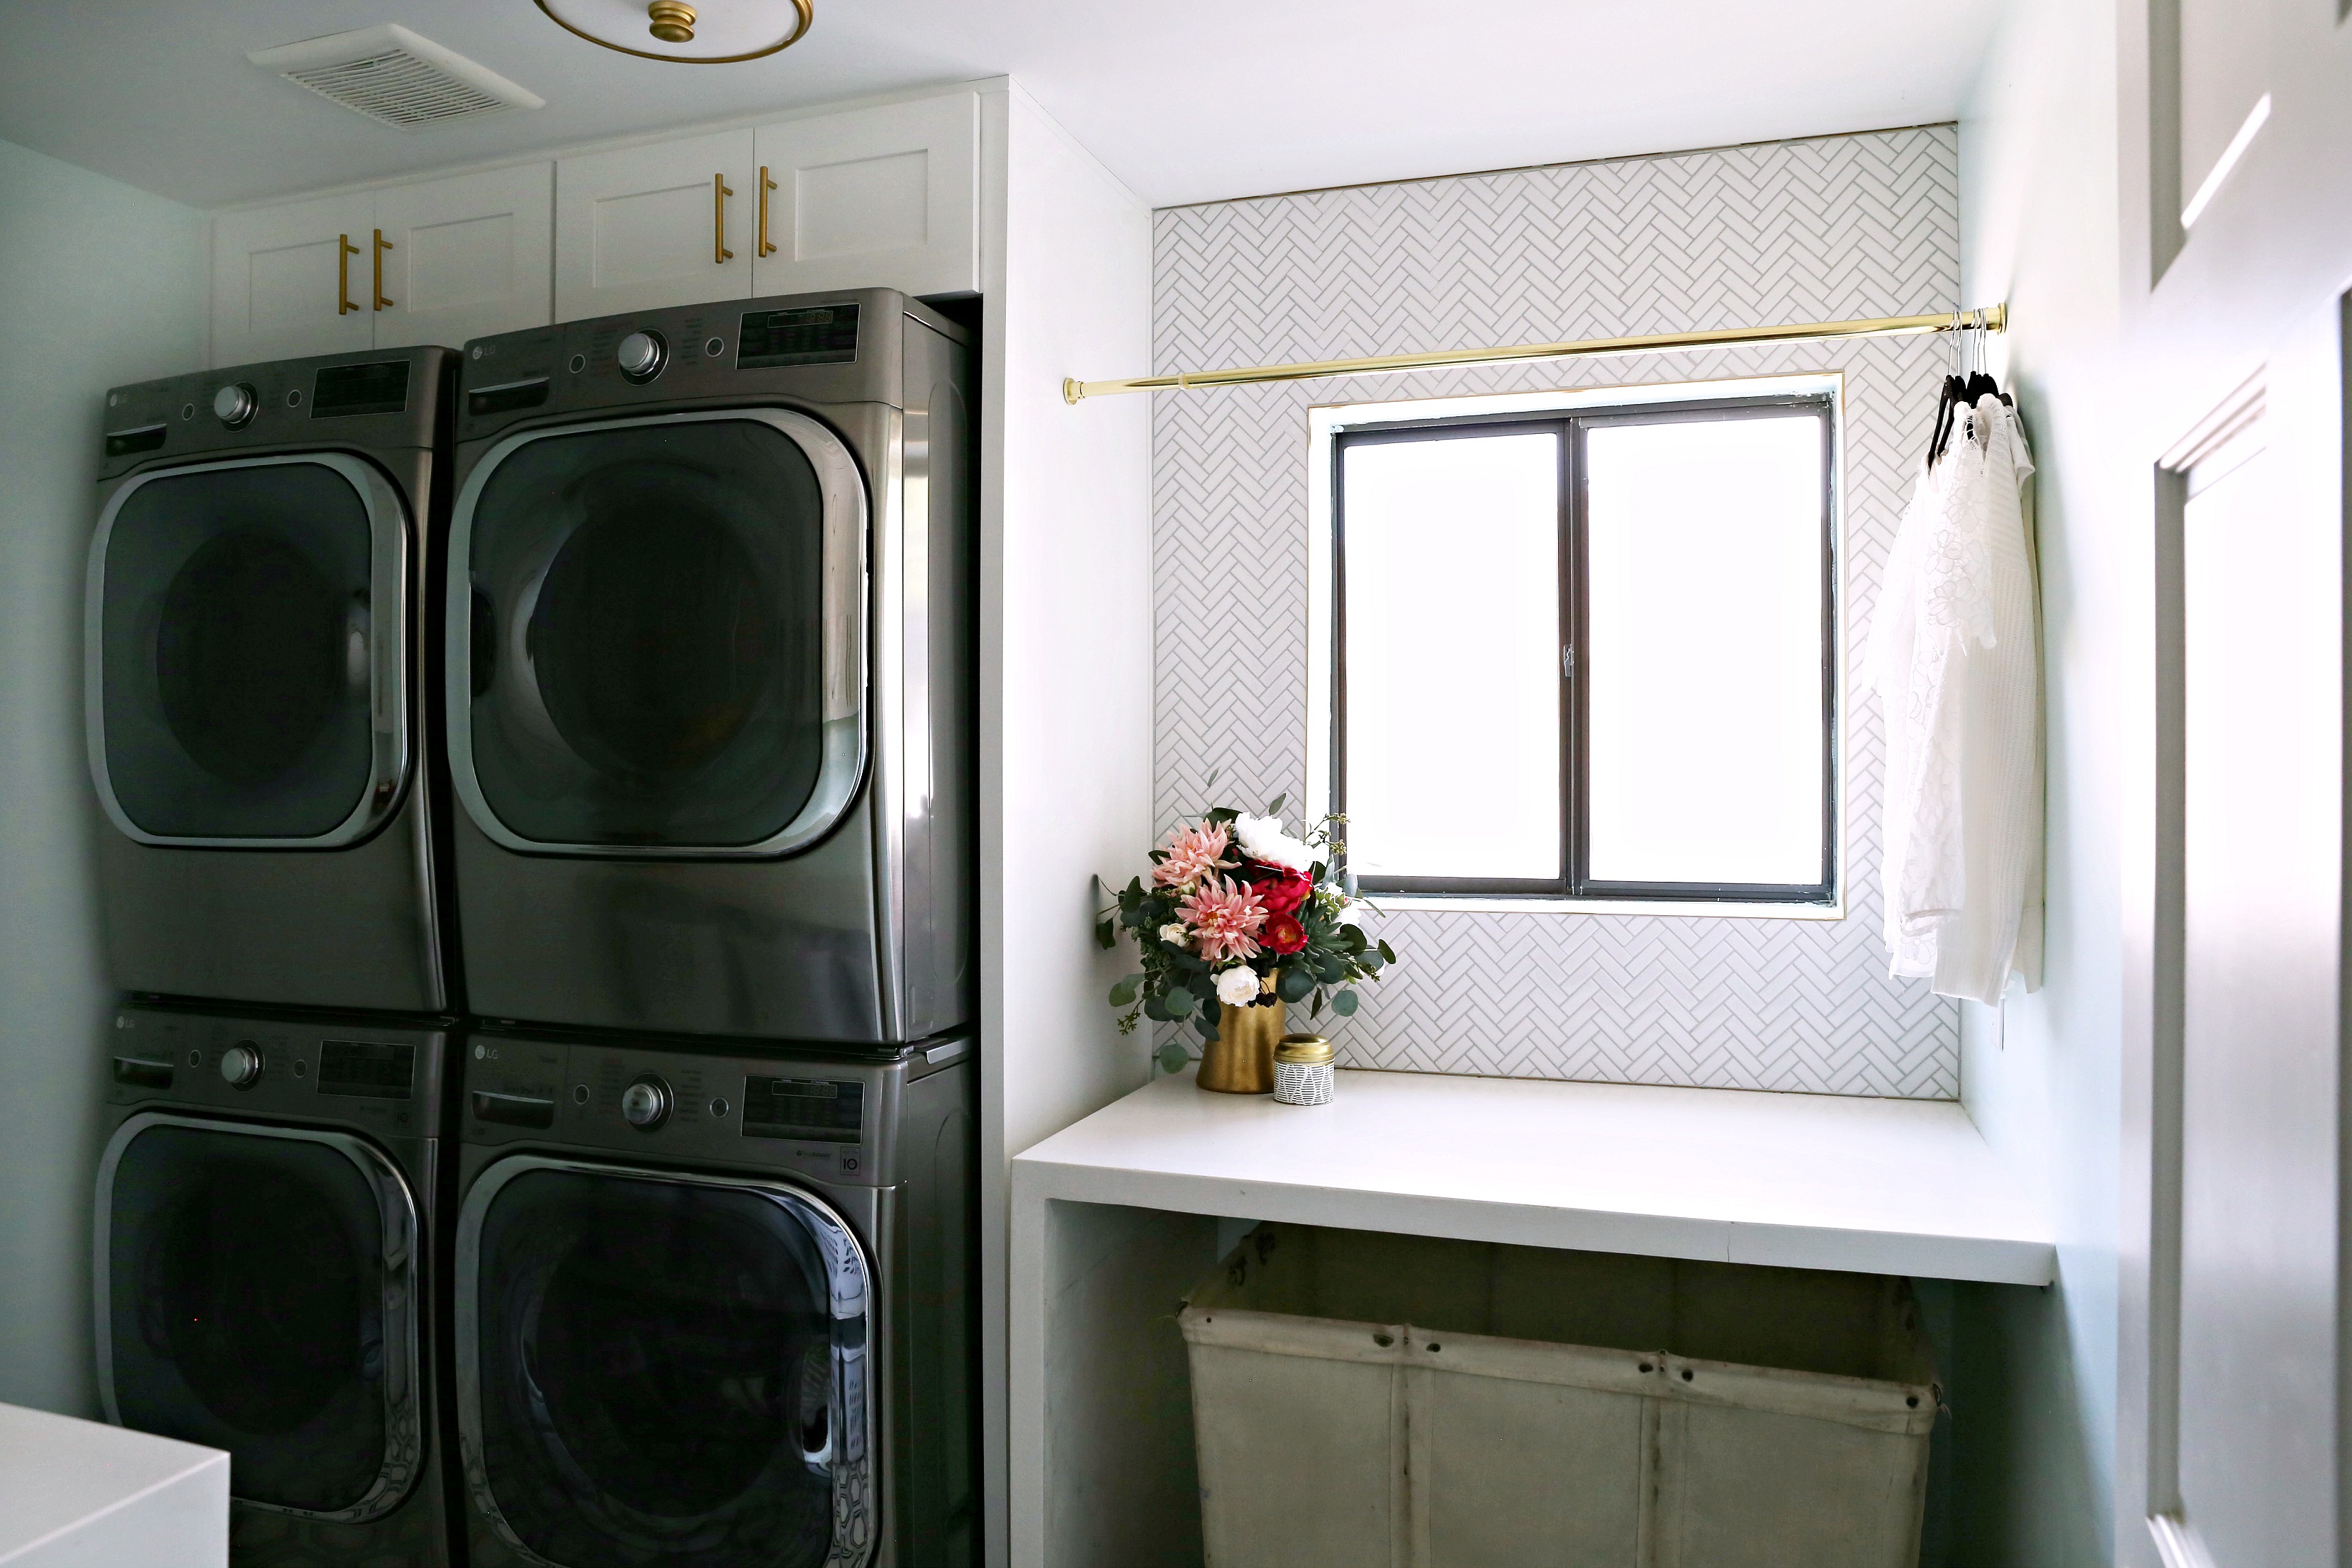
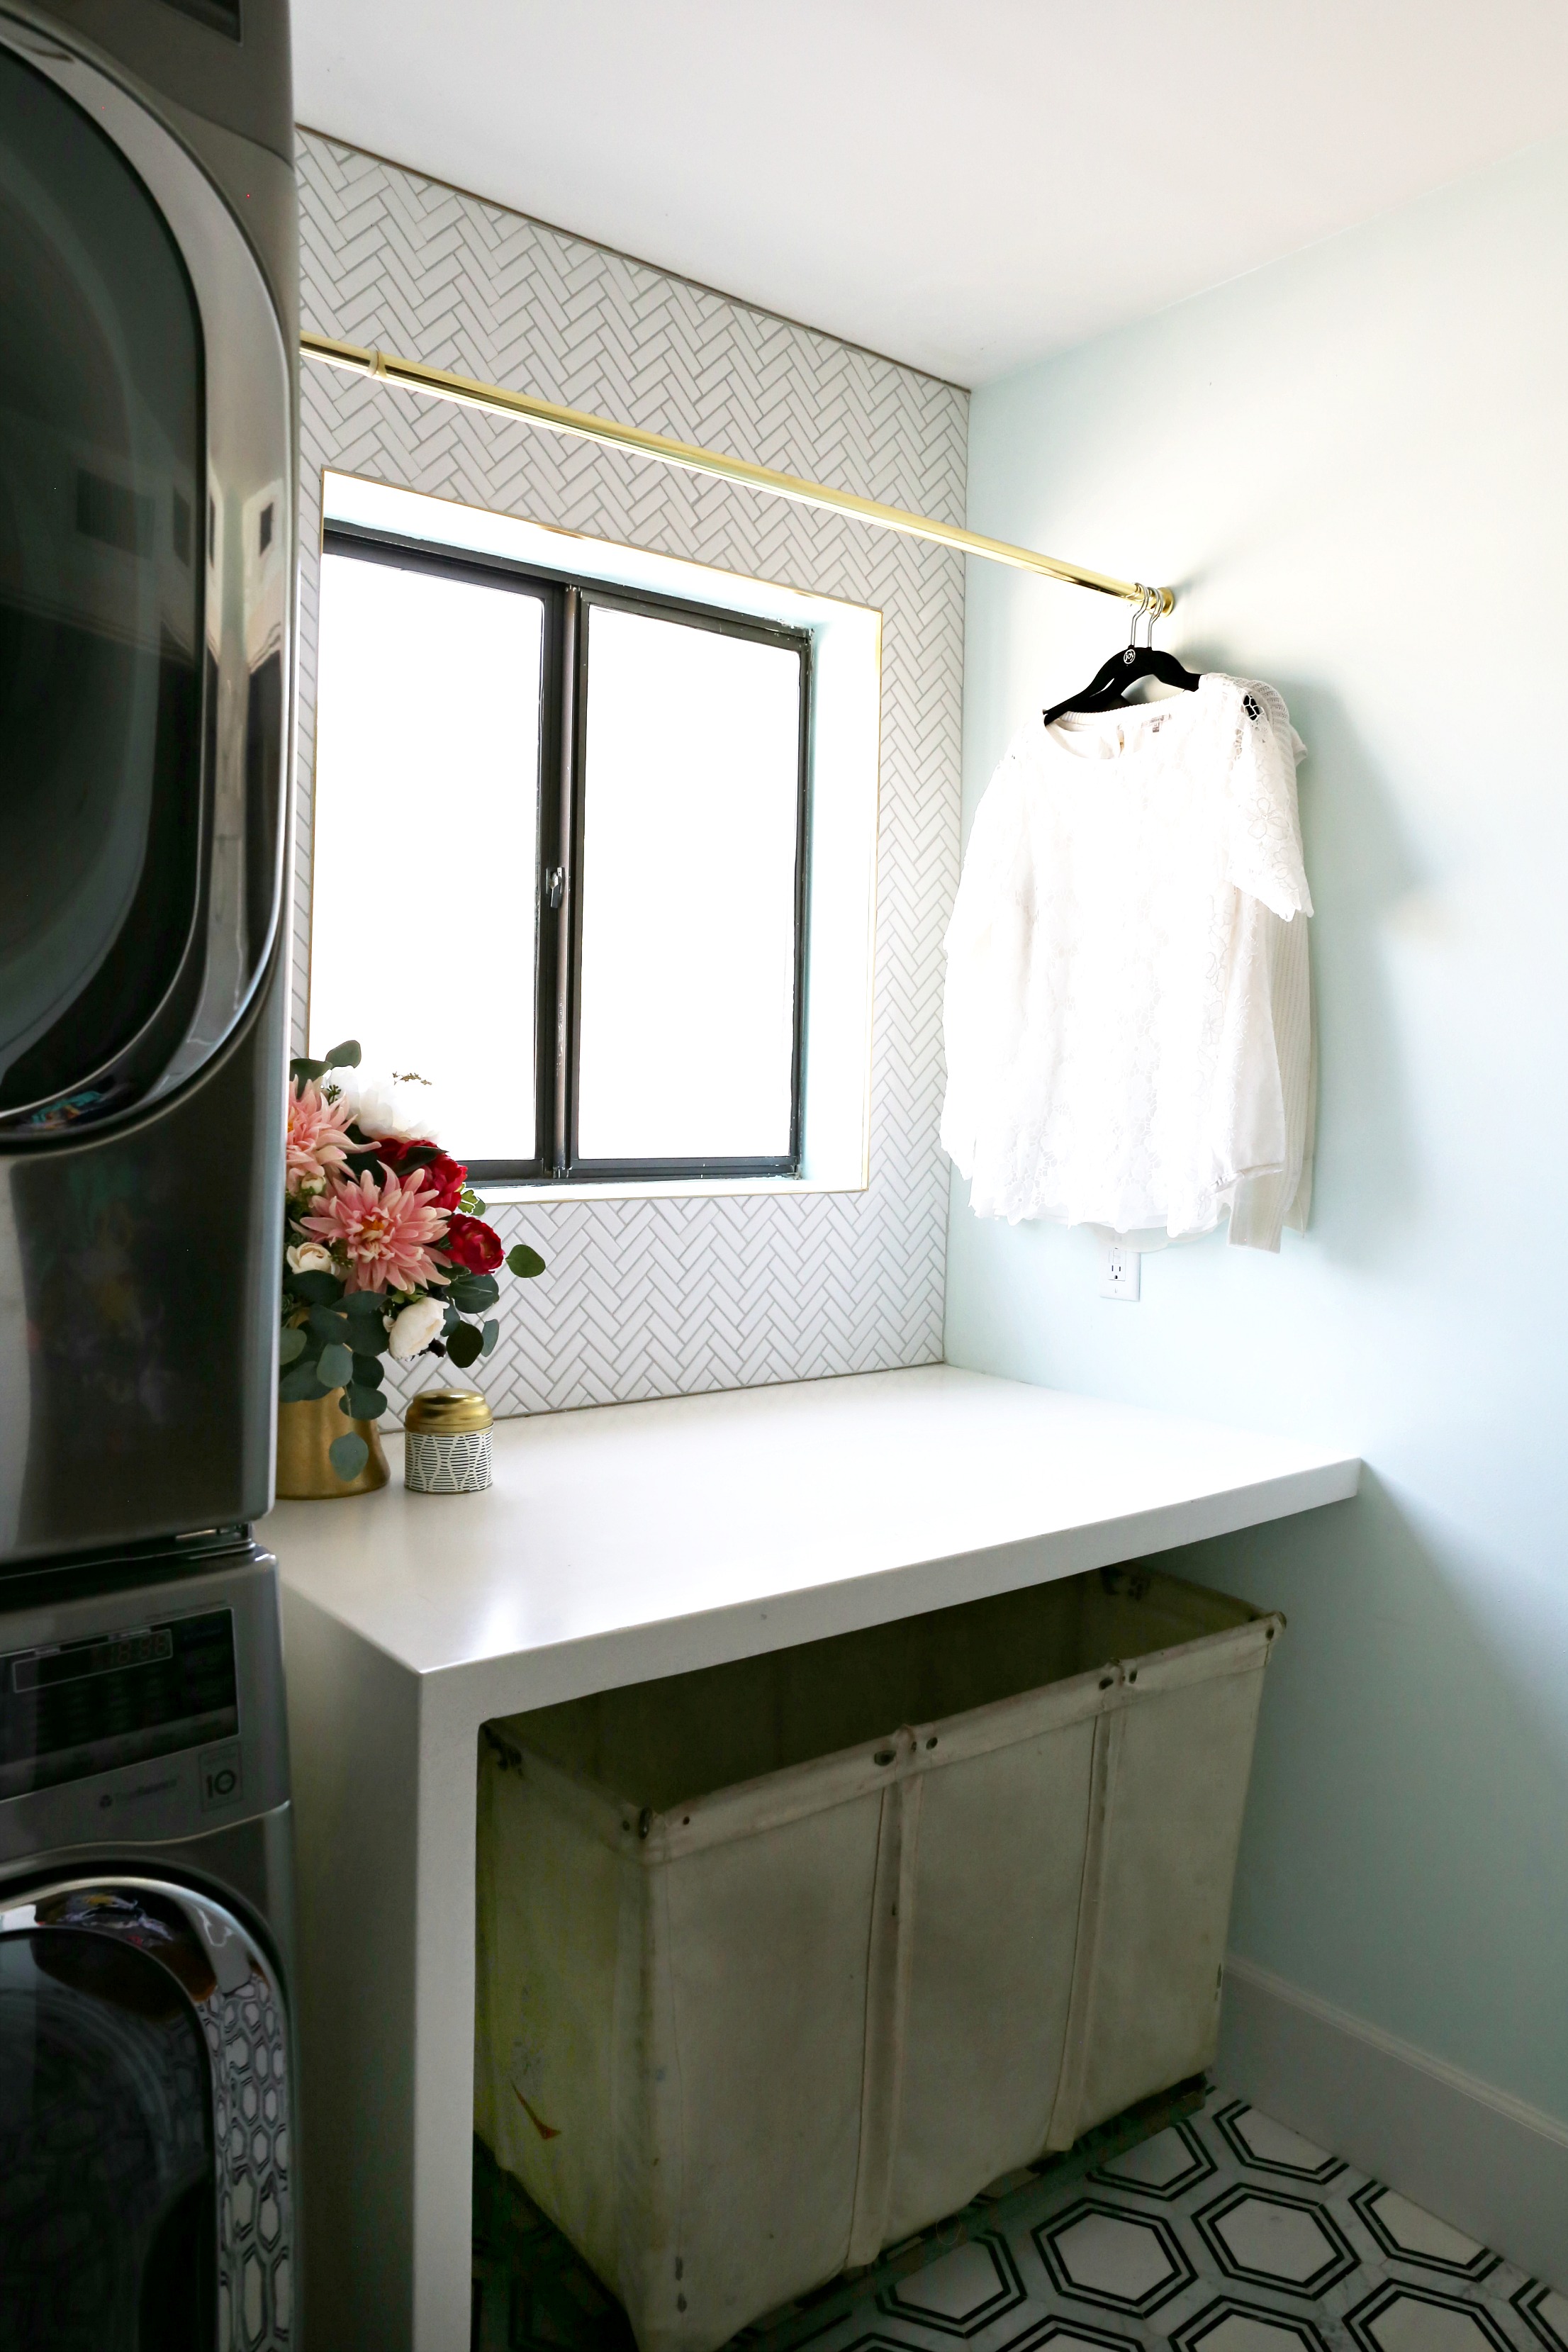
I wanted the backsplash to be simple and classic. I loved the flooring tile that we used which is this Carrara Thassos Hexagon Marble Mosaic and I did not want to take away from that. After a trip to Floor & Decor, we picked up a few options for the backsplash. My final section was this white herringbone tile . I love the pattern! It is simple, classic, and it compliments the flooring instead of taking away from it. This tile was exactly what I was going for in this space. For the grout we decided to use the same grout that we used on the floor which was this FlexColor grout in the color Rain.


Now here are a few more details on what we used to finish off the laundry room. One of the challenges we had with this backsplash was how do we finish the tile without tiling inside the window. Luckily Floor & Decor already had that all figured out for us! We used a Schluter trim piece to trim out the window. I love how it finishes off the tile so beautifully. Before we started to put up the backsplash we install this Schluter JOLLY Satin Brass trim around the window.
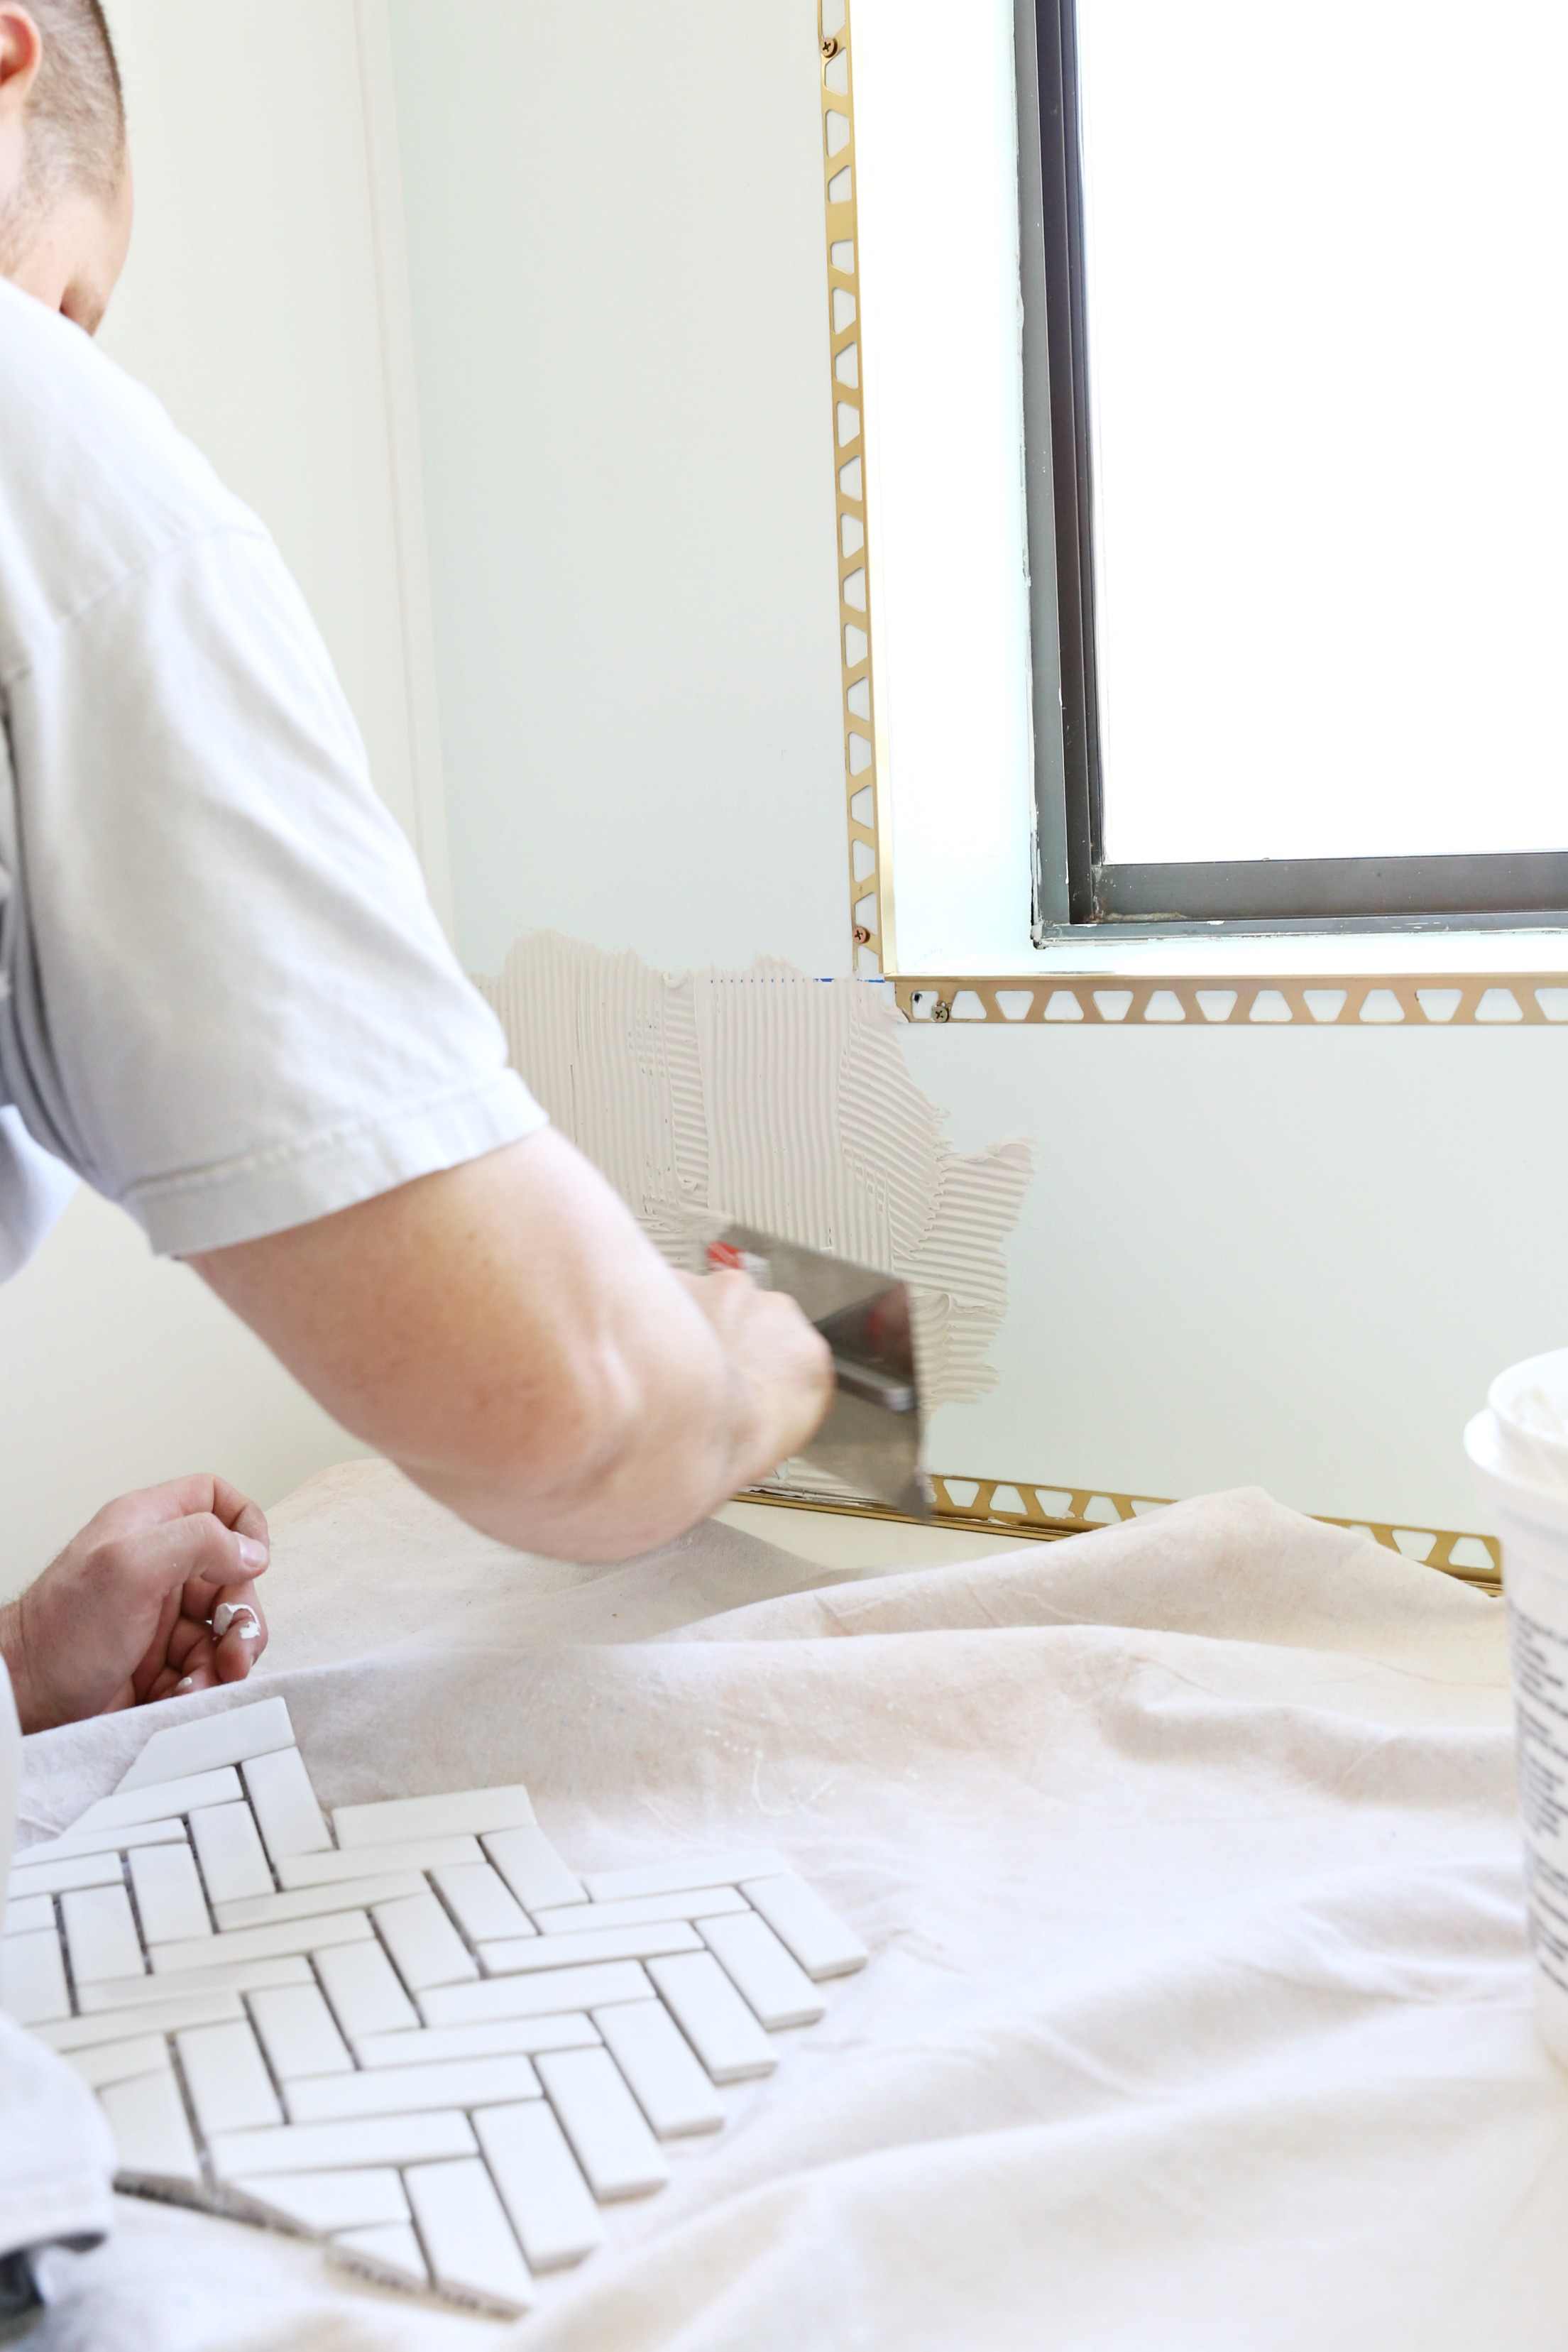
After that was installed we were ready to start installing the tile. We used the Mapei Type- 1 White Adhesive and applied it using a 1/4 inch V Notched Trowel.
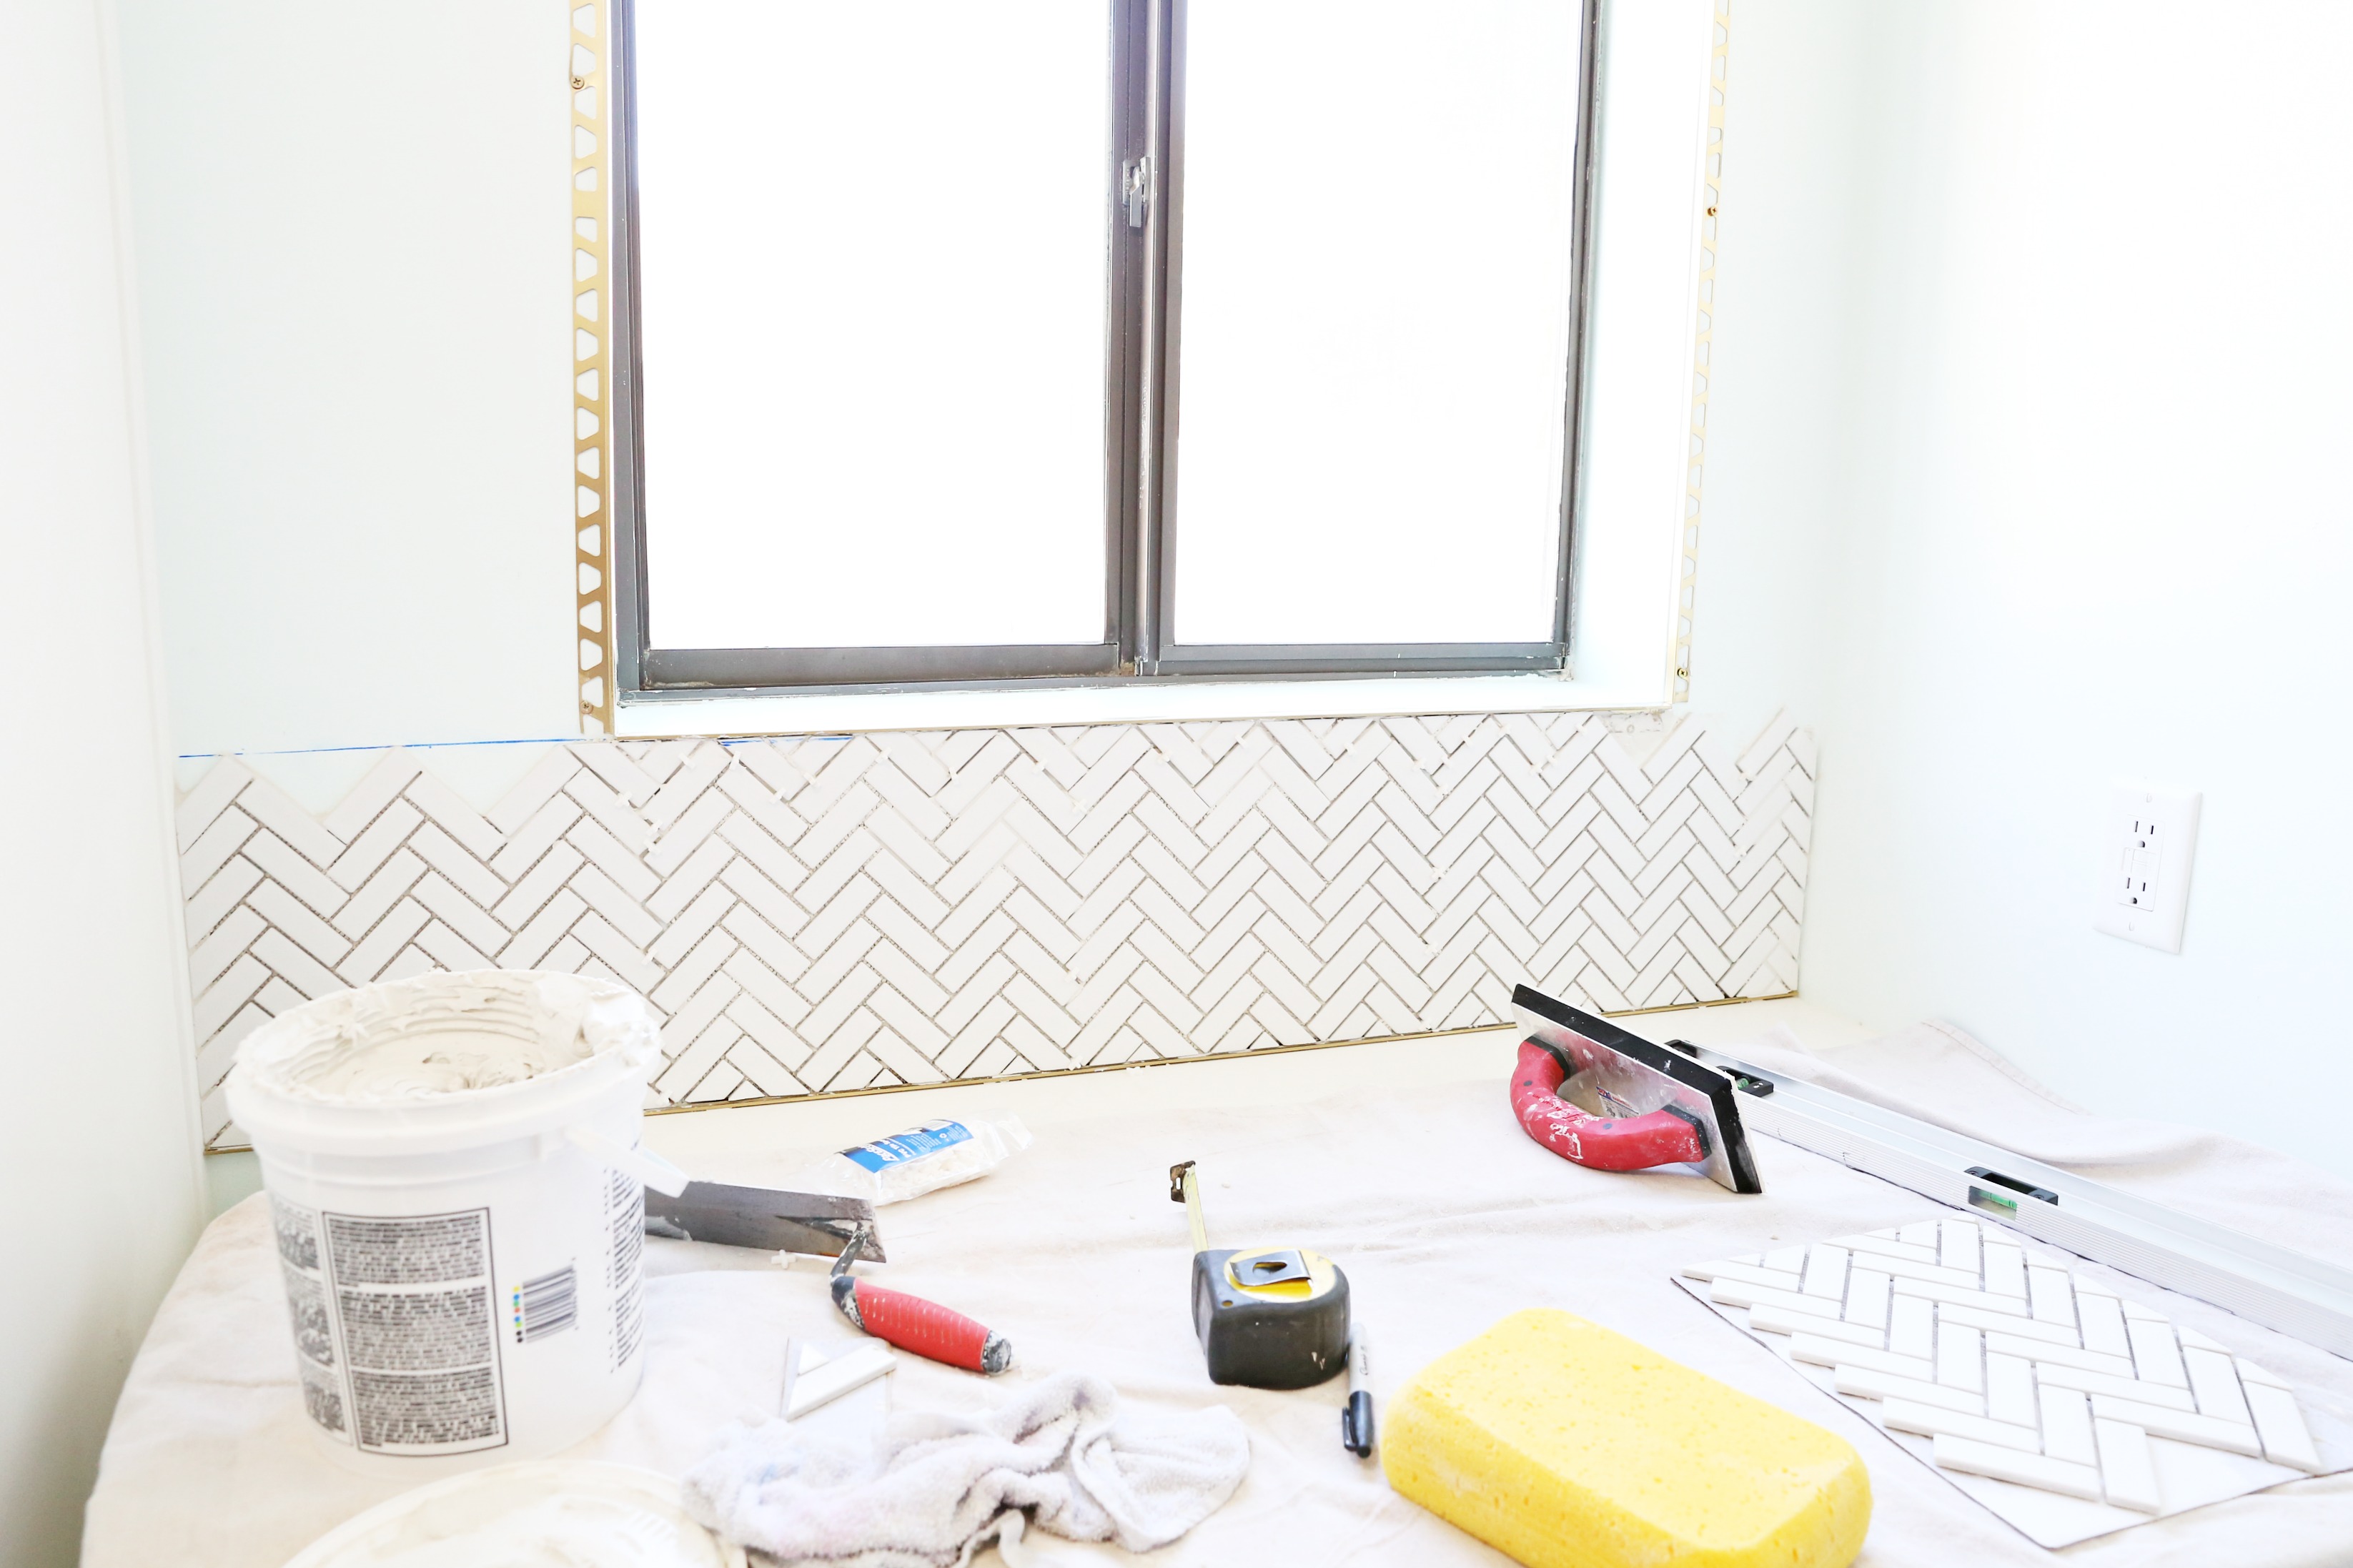
Not only did we install the Schluter around the window we also added it at the top and the bottom of the wall. I loved the finished look and I loved that it add a bit of brass to the backsplash which tied in with the rest of the room. We started tiling from the bottom and worked our way to the top.
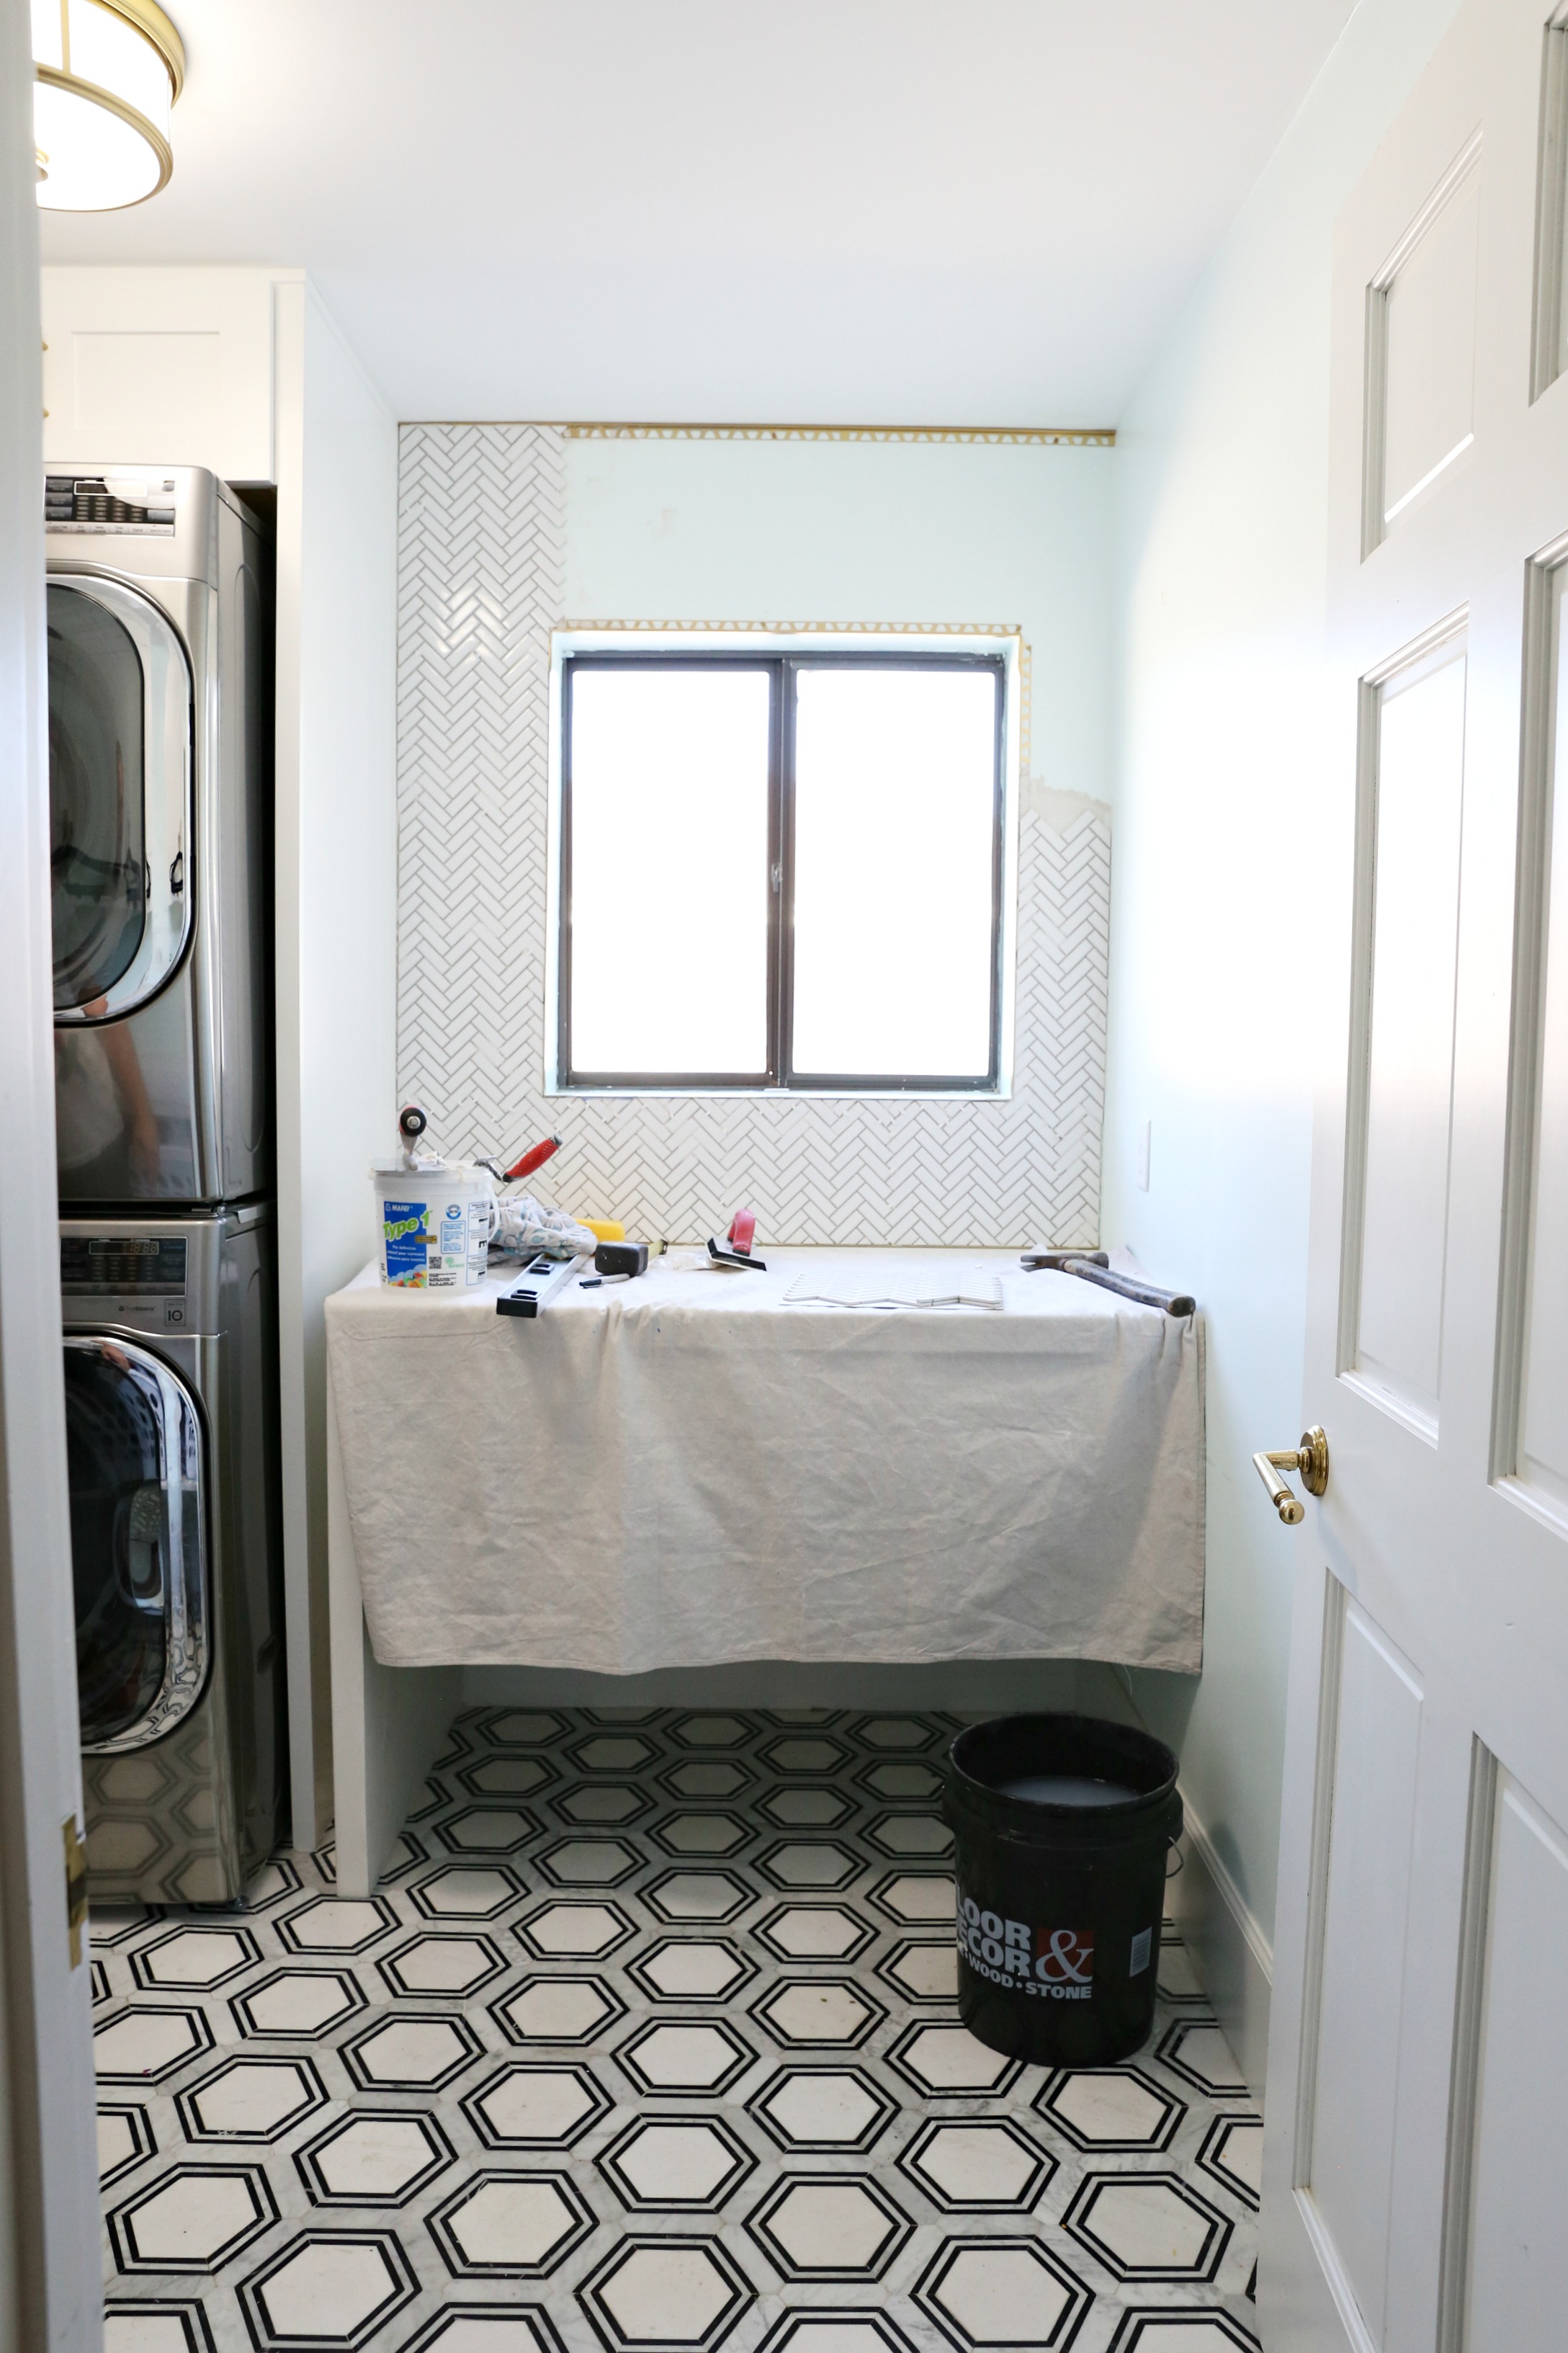

Going around the window was a little tricky but after the first row went in it was pretty easy to install.

The key to any tile work whether it be on a backsplash or floor is measure twice and cut once.
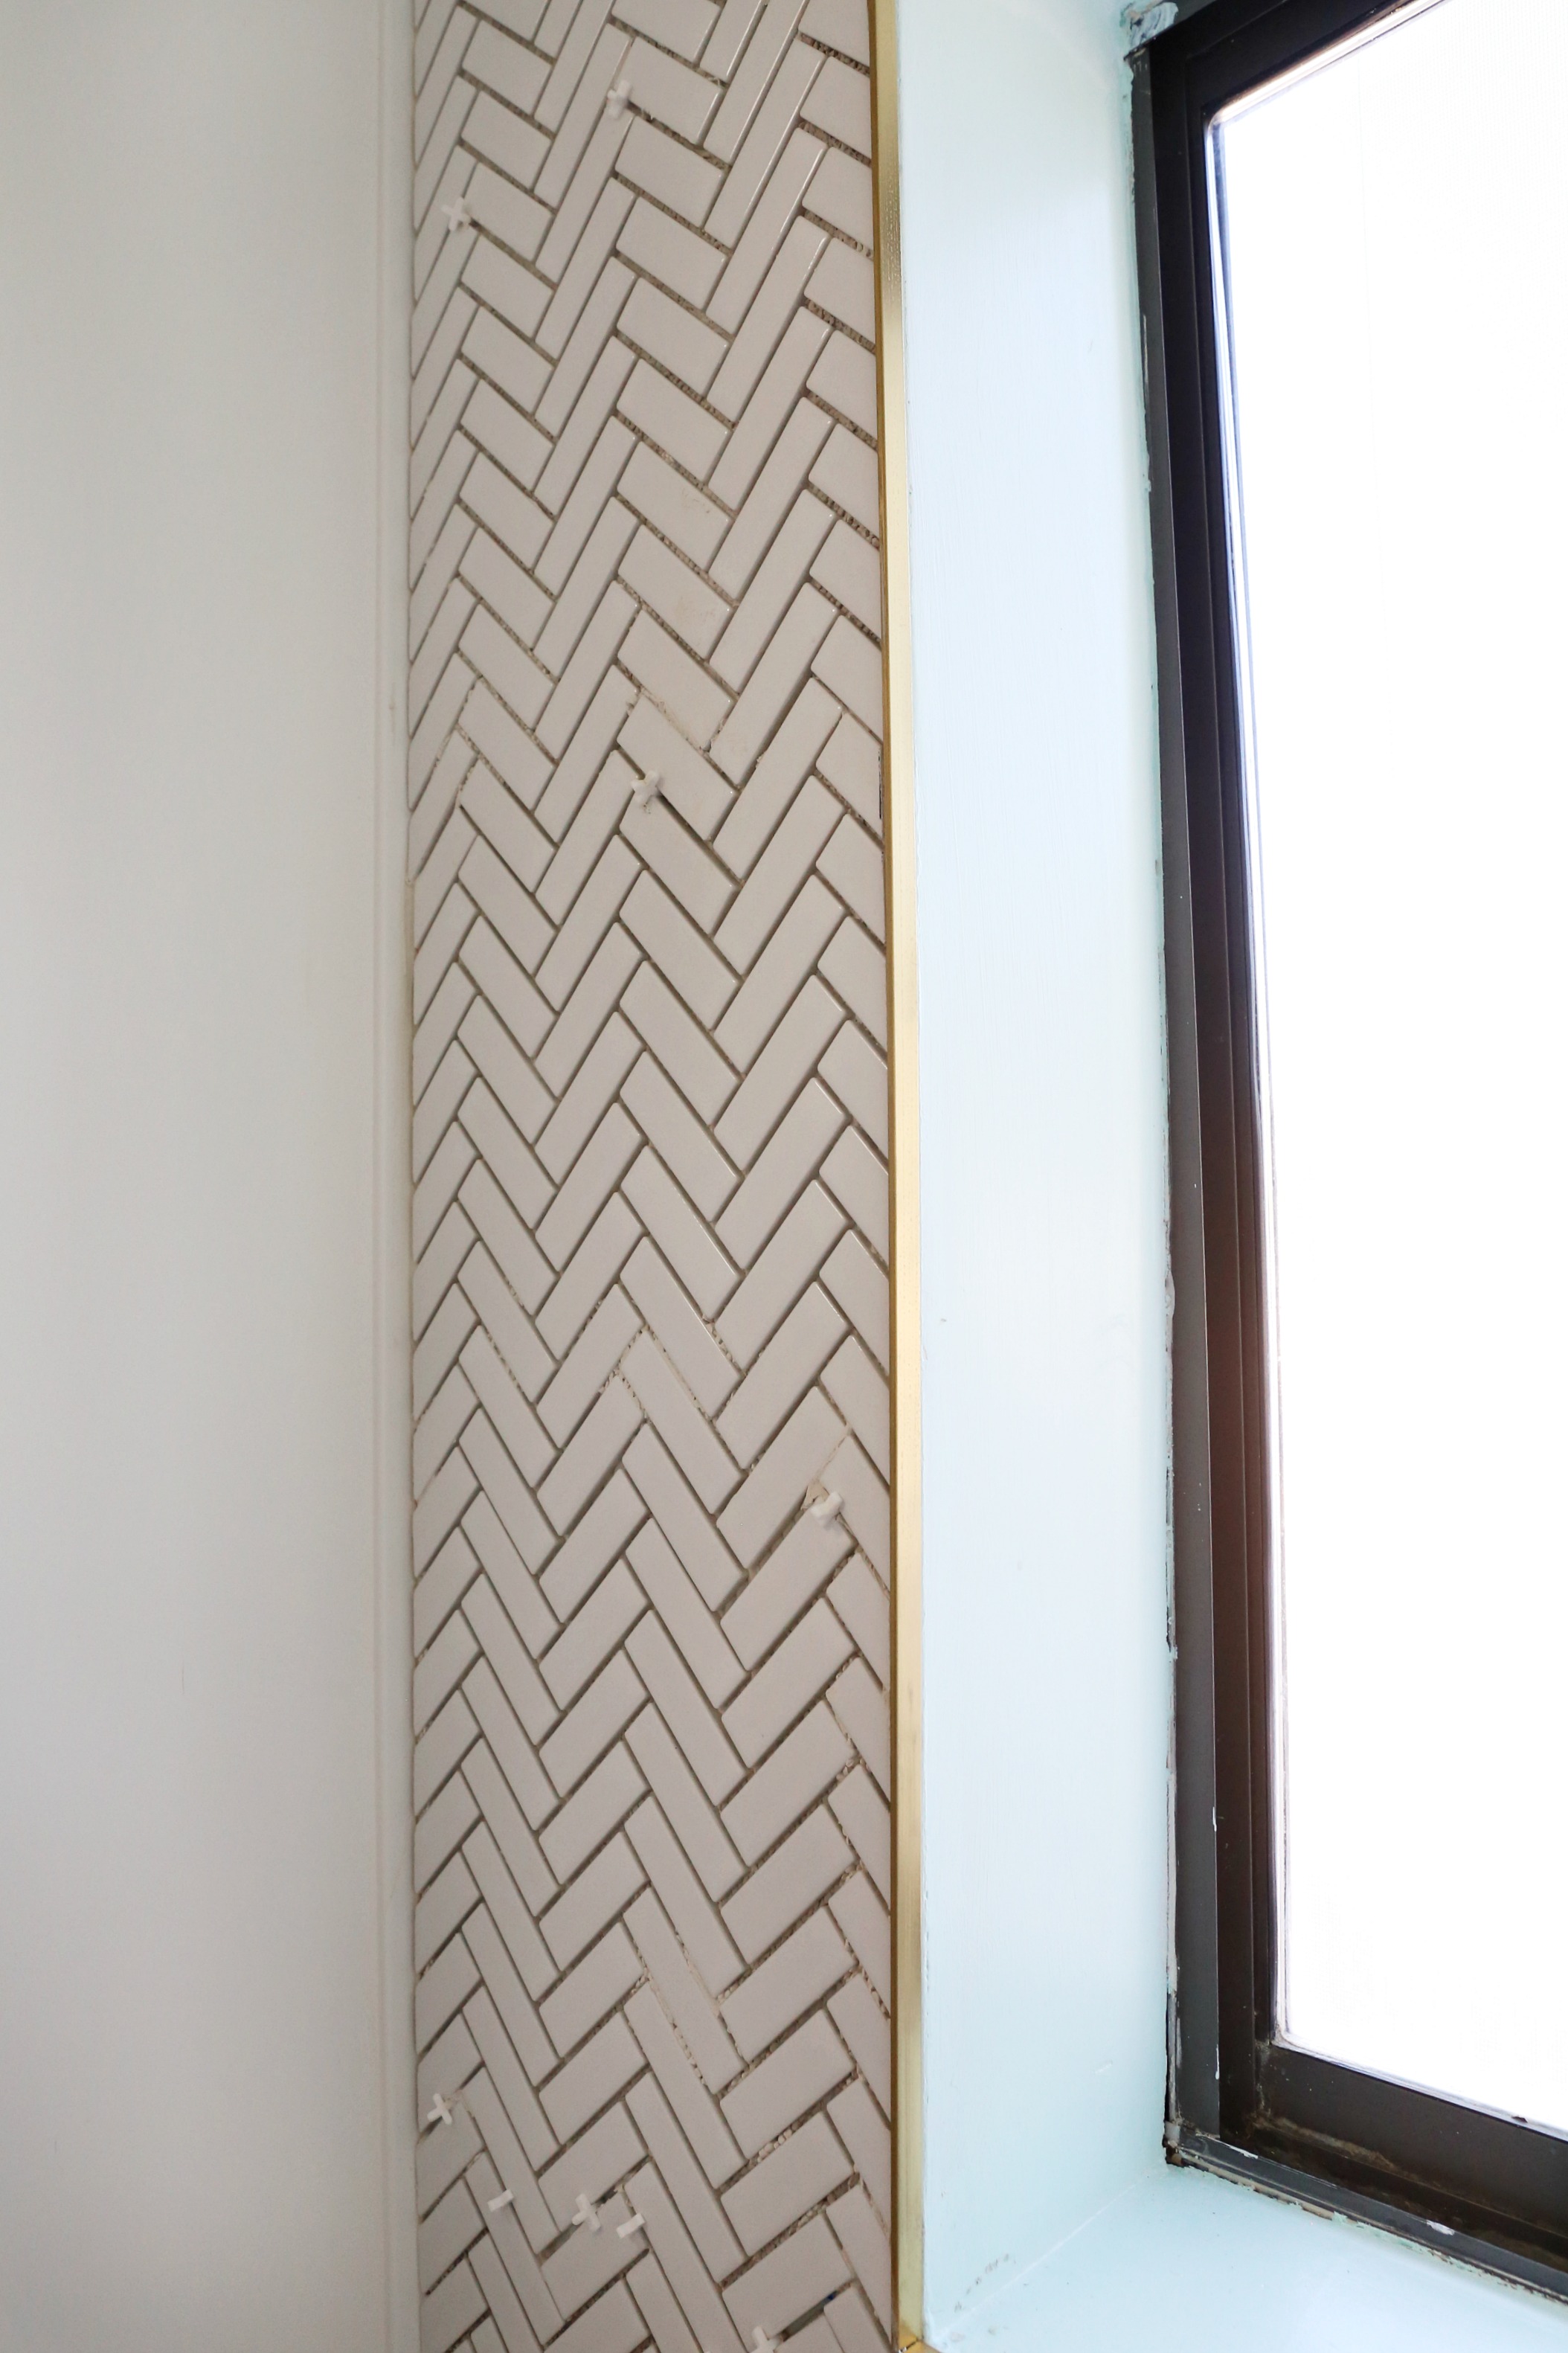
I love the way that the brass Schluter looks and finishes out the window. Like I said before it adds another really fun element and brings everything together.

I love how the light grey grout makes the white herringbone tile pop. I love this pre-mixed grout so much. Mallory and I have used it on almost every tile job we have ever done.
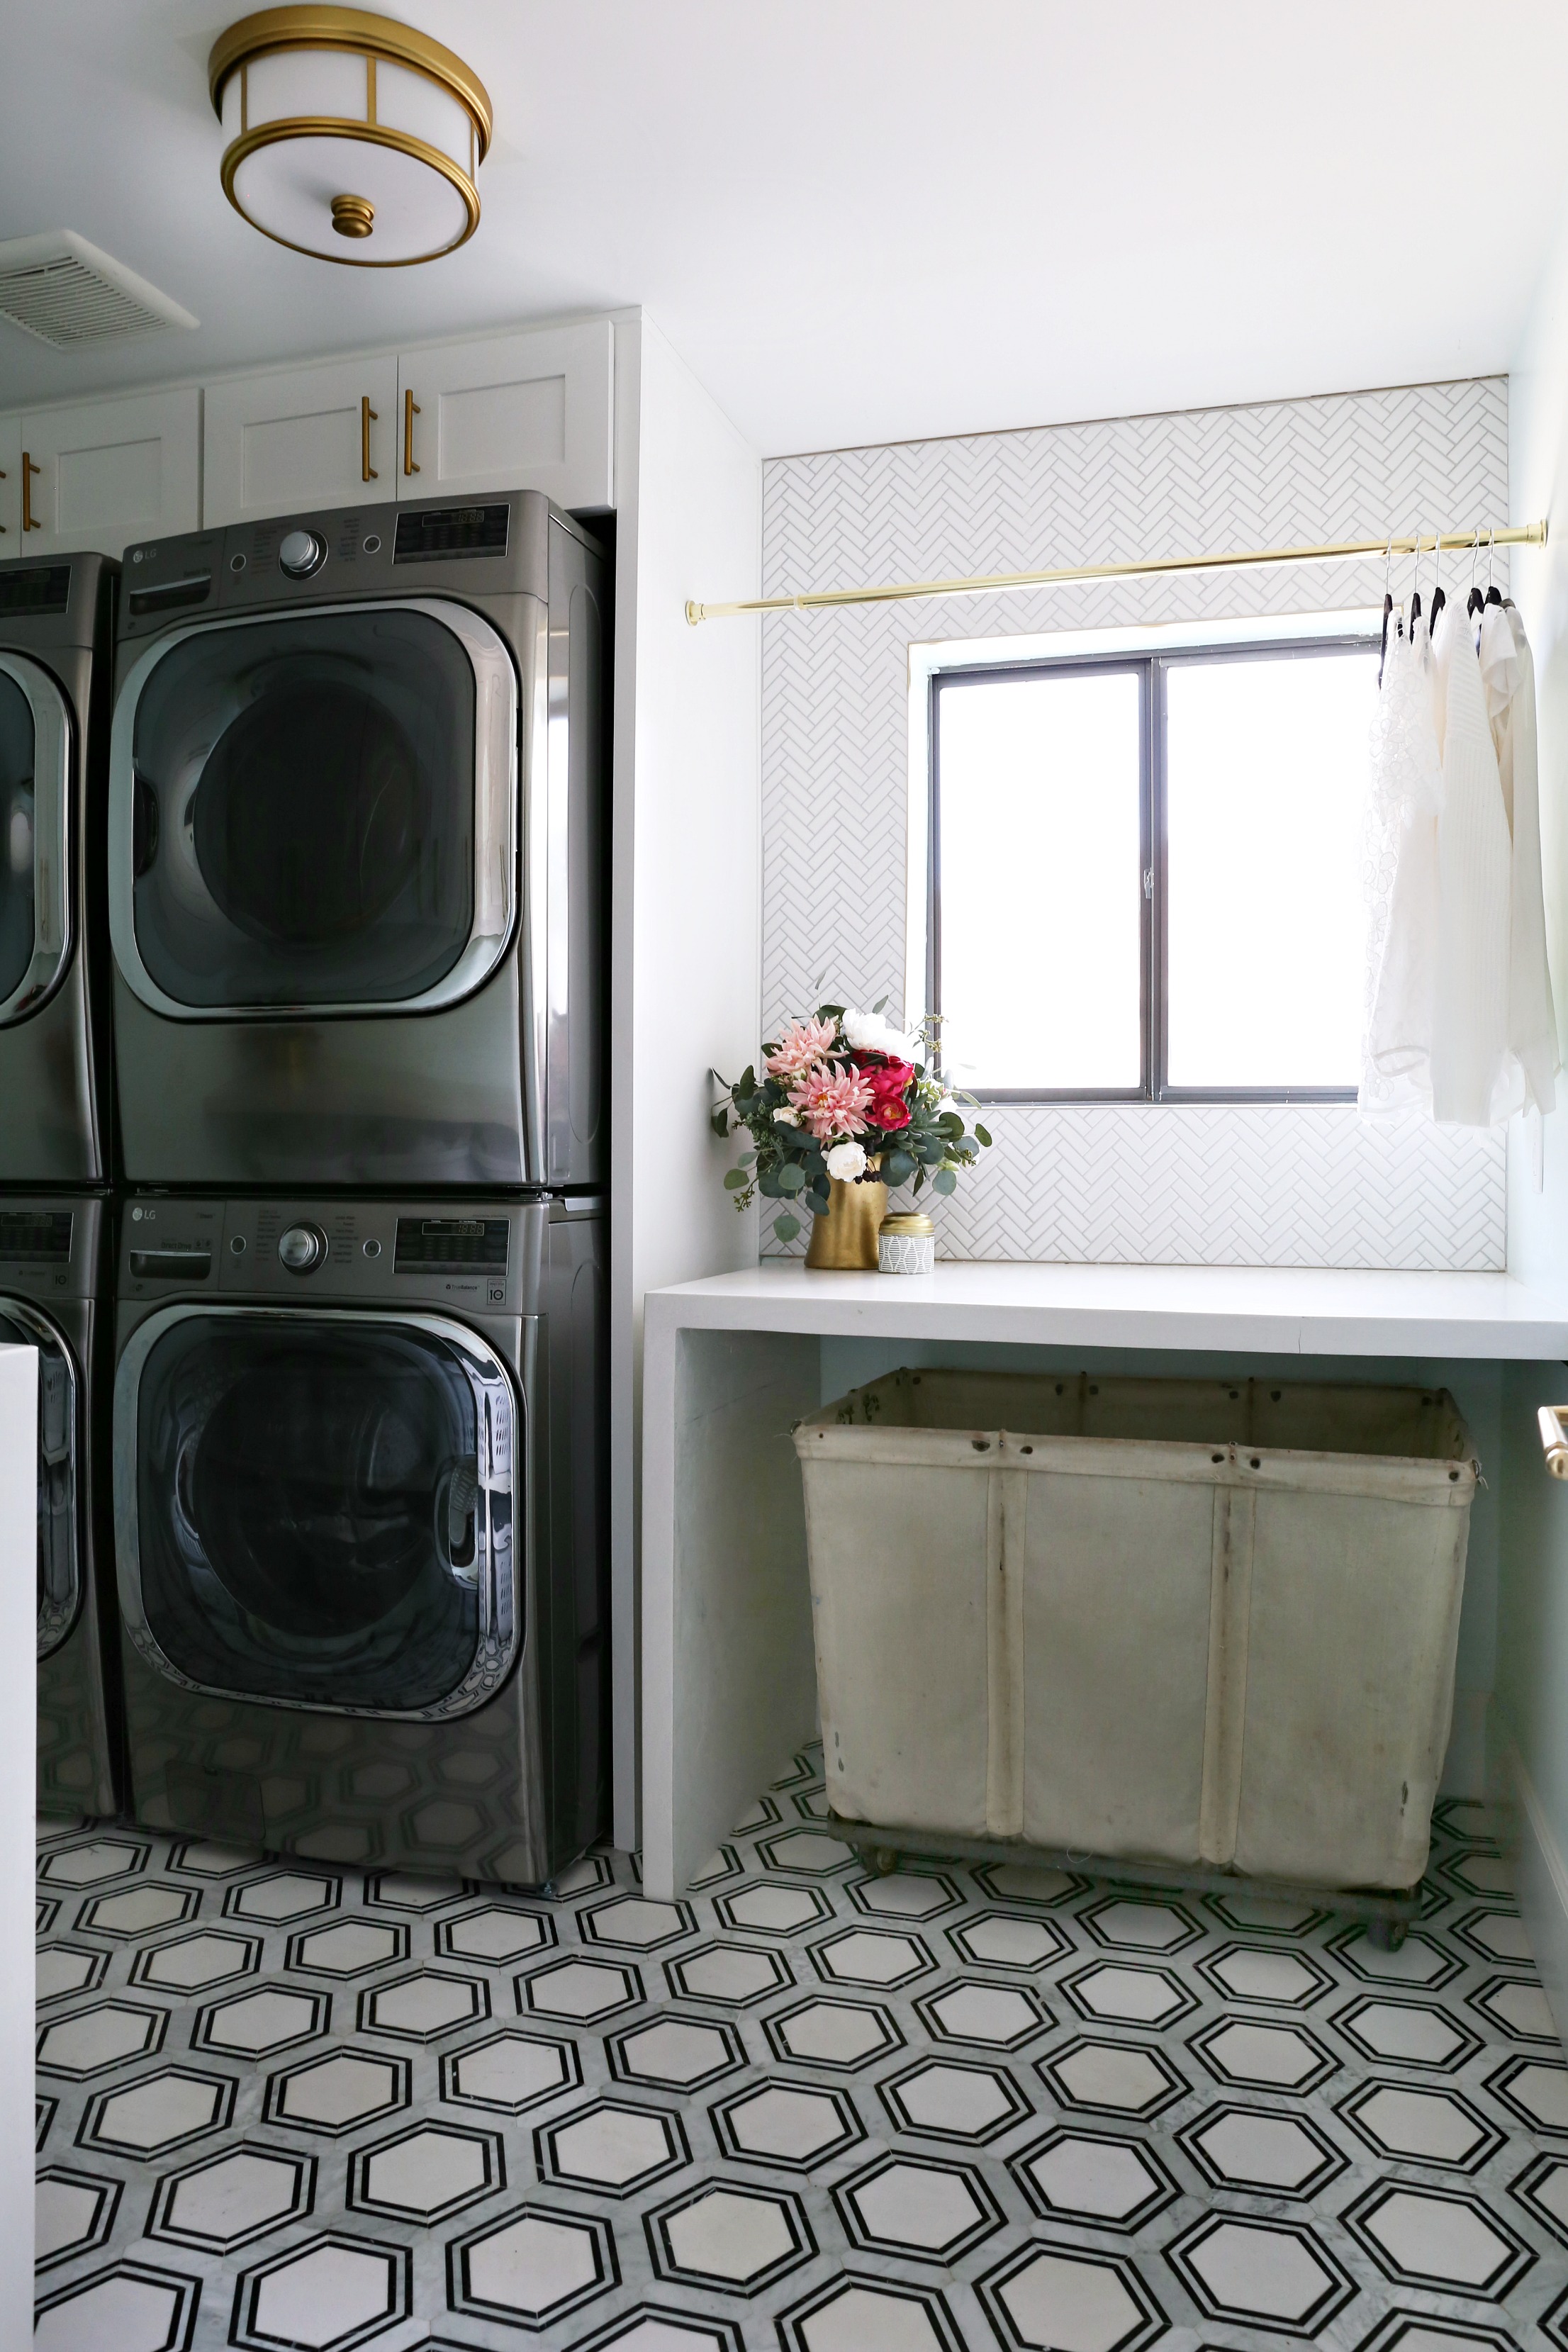
I love the way that my laundry room has turned out. The backsplash was the perfect way to finish off one of my favorite spaces in my house. This laundry room has been such a labor of love for us. I am so happy it turned out even better then we could have ever imagined.
I love that Floor & Decor has SO many different in stock options for all kinds of tile. Taking on a renovation is challenging enough, having a store like Floor & Decor to turn to for all your tile and floor needs is a life saver!
To see other pictures of my laundry room you can check out this post for the before pictures , this post for our appliance install, and this post for all the details on this stunning flooring.


This is a sponsored conversation written by me on behalf of Floor & Decor. The opinions and text are all mine.

What did you use as shelving for the laundry baskets?
Gorgeous backsplash. Love your style. Looking forward to seeing more photos of your home improvements.