
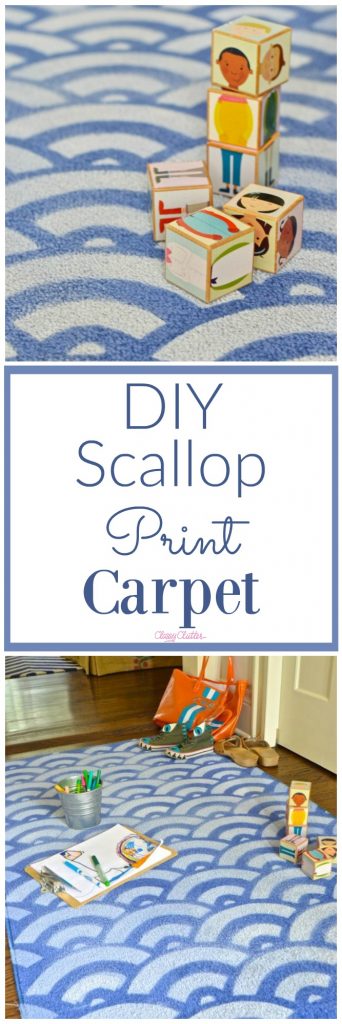
DIY Scallop Print Carpet
Hi Classy Clutter readers, I’m Charlotte from Ciburbanity (city + suburb + sanity)! Five months ago my heart raced and my eyes went all googly at the site of this wood scalloped wall… incidentally, I also counted that as my workout for the day because I considered my heart rate elevated. Fair, right? Fast forward to TODAY and I’m thrilled to be joining Mallory and Savannah as a contributor (I offered to hand wash their laundry for a year but I’m sure that had nothing to do with it…)! As an homage to my favorite DIY wood wall, come get your scallop on and see how I made this fun graphic rug for well under $20.
 Materials Needed:
- Rug (obvy)… This is from Home Depot and was maybe $10? Nothing fancy, but you want LOW pile… too shaggy and the spray paint won’t work with your stencil
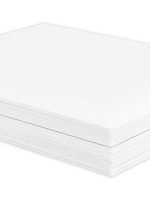
- Foam Core. Our dollar store carries them so I just grab a few whenever I go.
- X-acto knife with extra blades.
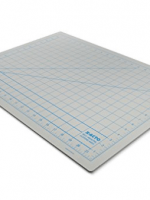
- Cutting mat.
- Photocopier… our printer makes copies, so I just used that.
- Spray paint. I used Rustoleum 2 in 1 Paint/ Primer because that’s what I had in my stash… this took maybe 2 cans?
- Straight pins for holding the foam core on top of your rug for a cleaner stencil
 Decide what type of pattern you want for your stencil. I usually start by looking at Google Images and then end up mixing and matching to make a design I like. For my rug, I definitely wanted scallops. (1: I LOVE all thing scallop these days, 2: Did you SEE the scalloped wood wall?!?!)
  Once I figured out my design, I photocopied it a couple dozen times (use your “draft” printer setting to save ink…)
  I taped together 2 pieces of foam core so that it was the same width as the carpet and centered my first stencil ‘module’. I carefully added each photocopy of my stencil making sure to keep the pattern uniform and lined up and just used tape to keep each sheet in place.
  With my X-acto knife and a cutting mat underneath I started carefully cutting out my scallop pattern. (Sidenote: If you’re thinking about ironing anything on top of your brand new self-healing cutting mat…do NOT. It will melt and buckle… lesson learned.) It didn’t take as long as I thought to cut out the whole thing… maybe 90 minutes?
  Now comes the fun part. Spray painting. I don’t have a great place to spray paint so I set up on our lawn, but a flat hard surface would be ideal. Like a garage or a driveway (nowhere near a furnace or hot water heater though as pilot lights and spray paint fumes are a bad combination if you know what I mean). To make sure my foam core stencil was flat flat flat against the rug, I used my straight pins to hold it in place. They also made sure that the foam core didn’t blow away or shift while I was painting.
 Make sure you grab an extra drop cloth to protect the part of the rug without the stencil on it, and give the stencil 2-3 light coats of spray paint. Once your paint is dry, shift the stencil and line it up so the pattern continues and repeat with your spray paint.
  How easy was that?! Totes Mcgotes. You’re more than welcome to spend a hundred smackers on a graphic rug somewhere else if that’s how you roll, but for UNDER TWENTY DOLLARS, this is a pretty spectacular compromise. IMFO (In my frugal opinion)!


Holy cow! We LOVE this Charlotte! Can you even imagine the possibilities, you guys? This DIY Scallop print carpet is amazing in every way!! Thanks for sharing your creative genius with us Charlotte!
Don’t forget to follow Charlotte on Pinterest, Facebook, Instagram, Twitter, and Google+


How cool is this!!! Awesome tutorial:)
Such a cool idea – with SOOO many possibilities! Loving this!
Awesome! Have you tried cleaning it? How does it do with wiping spills and vacuuming?! 🙂
Hi Renee,
Ha! Calling me out on my lack of housework. 😉 Wink wink. It HAS been vacuumed and has held up great. I haven’t had to spot clean but I don’t see why it wouldn’t last fine… kinda like paint on a wall I don’t think it would come off… over time perhaps it would wear down a bit… I’ll update if that ever happens!