
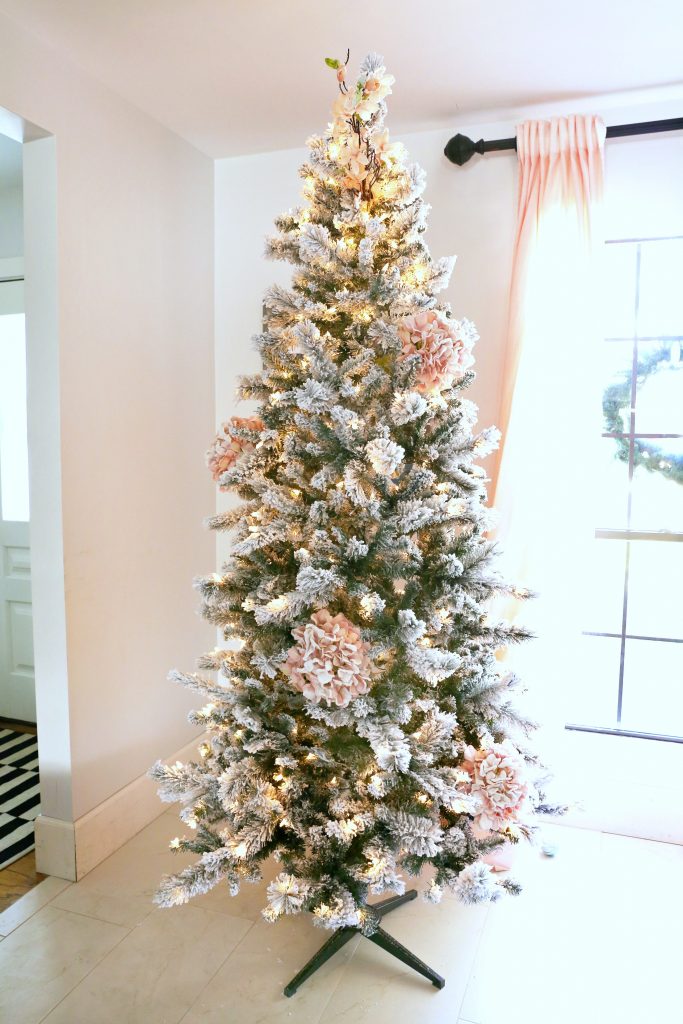
Flocked Christmas Tree with Pink and Gold Accents
This post is sponsored by JOANN. All opinions and ideas are our own.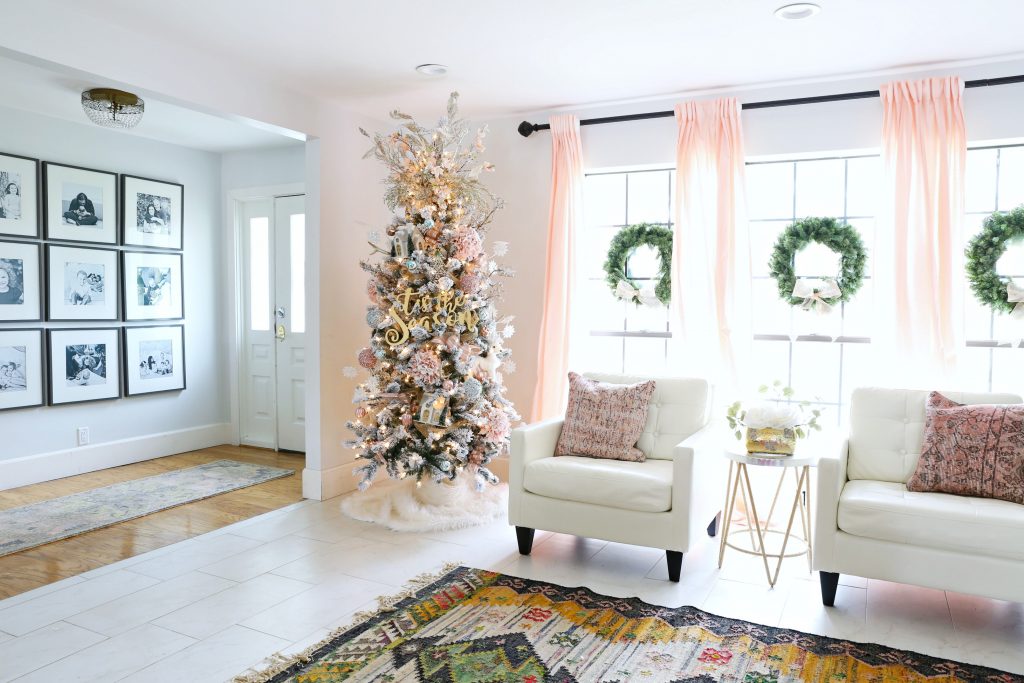
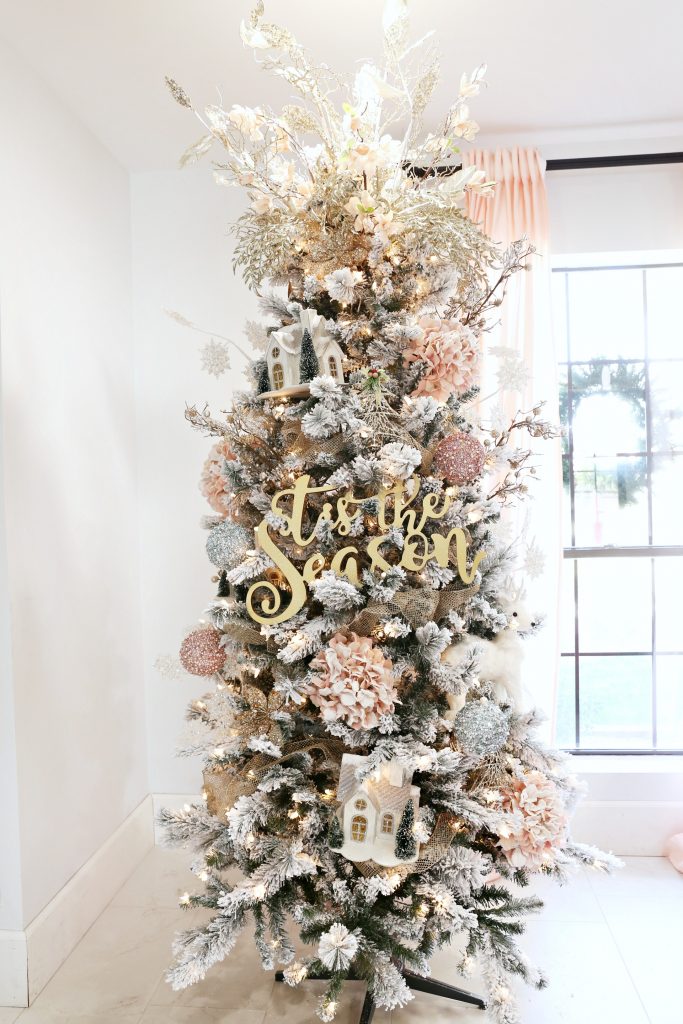
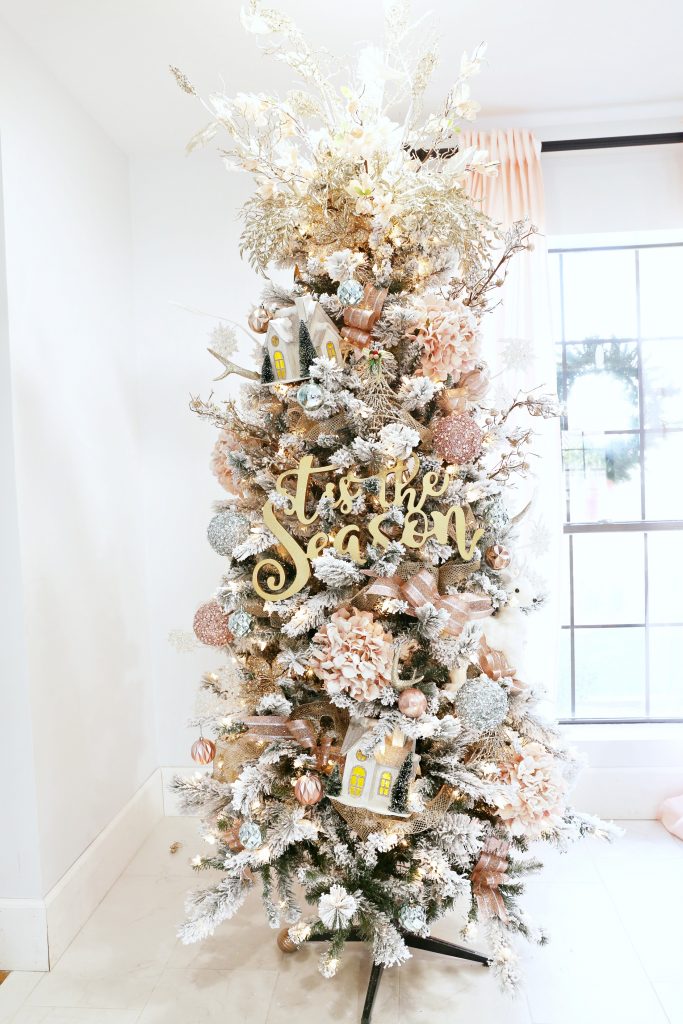
Do you need some White Christmas tree ideas? I have always wanted a flocked Christmas tree and this year I did a flocked Christmas tree with pale pink accents. I want to share all the details on how I did this White Christmas tree.
I love having a flocked Christmas tree. This is the first time I have ever had one. I wanted to share my white Christmas tree ideas. When I was shopping for items to go onto my tree I kept my color scheme in mind and I went to JOANN and I found the most amazing stuff.
Tips when buying Materials for a White Christmas tree
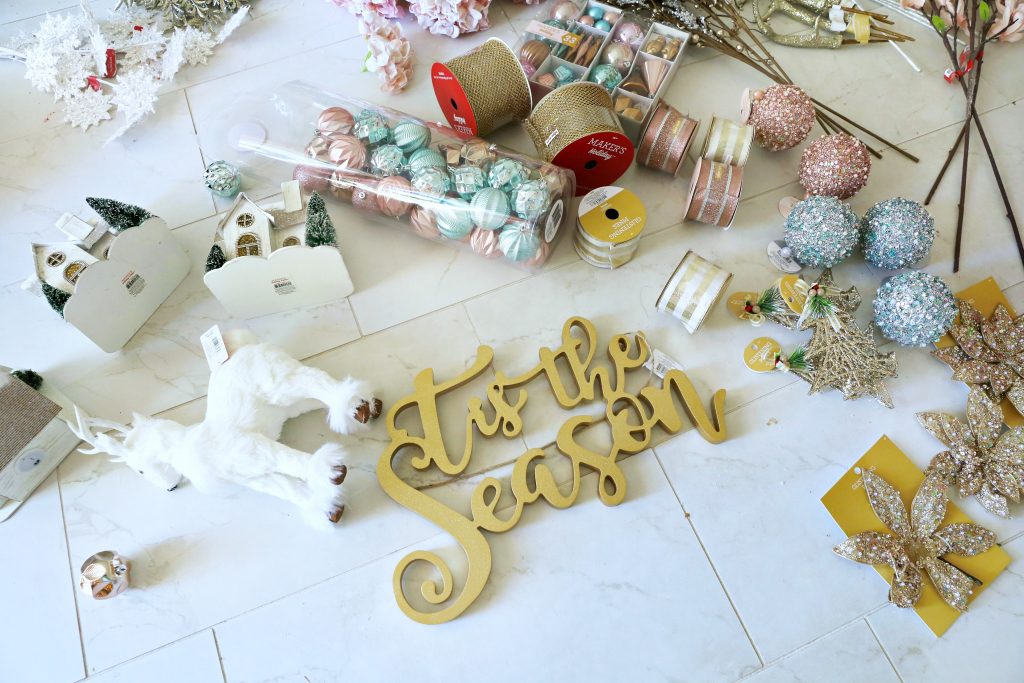
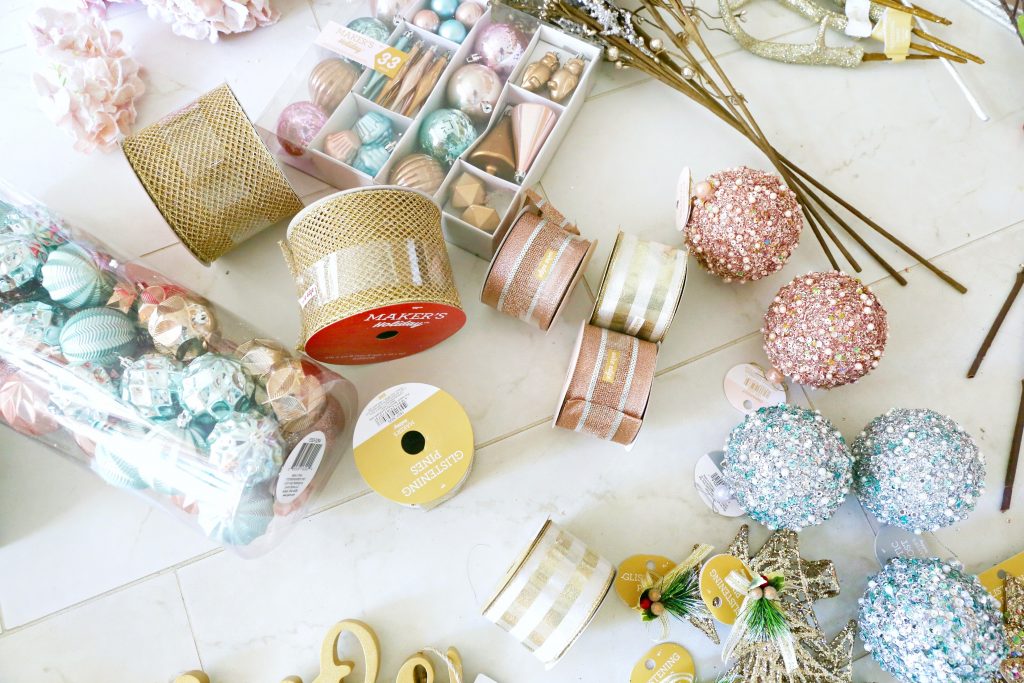
I like to buy my ornaments and spray/picks in odd numbers. I normally get 5 of each item. Here is a list of everything I used to decorate my flocked Christmas tree.
Materials:
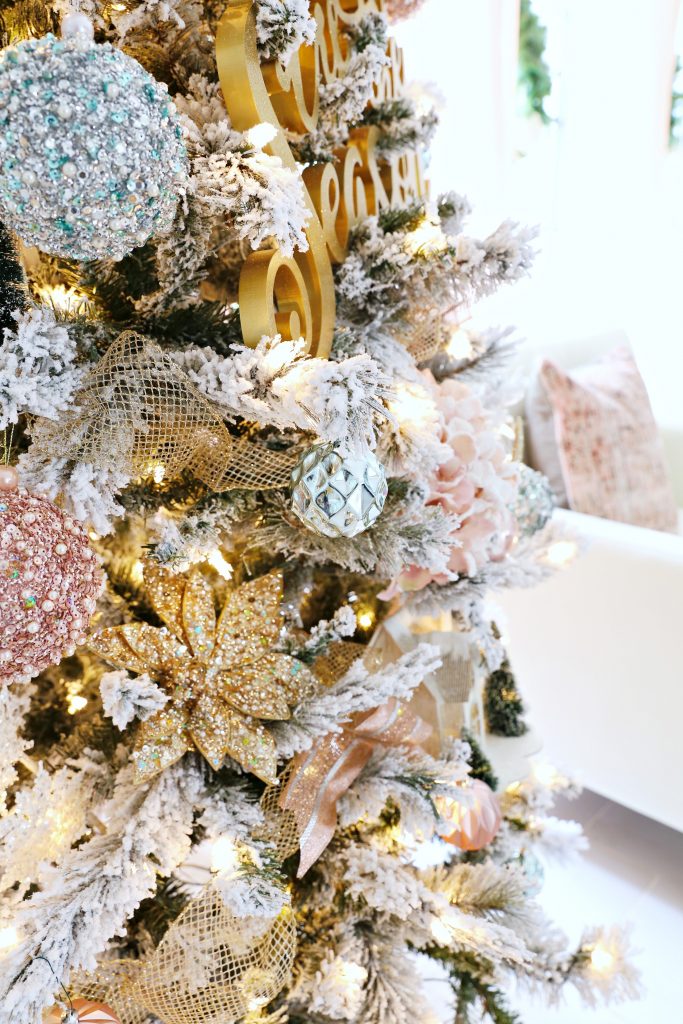
- Blooming Holiday Christmas 21” Glitter Leaf Spray-Champagne
- Blooming Holiday Christmas Standing Deer with Fur Hoofs-White
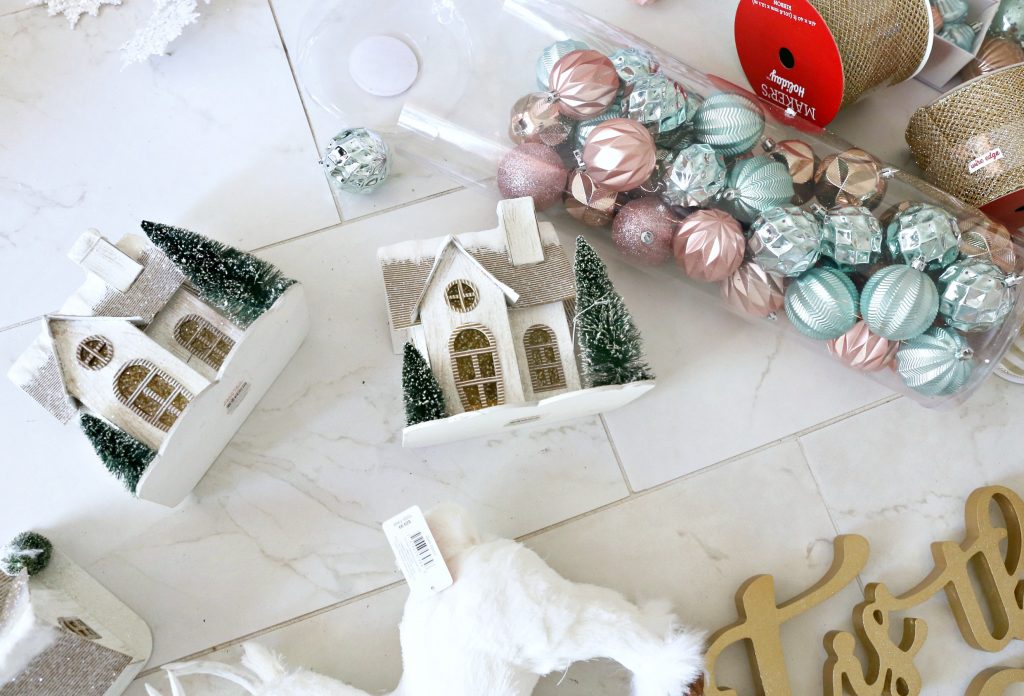
- Maker’s Holiday Christmas Holiday Charm 33 pk Shatterproof Ornaments
- Maker’s Holiday 50 pk 60 mm Shatterproof Ornaments-Blue, Pink & Gold
- Maker’s Holiday Christmas Glitter Mesh Ribbon 4”X40′-Gold
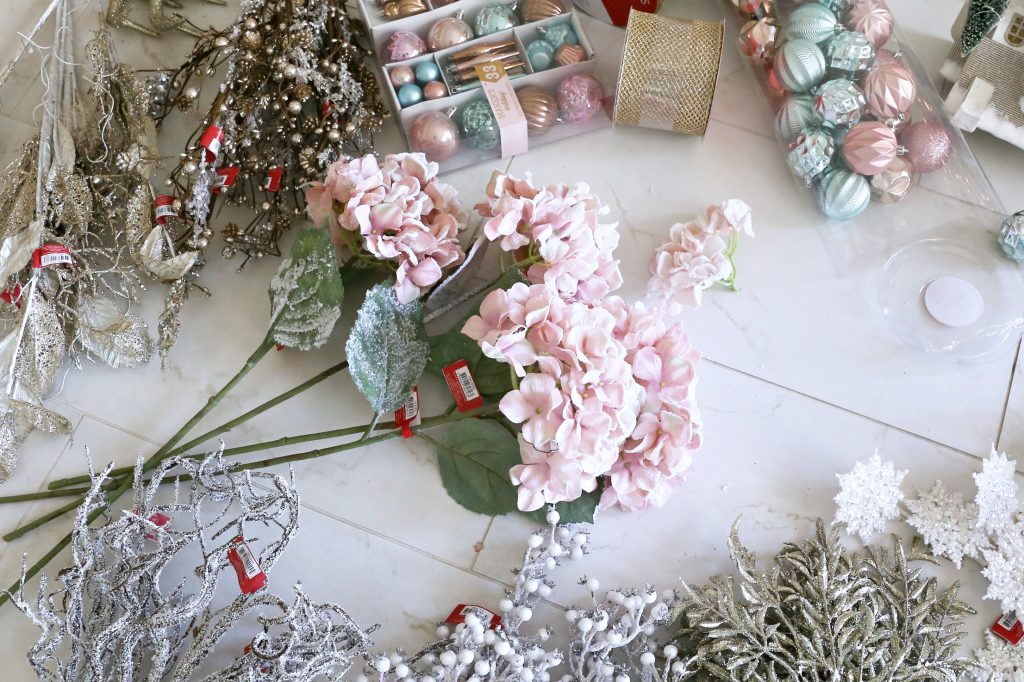
- Blooming Holiday Christmas 27” Hydrangea Stem with Snow-White & Pink
- Blooming Holiday Christmas 40” Magnolia Spray with Snow-Pink
- Blooming Holiday Christmas 29.5” Glisten Snowflake Spray-White
- Blooming Holiday Christmas 36” Leaf & Twig Spray-Champagne
- Blooming Holiday Christmas 28” Current Berry Spray-White & Silver
- Blooming Holiday Christmas 25” Antler Stem-Rose Gold
- Blooming Holiday 31” Glitter Berry, Pinecone & Gypsum Crystal Spray
- Blooming Holiday Christmas 29” Curvy Branches with Ice-Brown
- Maker’s Holiday Christmas Glistening Pines Glitter Tree Outline Ornament
- Maker’s Holiday Christmas Holiday Charm Sequin Globe Ornament-Pink
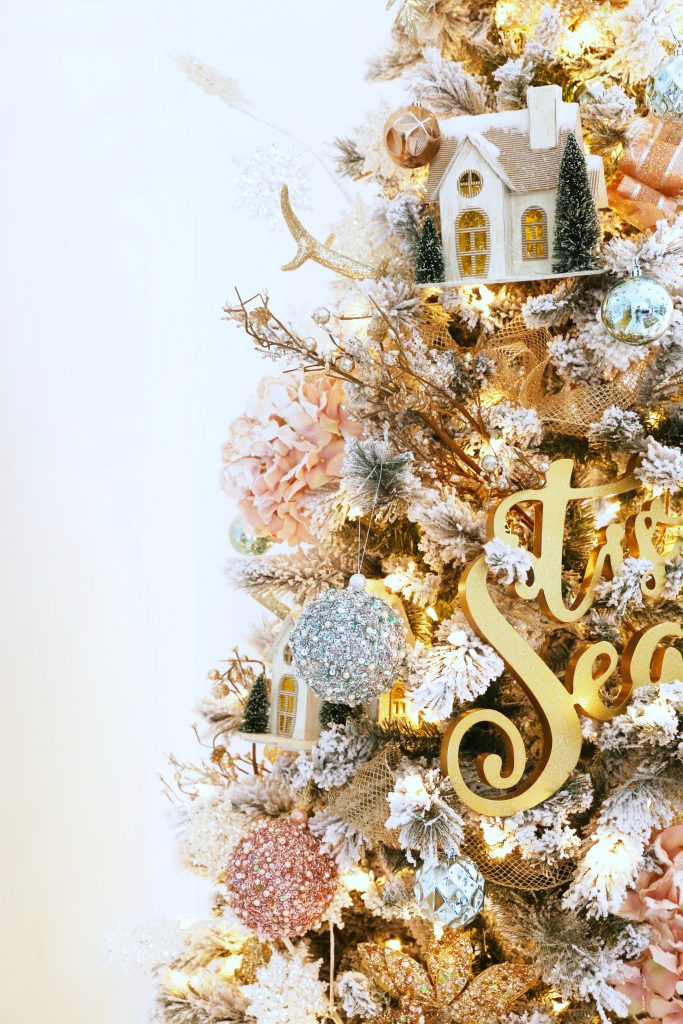
- Maker’s Holiday Christmas Tis the Season Die Cut Wall Decor
- Maker’s Holiday Christmas Mesh Ribbon 2.5”x25′-Pink Glitter
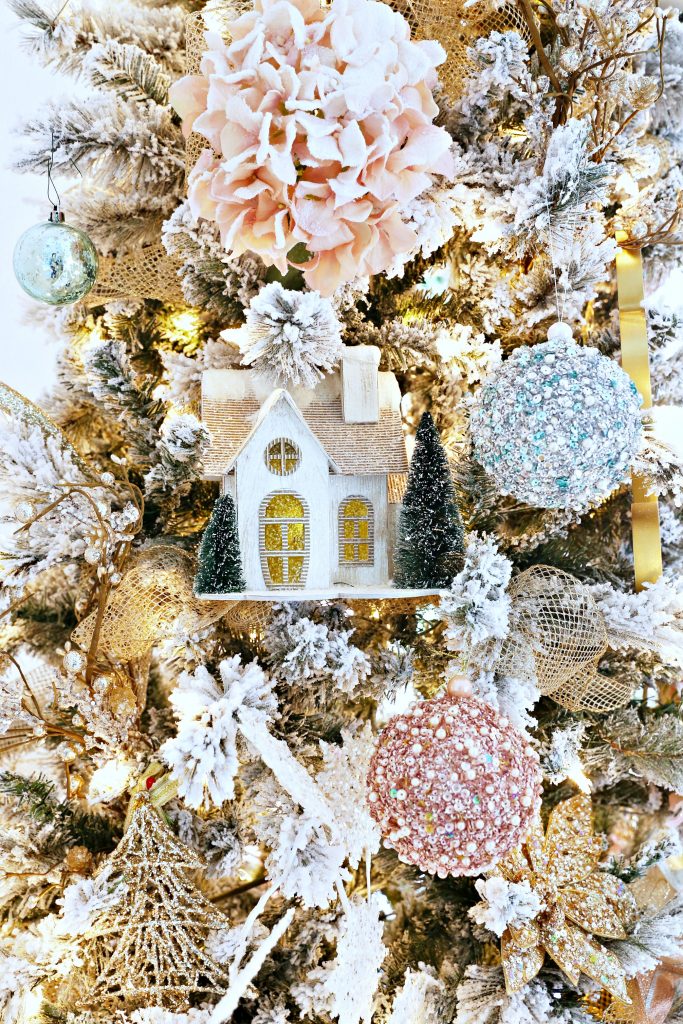
- Maker’s Holiday Christmas House Ornament-Silver
Tip: What to do after you buy everything for your flocked Christmas Tree
After I got home from JOANN with everything I need to trim my tree, I started by laying out everything on the ground and organized it into piles.
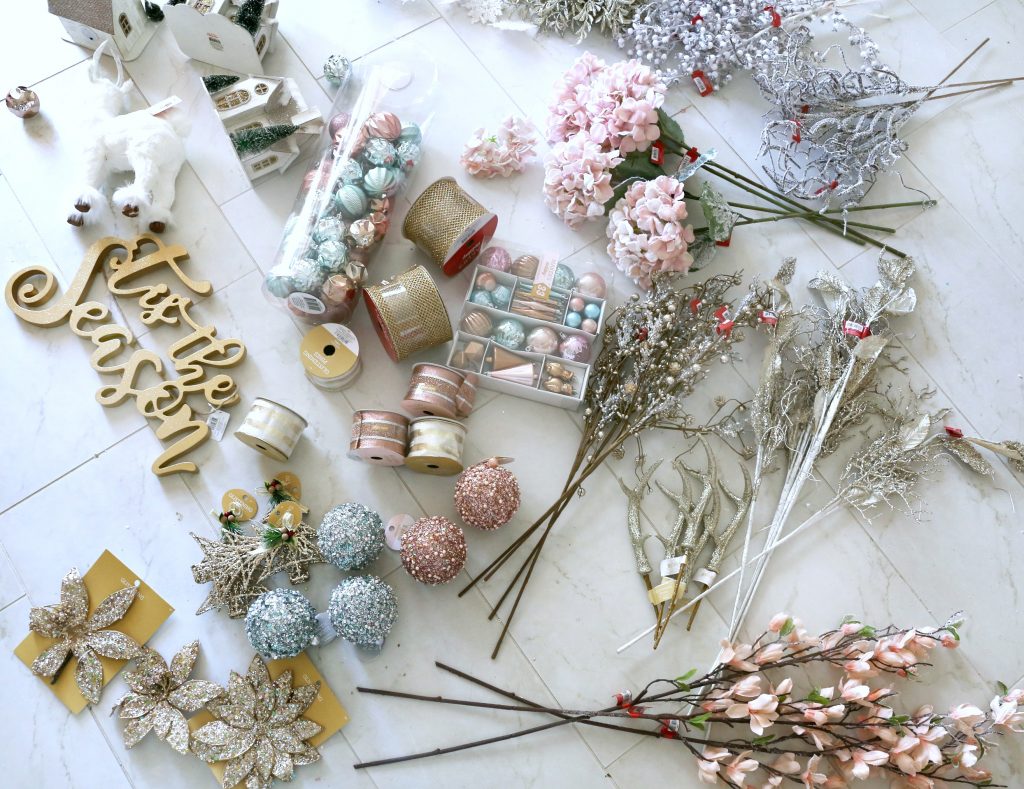
I like to see everything before I start putting anything on the tree.
Step 1: Start with the largest items first
When we are decorating our trees we like to go for a few oversized pieces to start. These pieces could be signs, florals, little houses, toy cars, picture frames or giant ornaments.
With this tree I started with these Blooming Holiday Christmas 27” Hydrangea Stem with Snow-White & Pink .
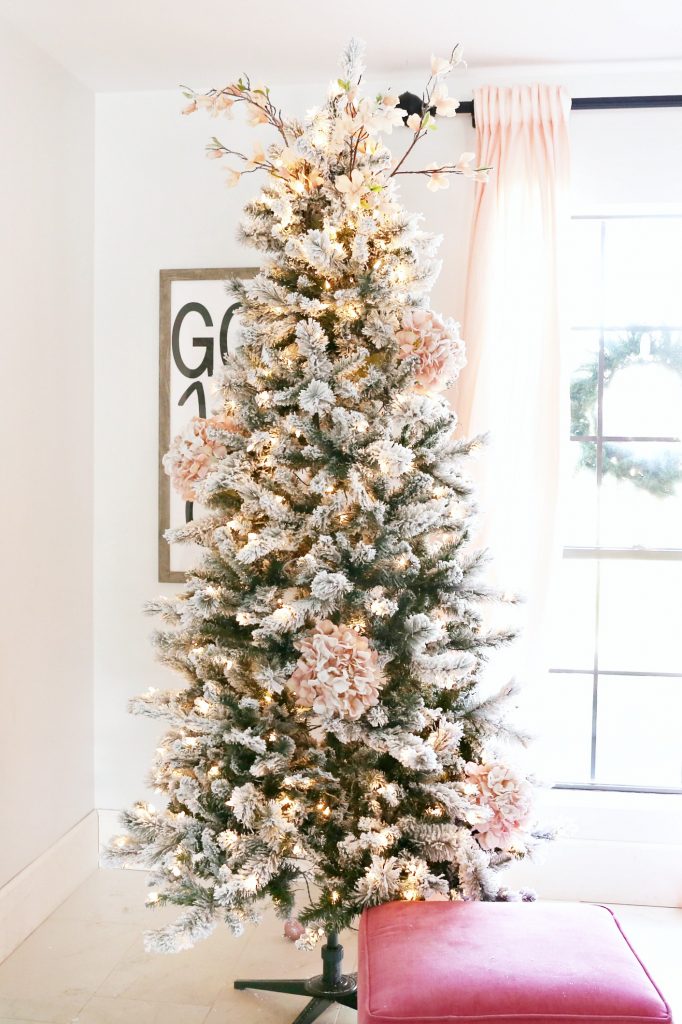
I even added a few of the Blooming Holiday Christmas 40” Magnolia Spray with Snow-Pink to the top of the tree.
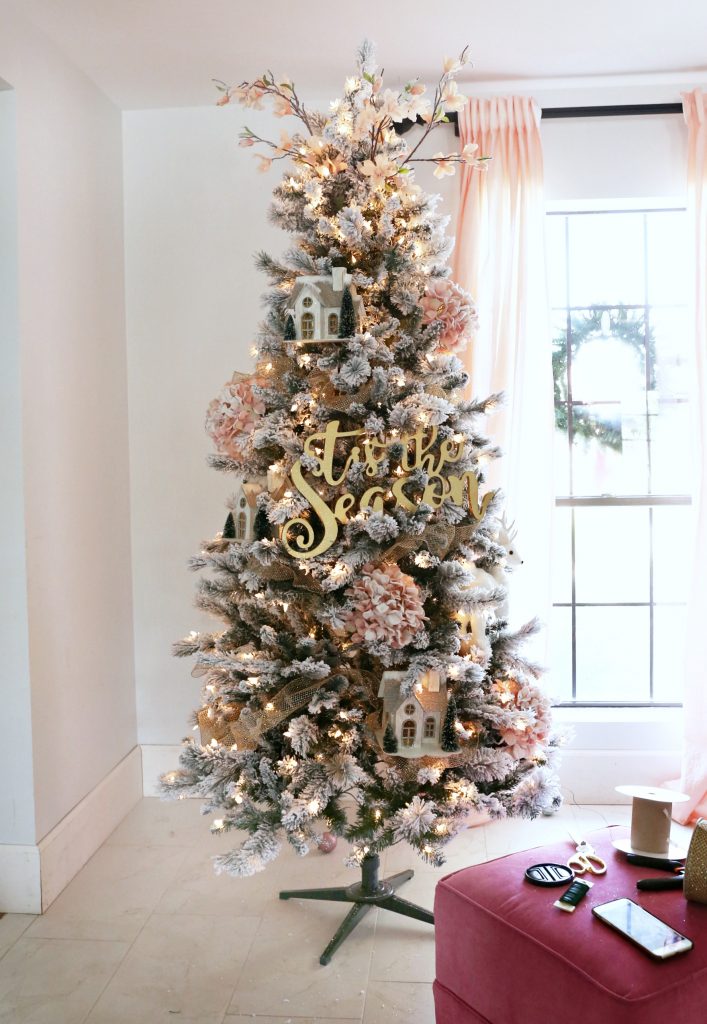
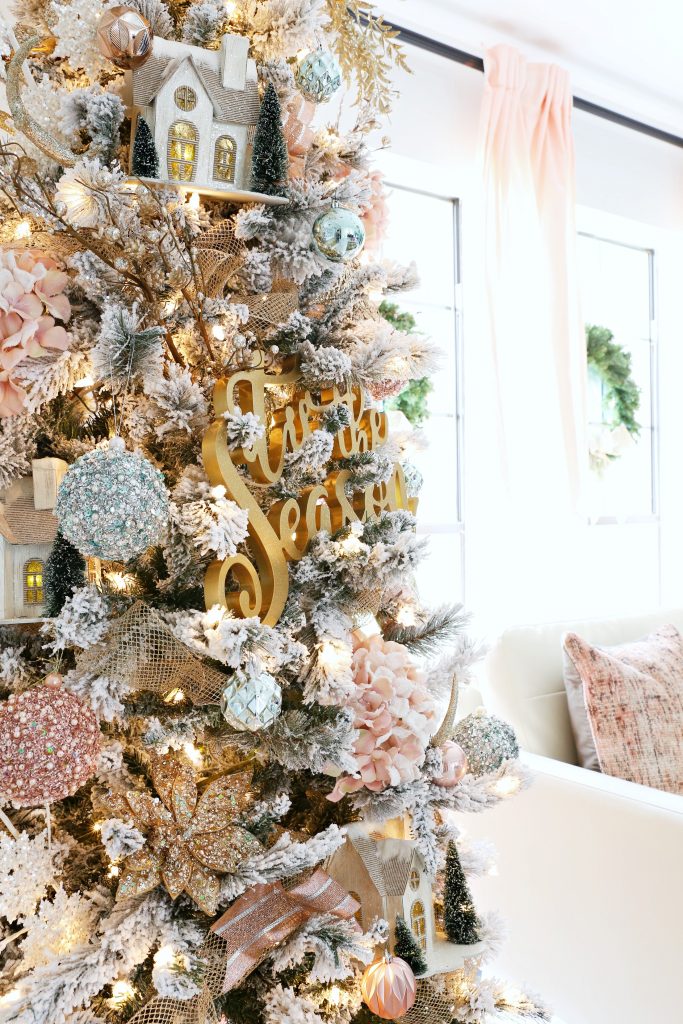
For a few more large items I added in the Maker’s Holiday Christmas Tis the Season Die Cut Wall Decor, and a few Maker’s Holiday Christmas House Ornament-Silver

Step 2: Use branches and picks/sprays to top off the tree
Although it not super traditional to not have a star at the top of the tree I wanted the top of this tree to be a bit more dramatic. I used several different lengths and textures of sprays to add to the top of this tree. I left the branches long so that I could the wedge the sprays right into the top of the tree and everything would stay into place.
Step 3: Add in the fill pieces
After the top is done and the big items are in place I then went in and added in some filler pieces. Which were Maker’s Holiday Christmas Holiday Charm Sequin Globe Ornament-Pink and some of these cute and colorful ornaments Maker’s Holiday 50 pk 60 mm Shatterproof Ornaments-Blue, Pink & Gold and some Maker’s Holiday Christmas Holiday Charm 33 pk Shatterproof Ornaments and Blooming Holiday Christmas 25” Antler Stem-Rose Gold.

Step 4: The final touches
I added in these two different ribbons Maker’s Holiday Christmas Mesh Ribbon 2.5”x25′-Pink Glitter and Maker’s Holiday Christmas Glitter Mesh Ribbon 4”X40′-Gold
I used some thin wire to make some bows with the ribbon and I placed a few of the bows into the tree. I love the texture that the bows added to the tree. The bows can add a dramatic touch without having ribbon around the whole tree.

Step 5: Enjoy!
I love how this tree turned out. I love the different sizes and shapes of everything and I love how it came together!

Be sure to go to your nearest JOANN store to get everything that you need to trim out your Christmas tree.
 You may also like:


Oh my! This is one of the most beautiful trees I’ve seen! Y’all are truly so talented! I really am curious as to how you set up the skirt so that tree root(?) doesn’t show? I always feel like it can look bare and awkward down there.