
Backyard Makeover
I had such a great opportunity to redo my backyard patio area with Home Depot during the Patio Style Challenge. My backyard was in need of a total makeover. We had this plain and very boring patio area on the side of our house. It was such an eye sore but now its a place that we can really entertain in.
Check out the BEFORE:

Now the AFTER: 
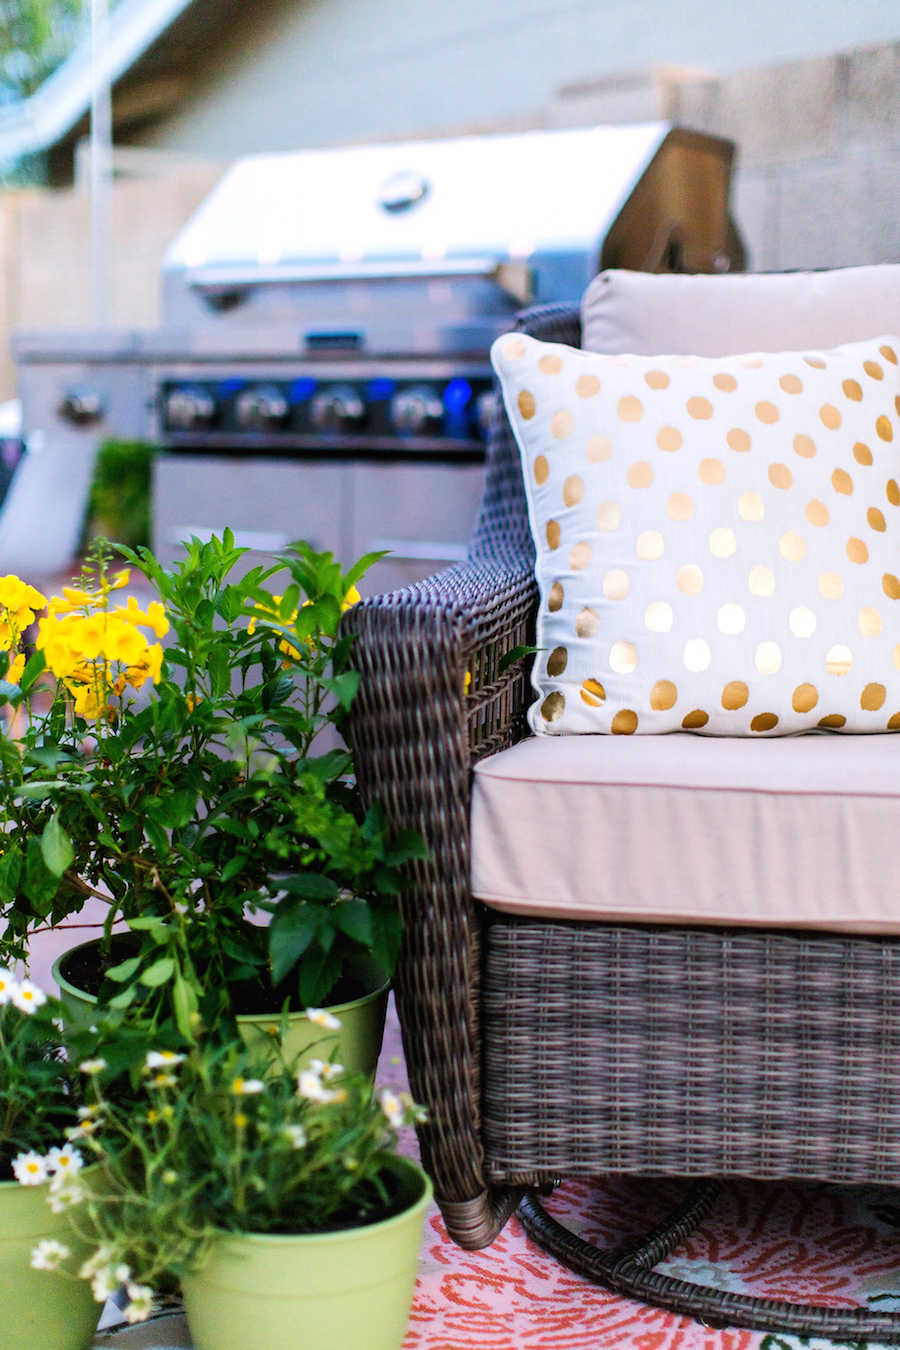
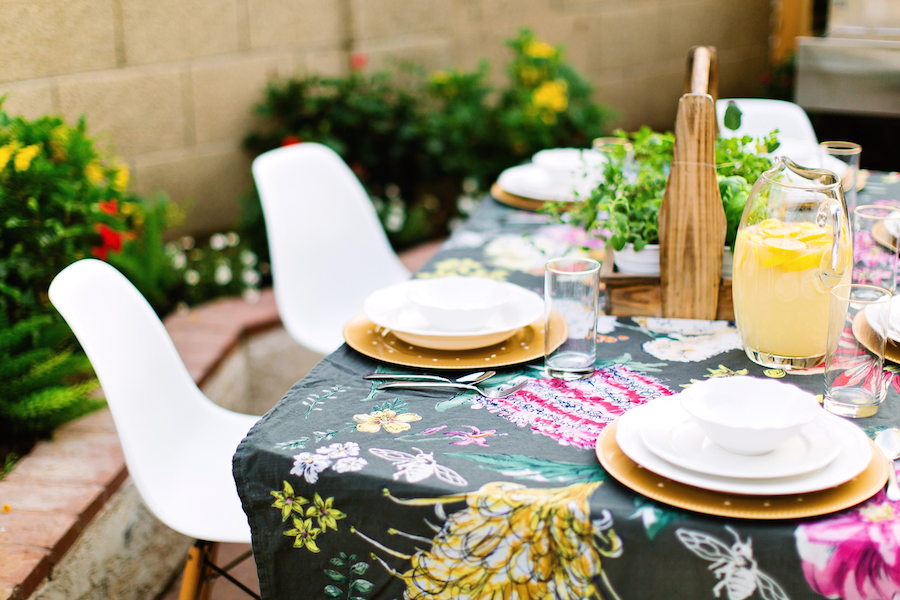
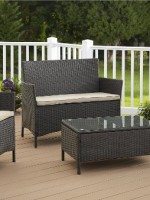
I love this space. We did this covered area that is much-needed in Arizona. I am in total love with this patio set. Not only is very comfortable it has such great fabric. I got the outdoor loveseat and two swivel rockers from the Spring Haven Grey patio collection, with cushions in Spectrum Sand. The slip covers are made from weather-resistant Sunbrella fabric since the sun in Arizona so hard on outdoor fabric. I have been sitting out there every morning and it’s been just so nice. 
Using 2×1 boards we built a privacy wall that also creates even more shade. It also separates the patio space from the dining area. Its lined with beautiful trees.
I have loved these lights since the beginning of time and above the dining table is the perfect spot for them. It helped to define the dinning area. The lights also dress up the area a bit. 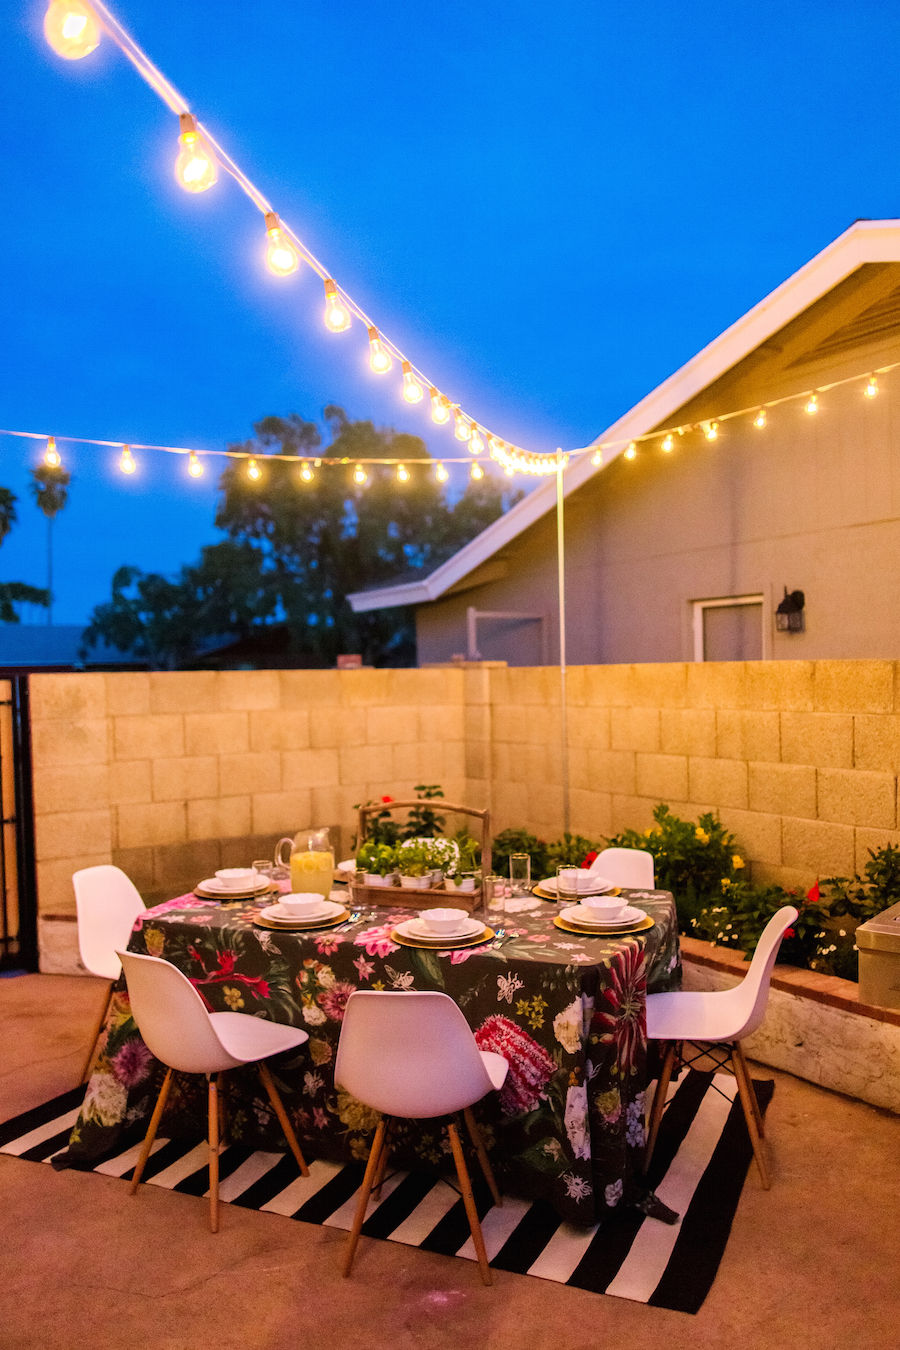


This grill is top-notch! I must say I have never seen a grill quite like this one, I mean the front lights up how cool is that. It’s the KitchenAid 5-Burner Propane Gas Grill in Stainless Steel. 


I love this table cloth from Anthropologie I felt like it fits the mood of the backyard space perfectly. 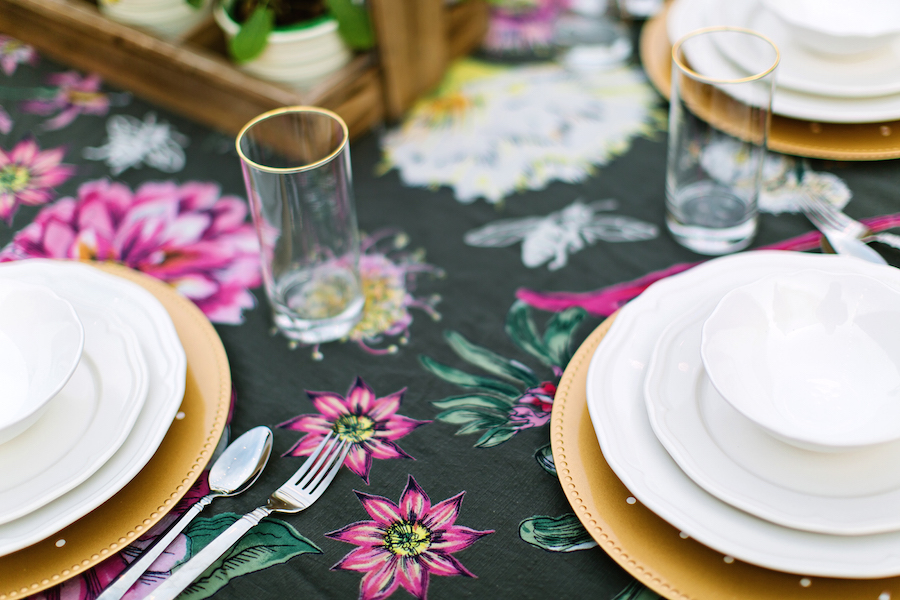

The cute rug was a great score from Home Goods for only $50. That place really does just make me so happy!
 I am very excited to entertain in this space and have many memories. For even more details be sure to check out our post over on the Home Depot Blog HERE.
What do you think about this makeover?


This is all gorgeous!! I love the pink floral rug and pillows in the seating area-may I ask where you got those?
Looks fantastic!
It’s absolutely gorgeous !
I love how you created a covered area and those lights over that beautiful dining area are perfection !
Just beautiful – all of it – great job!
xxx
Beautiful. Especially the night pics with the hanging string lights. I must know–Where did you purchase the pink floral area rug?
It’s so beautiful! I love that you added plants against the wood wall…such a lush, tropical look! Hope you enjoy many happy hours in your new outdoor oasis.
Love your eclectic style!
Curious how you strung the lights to the poll and what type of poll did you use and where did you get it from?
That was what I was wondering too, Amy! Yeah, how DID you attach those lights to that pole and what is it made of, and how did you stabilize it in the ground? We are trying to do that on our brick patio too!
We used a piece of 1/8″ stainless steel wire and hung the lights from that wire. Then using 3/4″ electrical conduit and a few straps, we secured the conduit to the brick by using vinyl anchors and screws. To install vinyl anchors into masonry, ideally you should use a hammer drill with a masonry bit that is sized properly to sink vinyl anchor into the masonry. The directions that accompany the vinyl anchor kit should tell you what size drill bit to use. Some kits even come with the masonry bit you will need for the corresponding anchors.
Please let me know too when you get an answer to this question… I want to do this in my backyard too… Thank You.
Have you ever thought about painting the cinder block wall?
I have thought about it but for now we are just keeping it as is!
This is amazing!
What did you use as the top piece ?
What did you use for the covered top ? Nd how?