
Beaded Jewelry Tutorial
Beaded Jewelry Tutorial
I never met an accessory I didn’t like. These days, in my 7th month of pregnancy… accessories are kinda the only thing I can still buy and be guaranteed they’ll actually FIT! So… I wanted to share a couple I made recently that make me happy EVERY time I put them on. Best part is that both of these took no time whatsoever! Easy jewelry #forthewin!

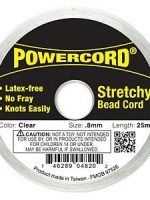
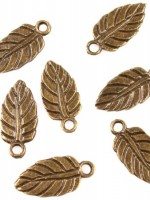
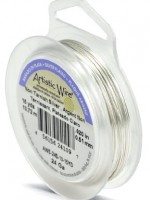
For the bracelets, you’ll need this thick elastic (8 mm) and whatever beads strike your fancy. I fell in love with these dainty fluorescent beads and then liked the idea of incorporating some little ‘gold’ accents.


The bracelets are super easy… just string your beads as long or as short as you’d like. I wanted a double strand when wrapped so needed about 10 inches? To finish each one off, I tied 3 knots and then placed a dab of super glue to hold it tight.


LOVING how light and cheerful these guys are… I haven’t taken them off since I made them. Nothing like a little neon to brighten a gal’s day… Also somewhat hopeful that an arm covered in neon might distract people from the width of my midsection. Ha!


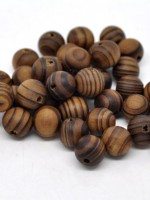
The necklace makes me very very happy and was even simpler than the bracelets. (Confession: the only things that really cover my stomach these days are men’s t-shirts so I’ve been trying to dress them up!) I had these beads and tassels on hand, but you can grab the beads here (affiliate link) and the tassels were from this awesome etsy shop.


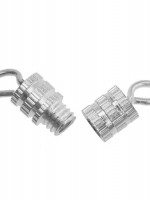
I use this flexible wire for my necklaces… super strong and easy to string. Our local bead store turned me onto these springy thingies… they pinch the end of your wire to prevent the beads from falling off!


Once I’d strung about 10″ of my wooden beads, I looped the wire through one of the tiny leftover neon beads and then through my tassel so that the tassel would fall the right way. I got carried away and added 6 colorful tassels… I mean, go tassel or go home, right?


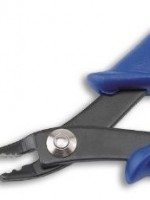
To finish this one, I didn’t really need a clasp because it’s long enough to slip over my head so all I needed were these tiny little crimp rings. I looped the wire through each one, and then used my needle nosed pliers to crimp the ends pinching and holding the wire in place.

Because these beads are so light weight, this necklace is easy breezy but still so fun and colorful. Like I said… makes the basic men’s tee look a teensy bit more feminine!


Thank you for indulging my beading 101 tutorial today. You’ve read the extent of my beading prowess… despite my status as a novice, I get SO much pleasure out of all my simple beaded necklaces!

xo Charlotte
Want an idea for storing all your rad new necklaces?

How about these upcycled thrift store bangles?

Last but not least, another necklace I made with some craft store beads and a fun brass pendant!


Your necklace looks awesome! And I LOVE those neon bracelets! Thanks for sharing the tassel love!!
These look so nice! Thanks for sharing 🙂
Beads like those in the pictures are what my wife and daughter enjoy making. I’m thinking about buying them a set of wholesale beads for them to make. Since part of their hobbies are putting them together and selling them to certain people.
These bracelets gave me a nostalgic feeling…in a great way. Looks a little like what I loved to wear as a kid but with a grown up flair. Love them, thank you.
Hi there Mal and Sav, you guys are creative to pull those gorgeous necklaces and bracelets together. I love plying around with beads myself, so this is definitely a thing that I would be interested in. Thanks a lot for sharing this with us, it sparks some inspirations.
Cindy
Very nice looking jewelries these are indeed! I just love each collection. Surely the tutorial presented here looks easy to follow and I’m looking forward to make my own collection of these beaded jewelry. Thanks for the tutorial.
Glad you enjoyed! Thanks for stopping by!
Love this tutorial! Reminded me of how we started our Camo Wedding Ring business!
I love this beaded jewelry idea. I really like the way you have explained about beaded jewelry. I would like to gift a piece of jewelry made by beads to my lovely wife. I hope she will like it. Thanks for sharing such a creative idea.
Amazing tutorial. I really like it