
Christmas Tree Village
I have always loved Christmas villages. I did not have a place for them on display but then I came you with this really cute Christmas Tree Village.
This post is sponsored by JOANN. All ideas and opinions are my own, always.
I am so excited to show you how I took my love for a Christmas village that I found at the Joann store and turned it into a really awesome and unique Christmas tree.
Christmas Tree Village

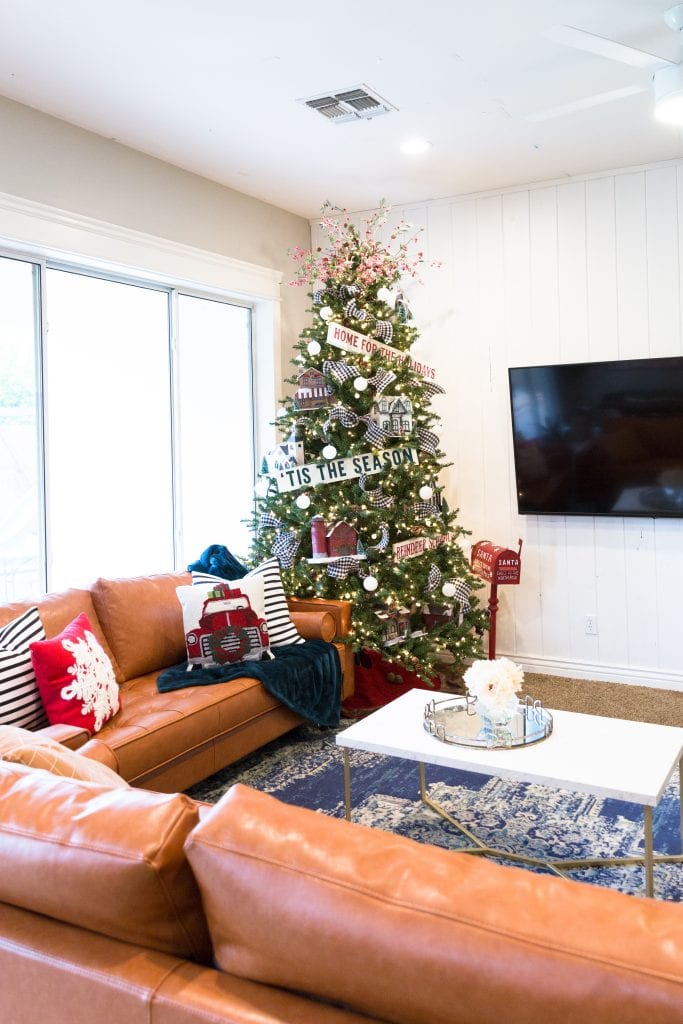
To create this Christmas Tree village I used mostly oversized countertop Christmas decor items. I love that when I use larger scale items I don’t have to buy nearly as much stuff. Larger items just take up so much room on the tree.
Materials
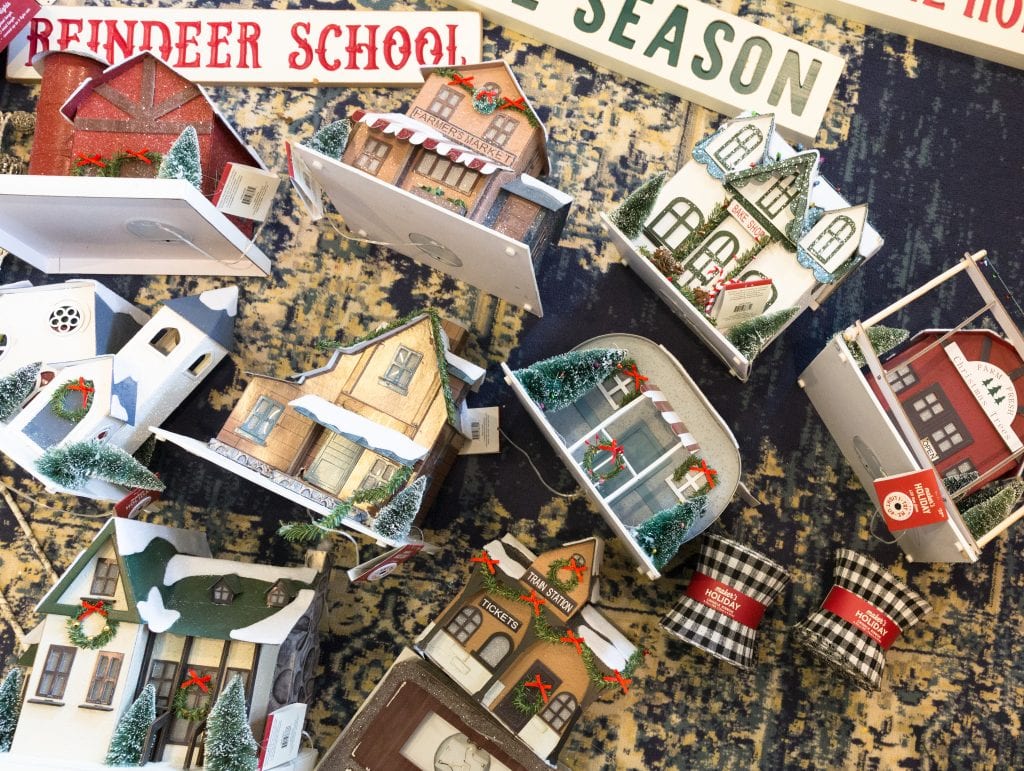
Here is the list of the materials and decor pieces that I found at the Joann store that I used for this Christmas tree.
- Christmas Bakers House
- White House with Green Roof
- Farmers Market Village House
- Christmas Camper
- Christmas Farm House
- Christmas Cabin
- Red tree skirt
- Christmas Red Barn
- Red berry bush stems
- Christmas Church
- Snowflake Pillow
- Red truck Pillow
- Buffalo Check Ribbon
- White Ornament
- Red Home for the holidays sign
- Green tis’ the season sign
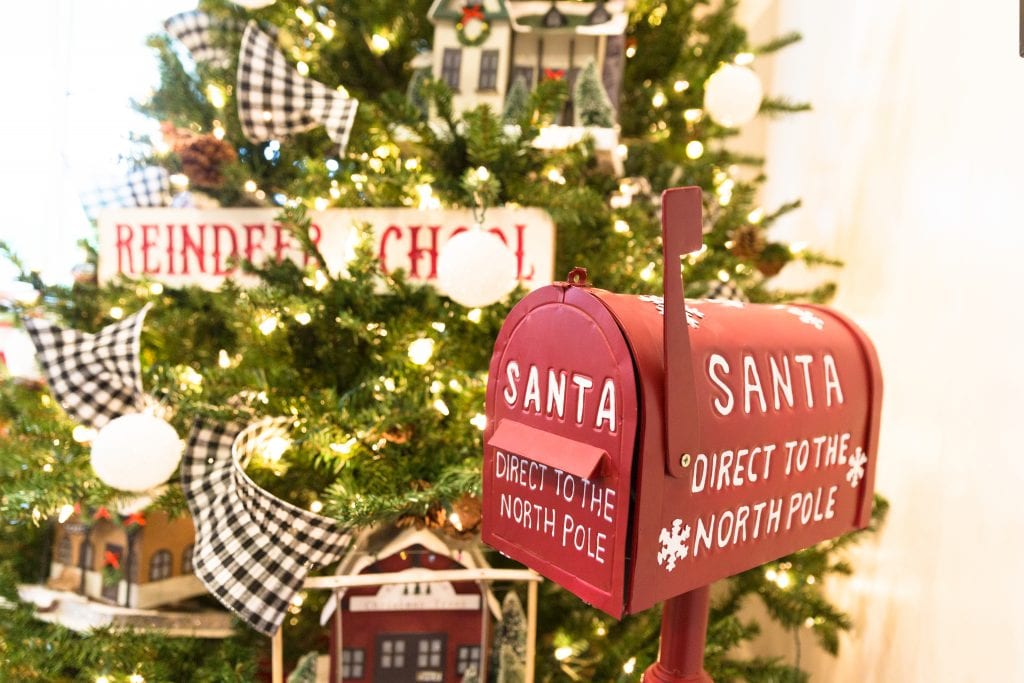
- Red reindeer sign
- Small Globe string lights.
- Christmas Mailbox
Step 1: Start with your tree fluffed.
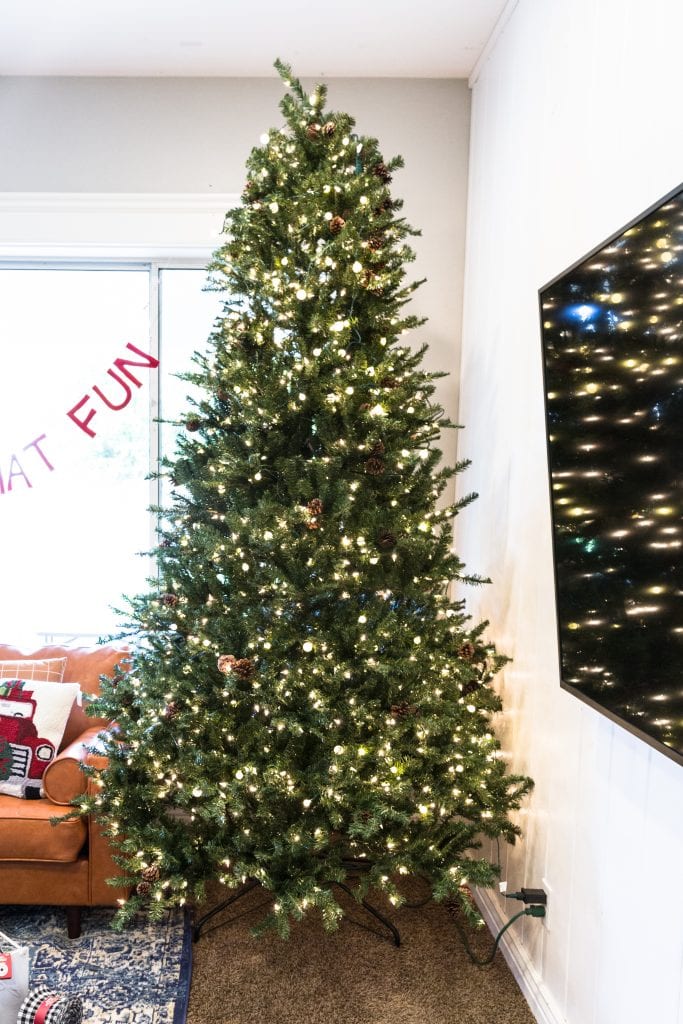
First, you want to fluff the Christmas tree. Then add some dimension. So I also added another size of Christmas Lights. I love these globe lights that I found at Joann. I used two boxes of lights and I think it just added something a bit extra.
Step 2: Add the ribbon
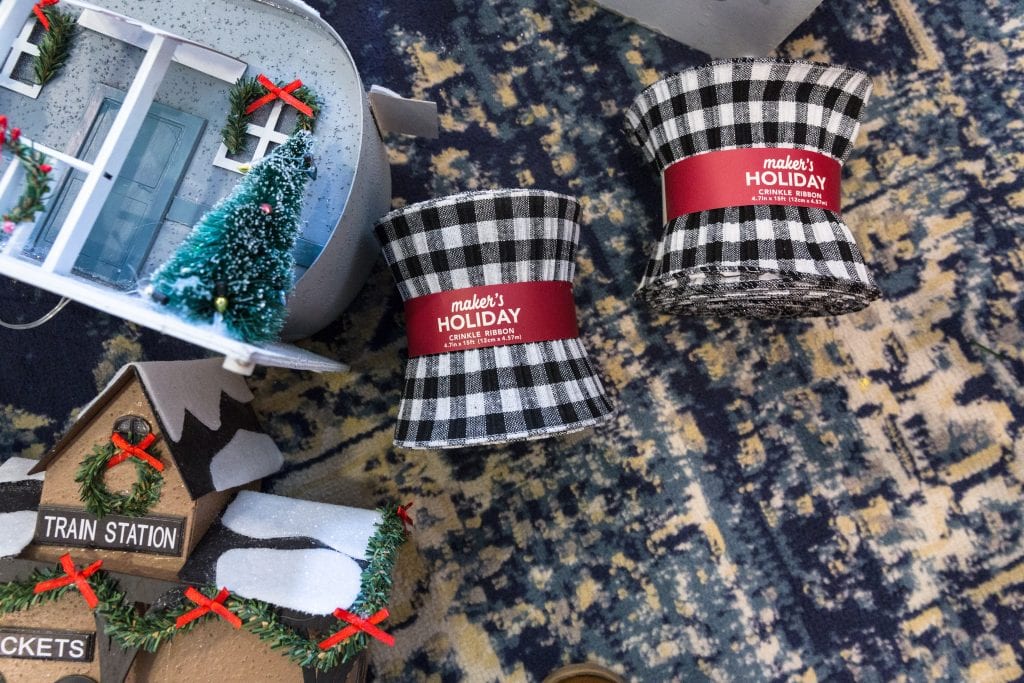
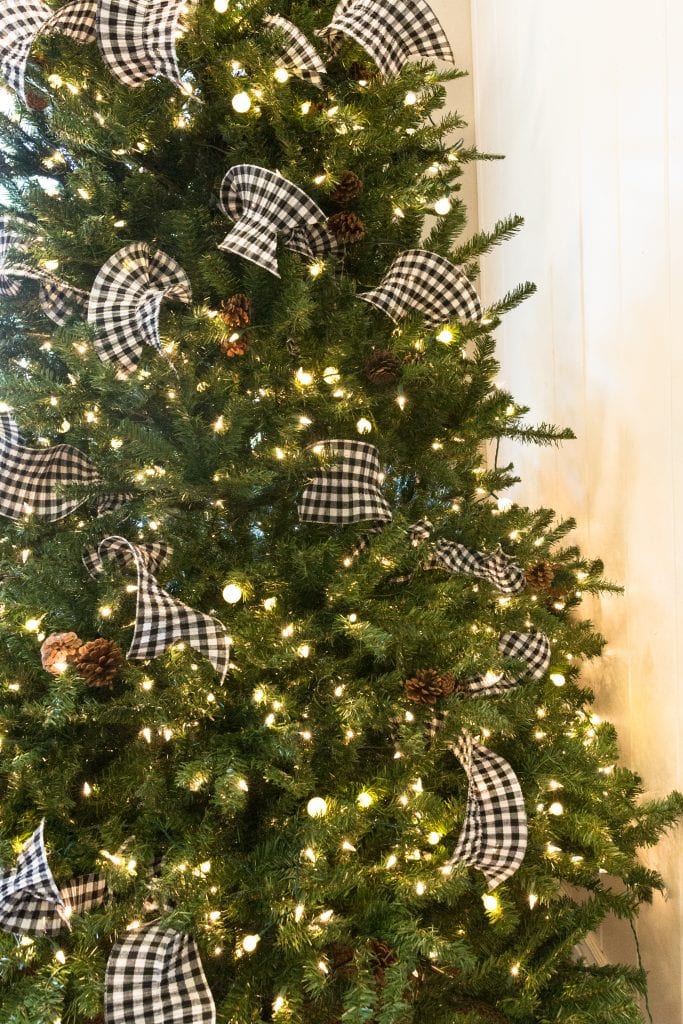
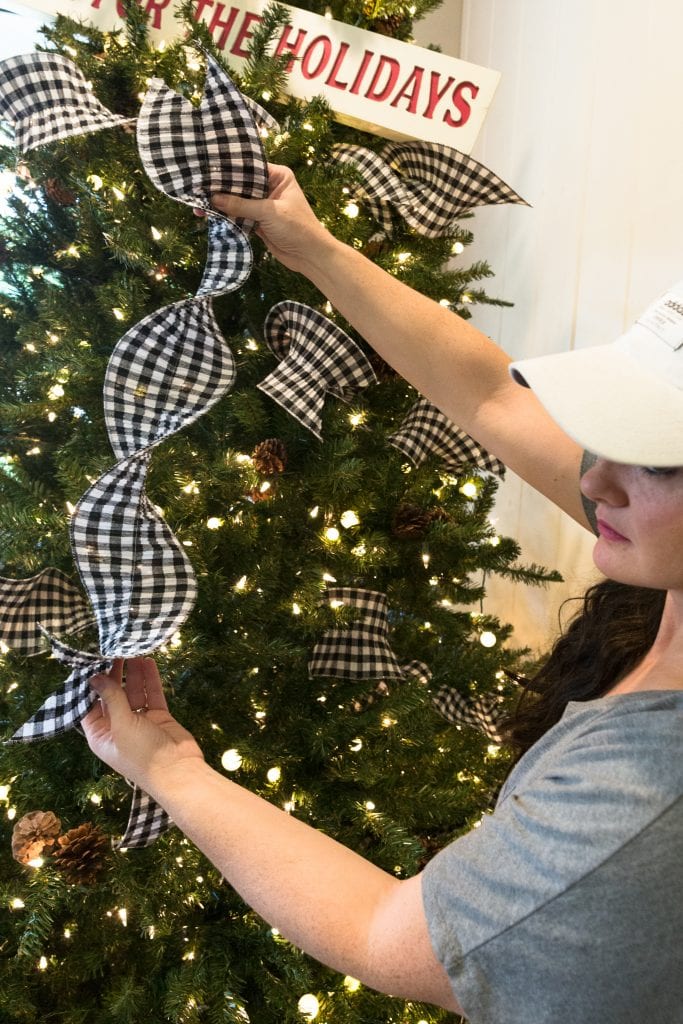
I love these thick buffalo check ribbon I found at Joann. I wanted the ribbon to go a long way so I decided to cut the ribbon into 2-3 foot strips of ribbon. I cut the ends of the ribbon so that the ends were cut pretty. For the ribbon for the Christmas tree village I wanted the ribbon to look like it was around the whole tree. I took the ribbon and would fold it in half and stick the center part into the tree and then just step back and make sure the ribbon looks balanced throughout the tree.
Step 3: Adding the big signs
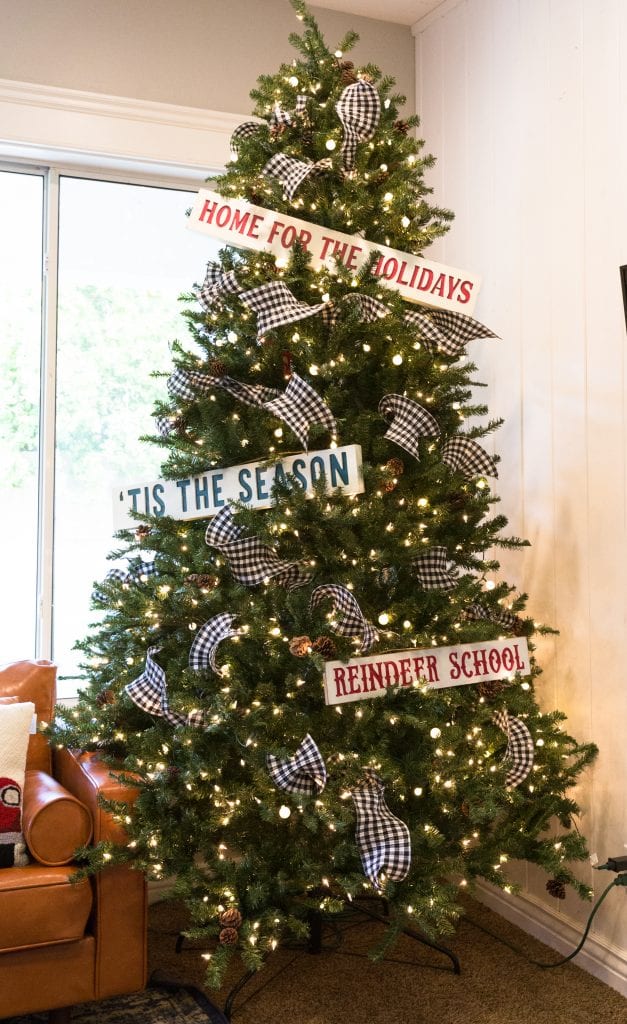
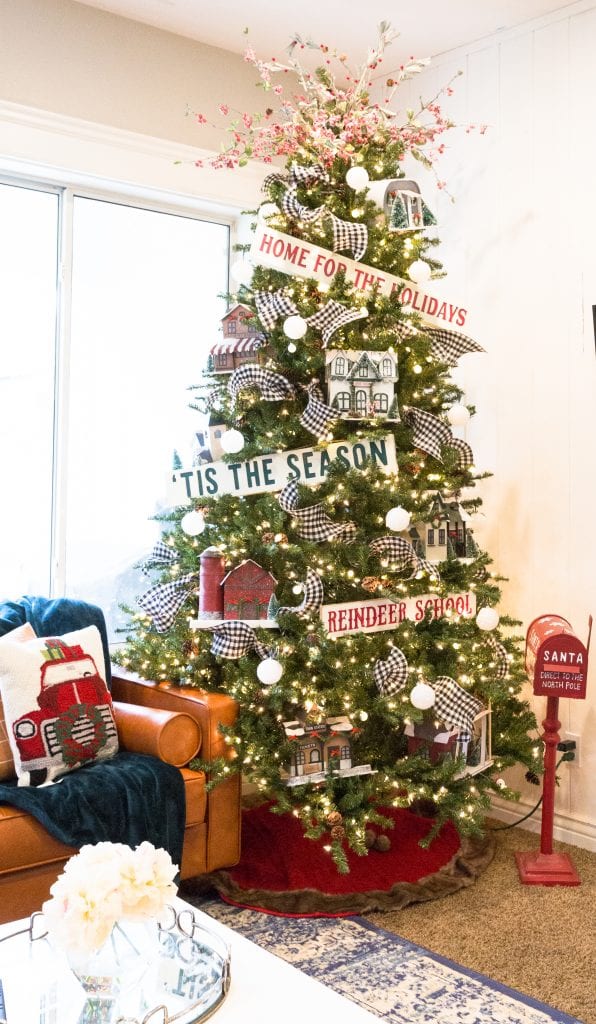
I have three different large signs for the Christmas tree village. I had two signs with red writing and one sign with the green writing. I put the green sign in the middle then a red sign at the very top and then a red sign in the bottom that way it was balanced.
How do you attach larger items on a Christmas tree?

It is very easy to attach bigger items onto a Christmas tree. Most of the time I like to use the tree branches to help hold the items into place, but if I need to I also use wire to help hold the items into place.
Step 4: The Christmas Village
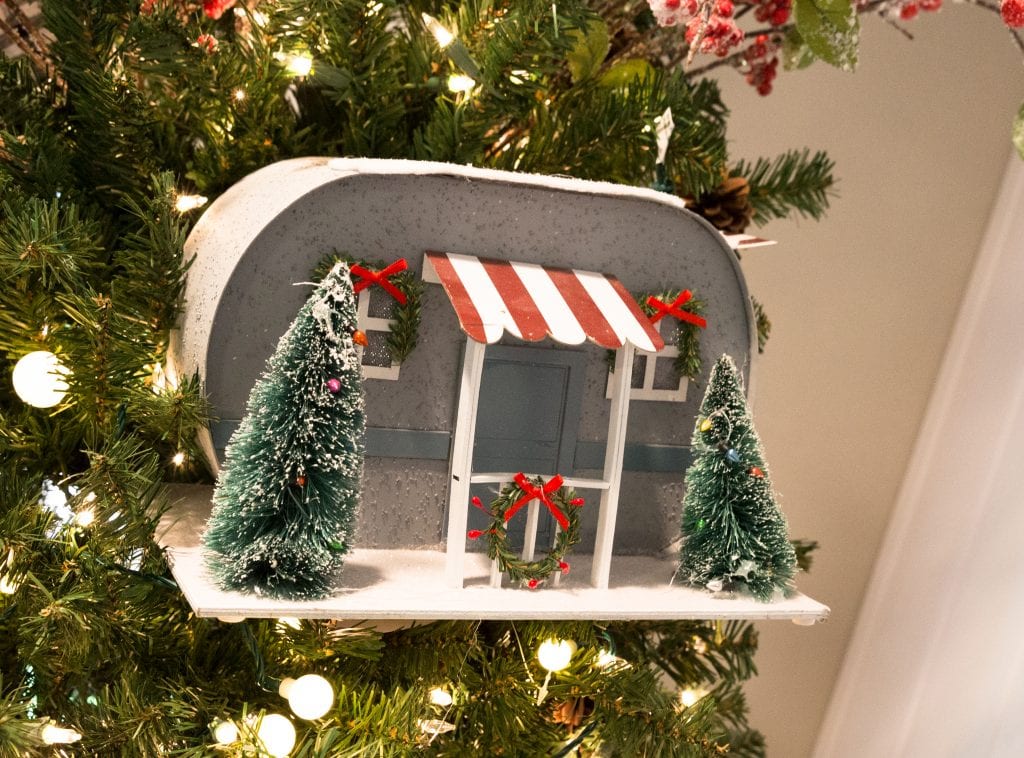
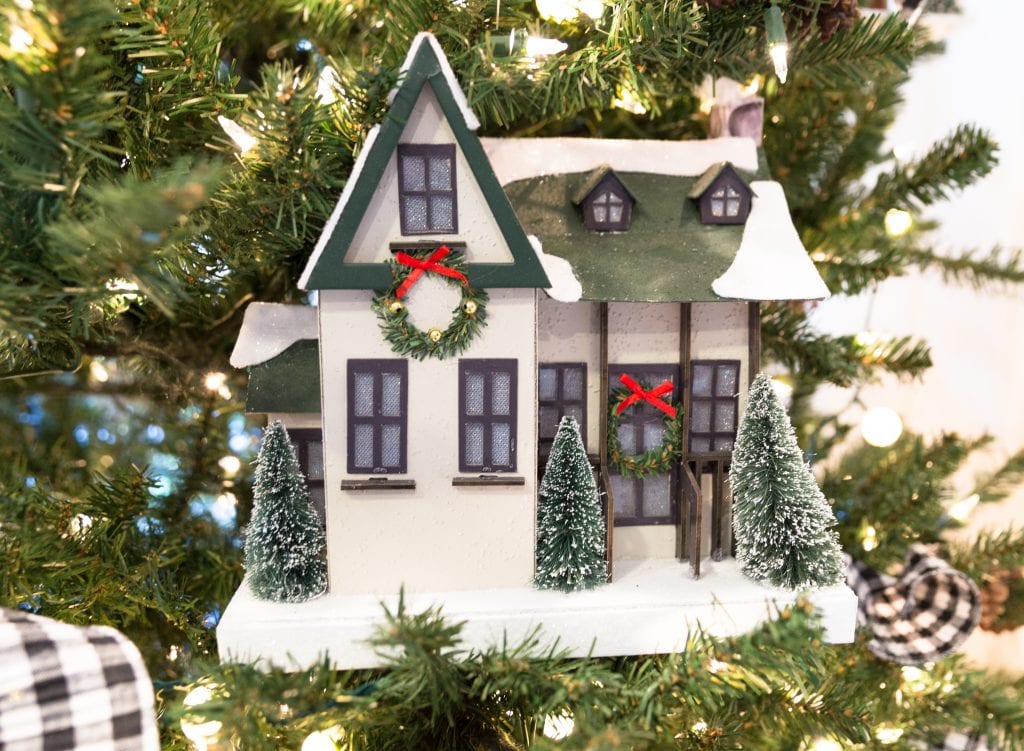
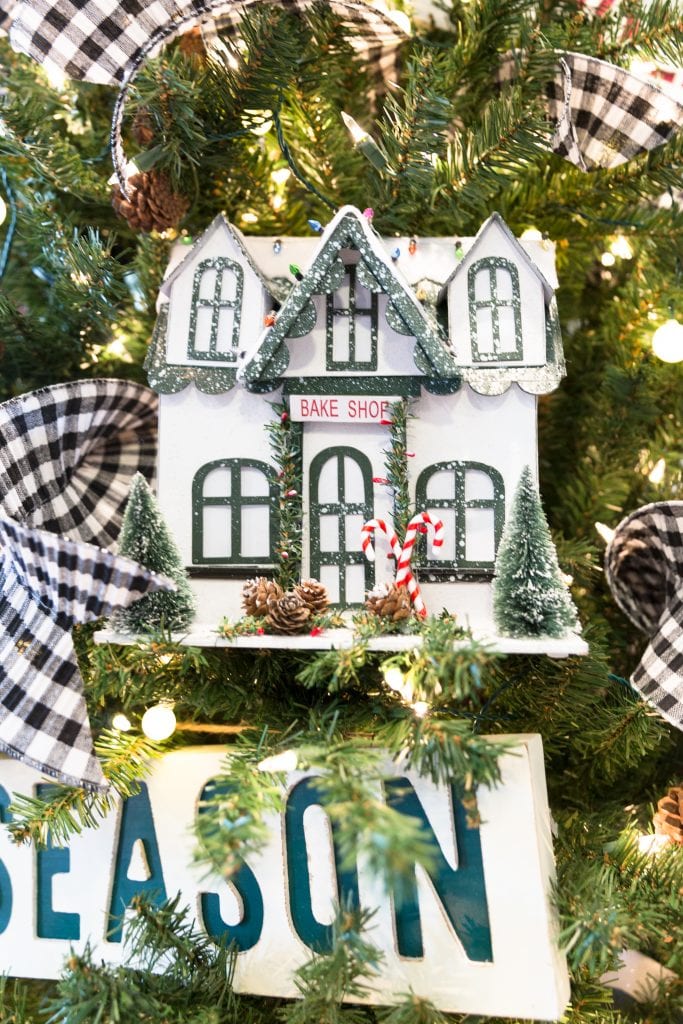
I love this village. I got one of each of houses that Joann had which they had several different houses. I like that they had so many different options. They were all different shapes, colors and sizes.
Step 5: The top of the tree
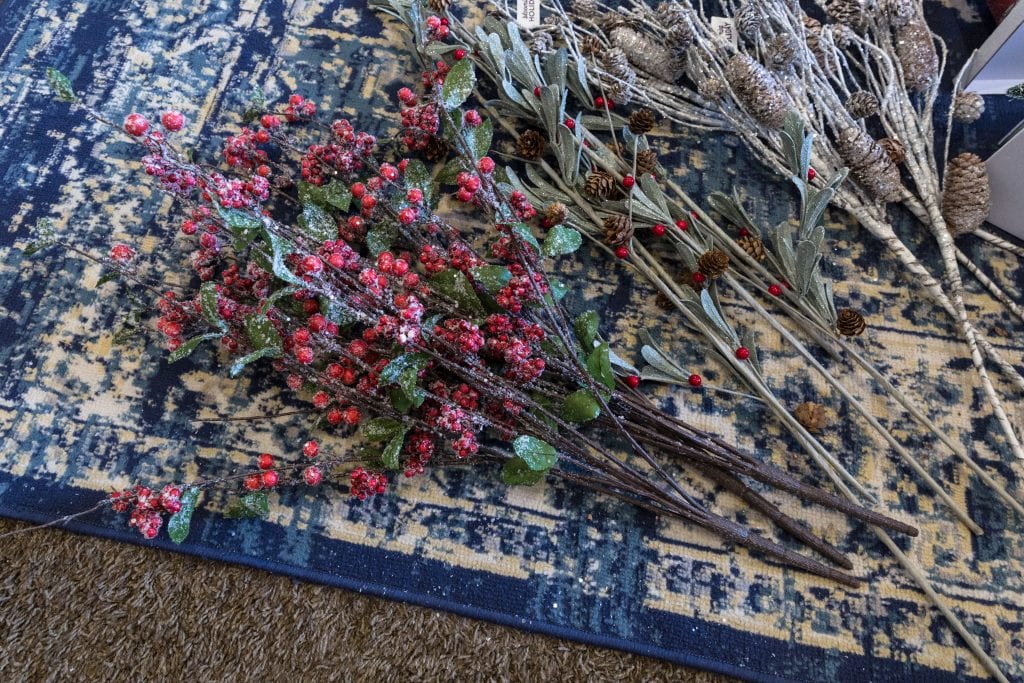
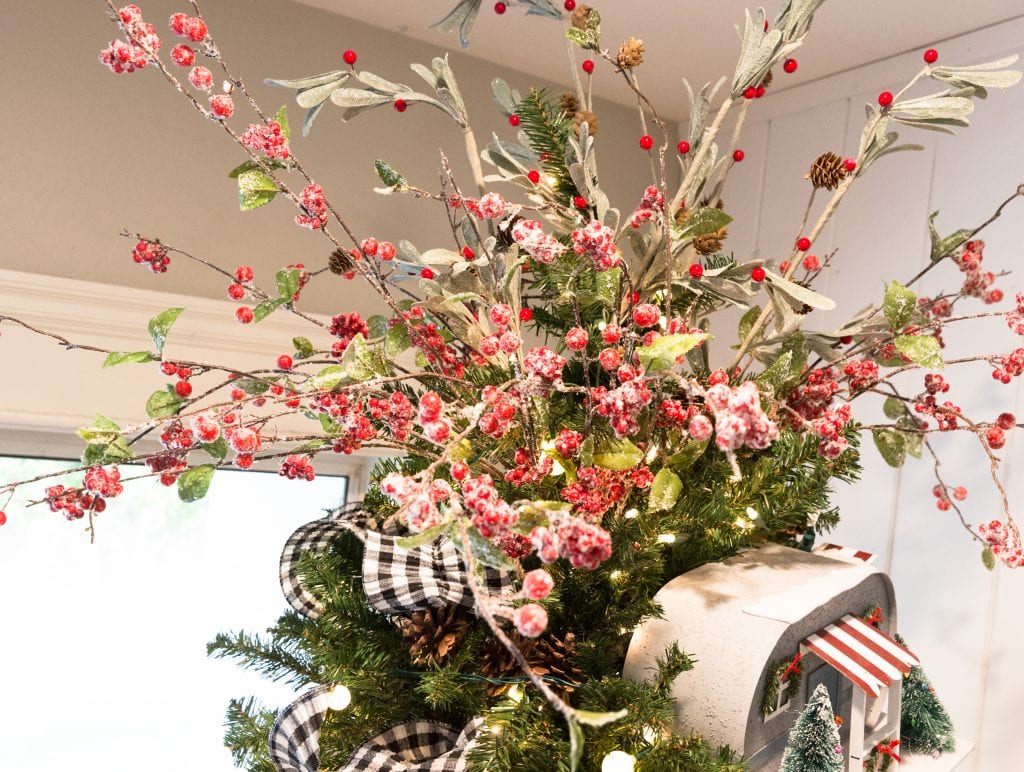
I like to use different picks and different stems for the top of the tree. I used two different styles of greenery stems. I liked that they work great together and yet they look so different and have different color of green leaves.
Step 6: Add a bit of a traditional decor
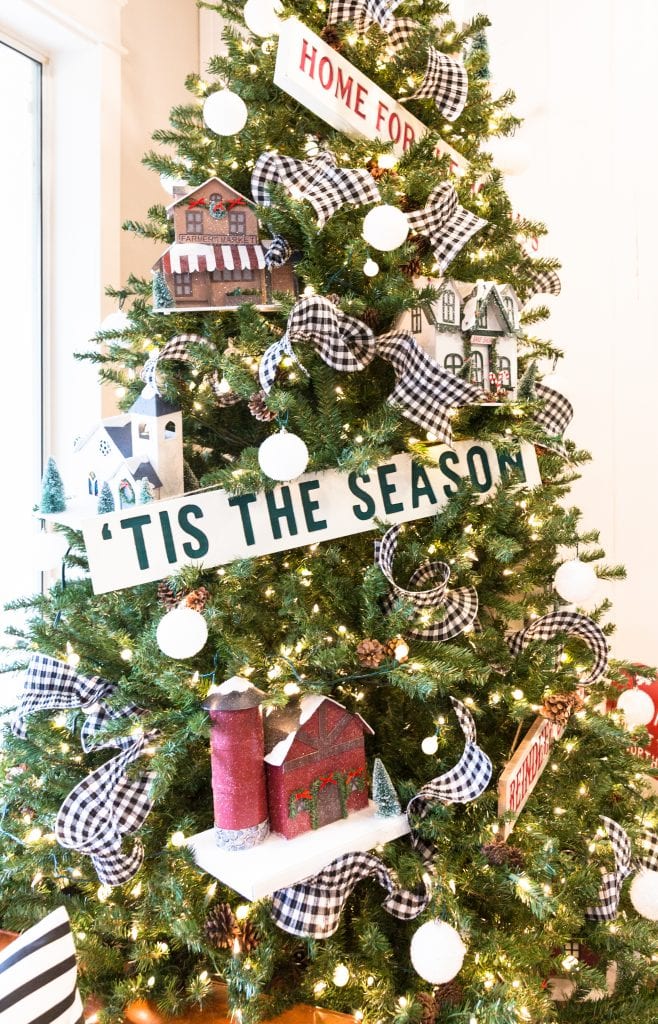
I added the classical and traditional element that was some white ball ornaments.
Step 7: Style the space


To finish off the space I wanted to style the space around the Christmas tree village. I got some really cute holiday pillows that really did make this space look really good and this cute little mailbox. Then I finished off the tree with a red tree skirt that I think just turned out so cute.

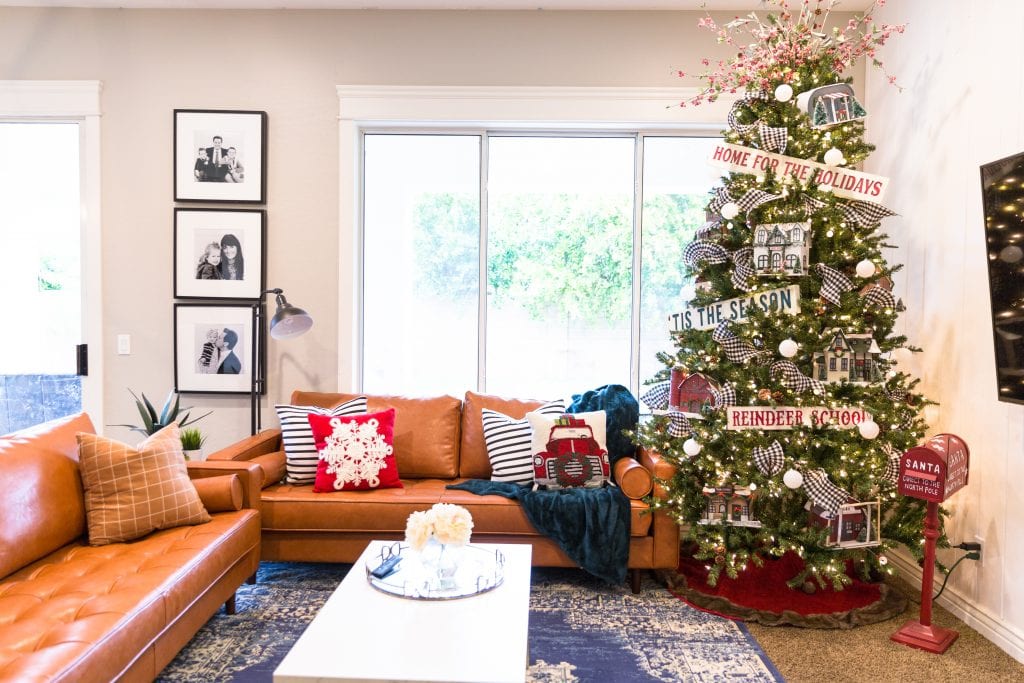
I love how cute and different this Christmas tree is. I love that it has a lot of different pieces and patterns and yet everything just goes together so well.


I was seeking this certain info for a long time. Thank you and good luck.