Kitchen Refresh: My New Kitchen Chandeliers!
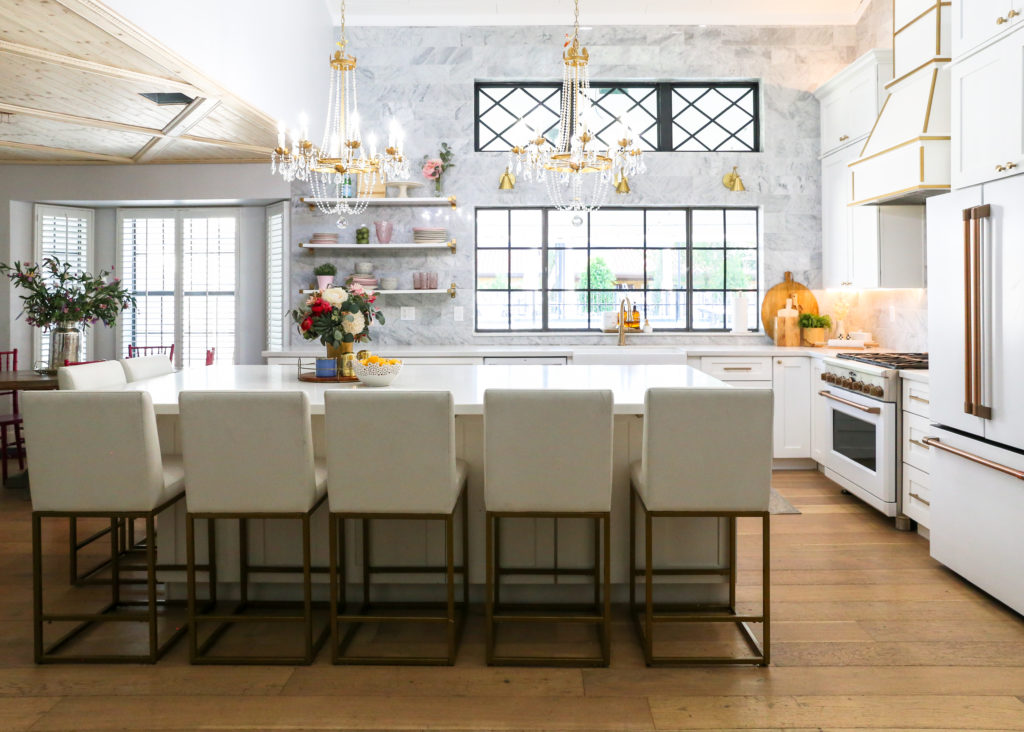
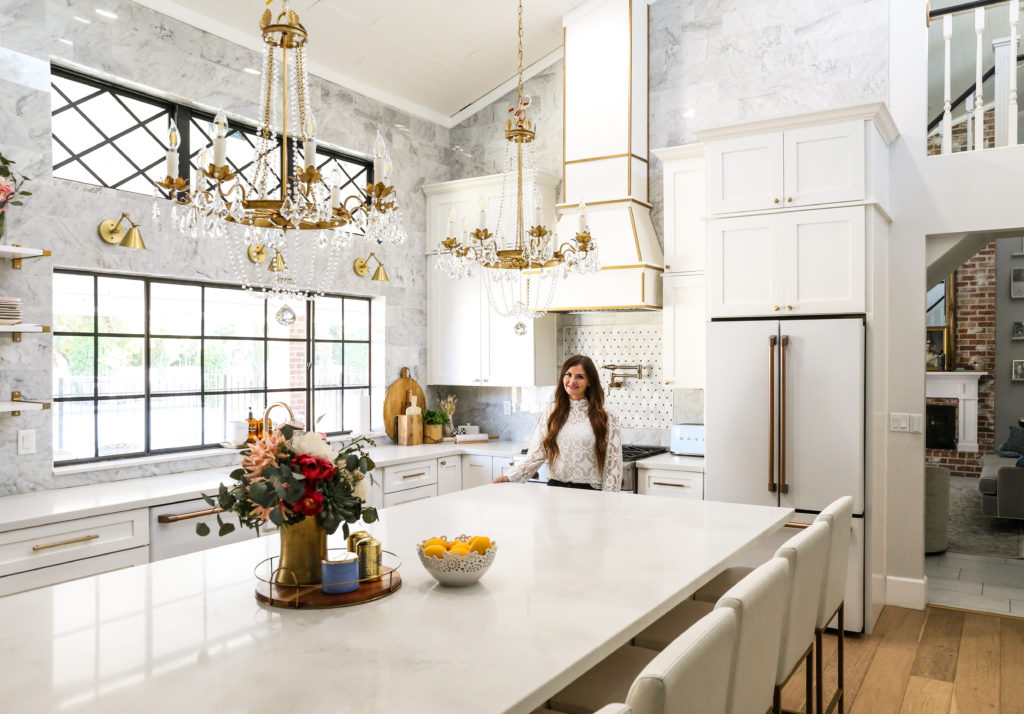
Today is the day I finally get to share my new kitchen chandeliers! I can’t believe it’s been almost THREE years since my kitchen remodel! This kitchen has had quite the transformation over the years. Check out this post to see the transformation and learn how you can change yours too!
Most of you probably don’t remember, but my kitchen used to look like this…
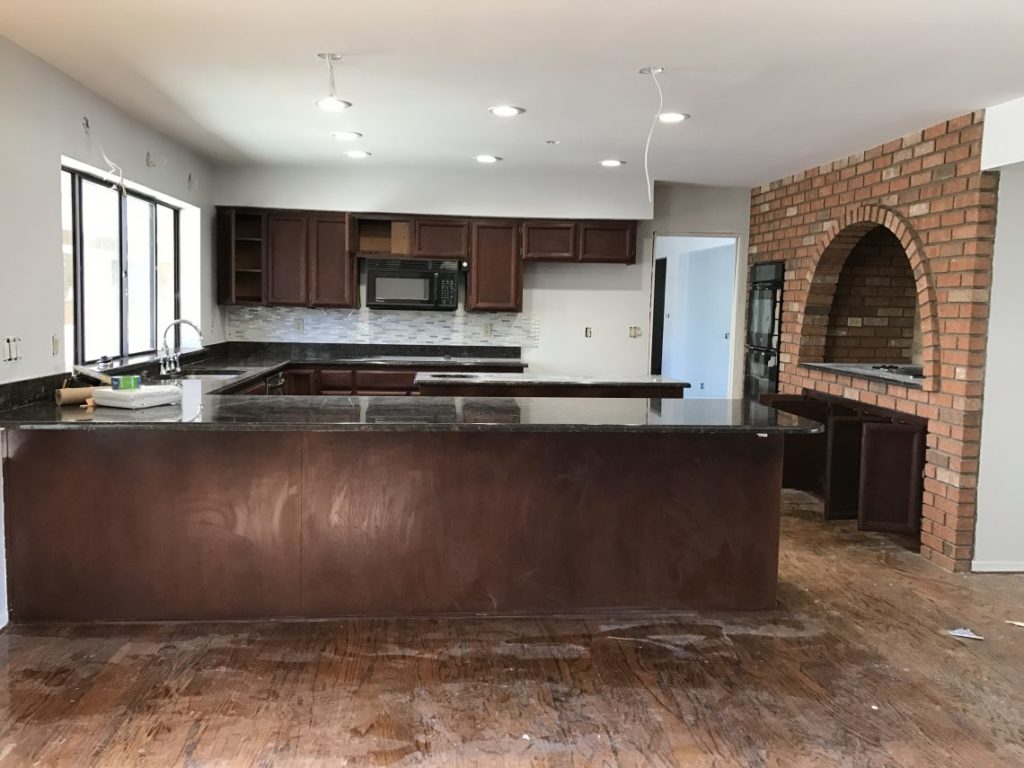
Remember when my kitchen flooded?
Due to a kitchen flood, we completely remodeled the kitchen – including the floors, taking down walls, and all new appliances. I wrote about the entire process on this post here!
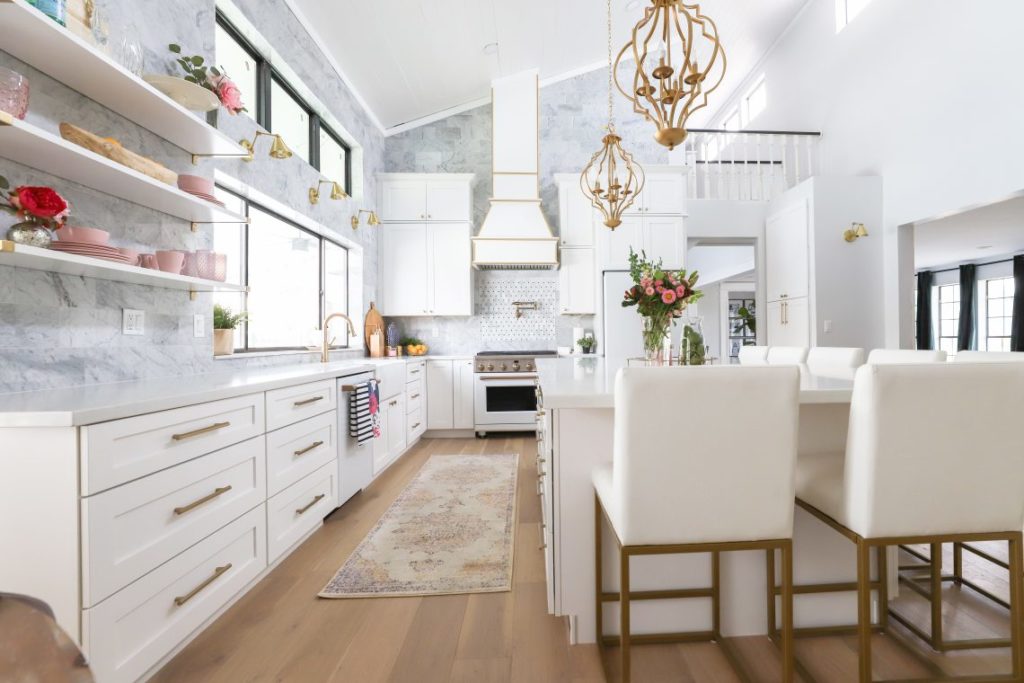
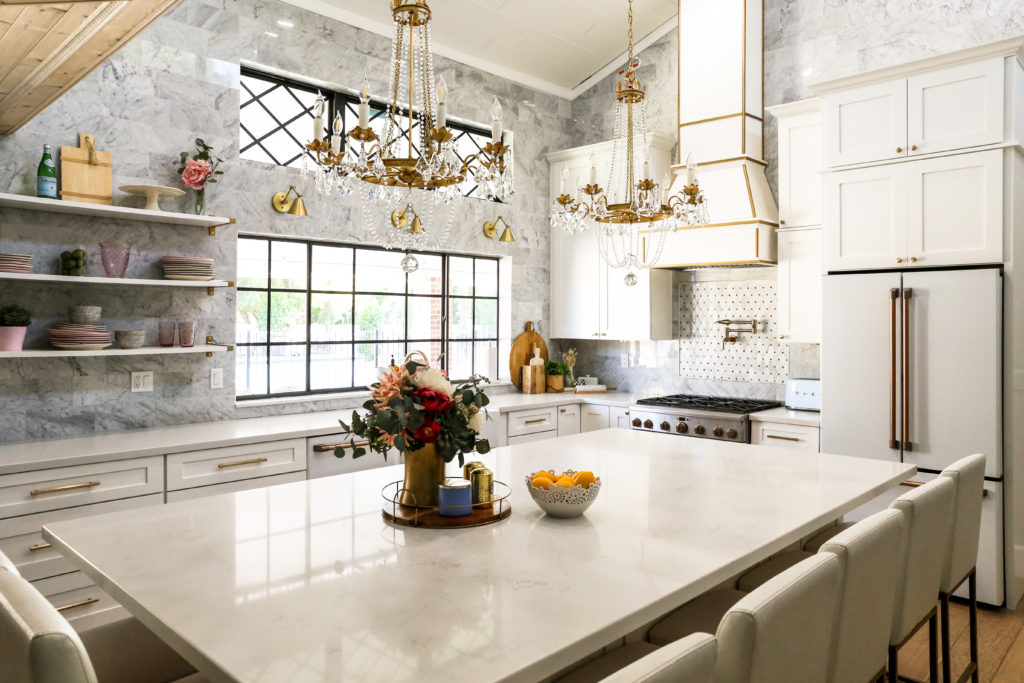
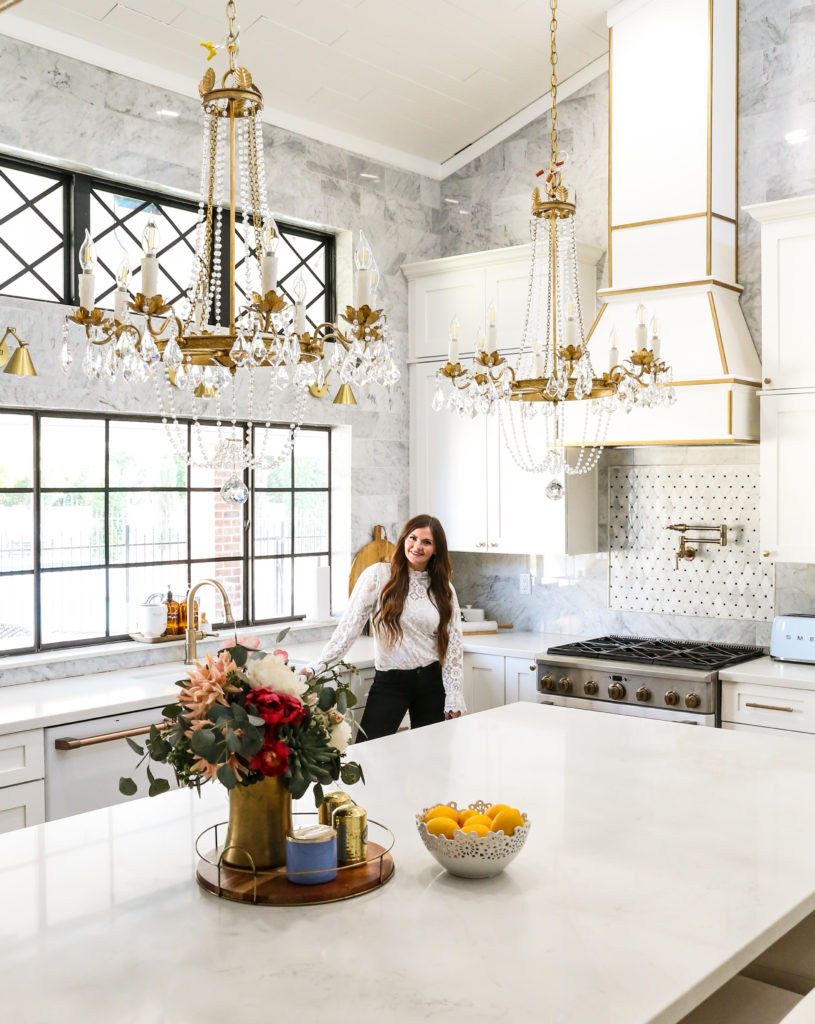
Fast forward three years and I’ve been itching to make a change in this space. I know, I know…but if you know me at all, you know that nothing in my house stays forever! I’ve been eyeing a very specific chandelier and when I found it in stock at Shades of Light, I knew they were meant to be in my kitchen! I can’t wait to show you!
Kitchen Chandeliers – What I Chose!
You don’t need to do a full re-model to change something in your space. Something as simple as changing out a light or adding new hardware can breathe new life into your kitchen while staying within budget.
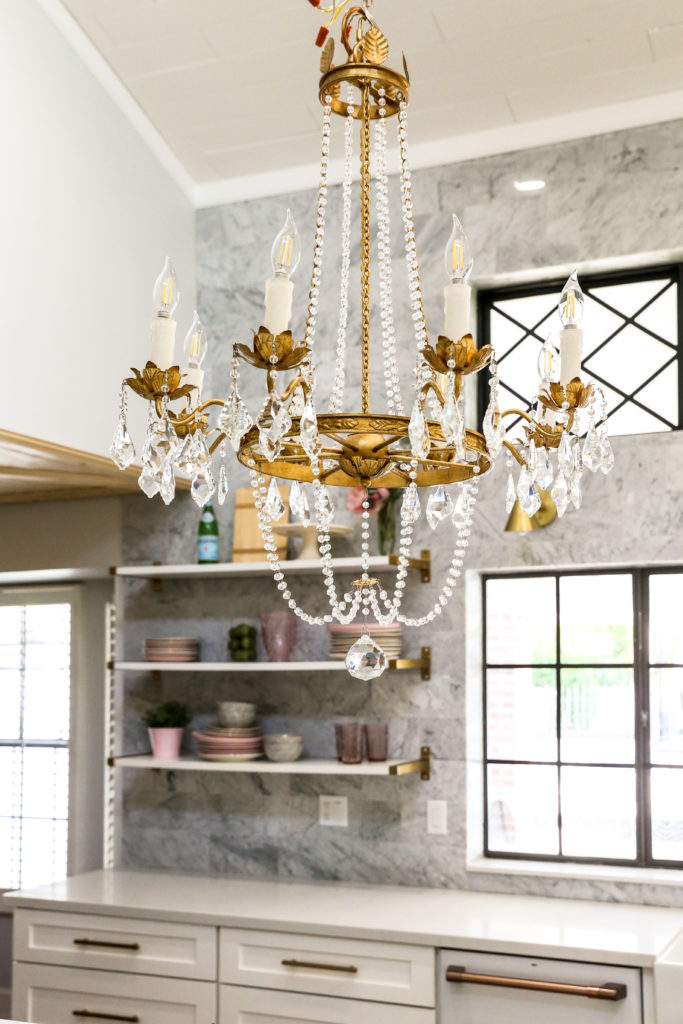
My new kitchen chandelier, the Classic Crystal Glam Chandelier – 6 Light, from Shades of Light is seriously a dream come true. The quality and the beauty of this light fixture is truly unmatched. It is even better in person, if that is even possible!
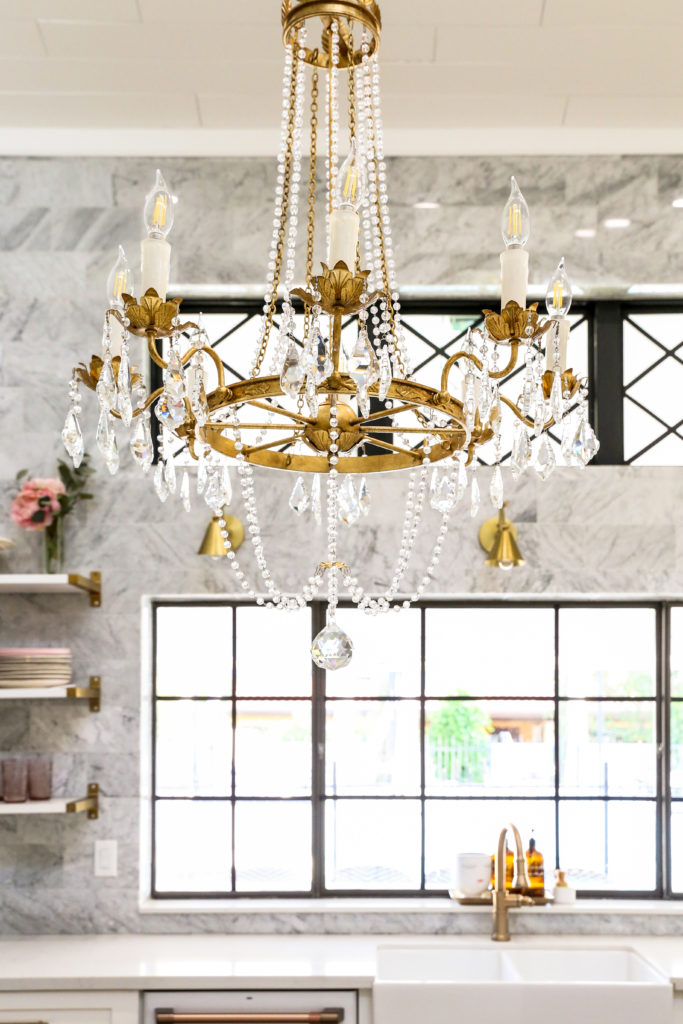
Classic Crystal Glam Chandelier – 6 Light
This was my very first time changing out a light and I’m here to tell you that it is way easier than you’d think. It was helpful to have a second set of hands for the heavy lifting, but there wasn’t nearly as much electrical work as I was expecting.
How to Change A Light Fixture
- Before you do anything else, turn the circuit off in the room where you’ll be working.
You do not want to skip this step! It is very important to make sure you find the breaker and turn off the circuit for the room you’re in to avoid any electrical mishaps. Don’t forget to turn the wall switch for the lights too.
- Remove the cover and the light bulbs from the previous light fixture.
- Remove the light by disconnecting the wire nuts from the black wire, white wire, and green wire.
- Lower the light gently to your nearest safe surface.
You may need a second pair of hands!
- Lift your new lights and attach the corresponding three wires – black, white and green.
- Once the wires are connected, tuck them into the light’s base plate and secure it to your electrical box.
- Screw in the new light bulbs!
Are you ready to see the new chandeliers?!
Shades of Light has so many different light fixtures to fit your exact design style! I linked some of my favorites below that are in stock and ready to ship!