While I was in Arizona, Savannah and I tackled a few projects! Of course! It’s pretty much our favorite thing to do when we are together! That and going out for sushi 😉 One project we really wanted to get done was her youngest daughter’s bed. Her (almost) two year old little angel was done with her baby crib and needed a big girl bed! Savannah knew exactly what she wanted but she was a little nervous to tackle it herself. It was definitely a two person job but turned out to be a really fun project!
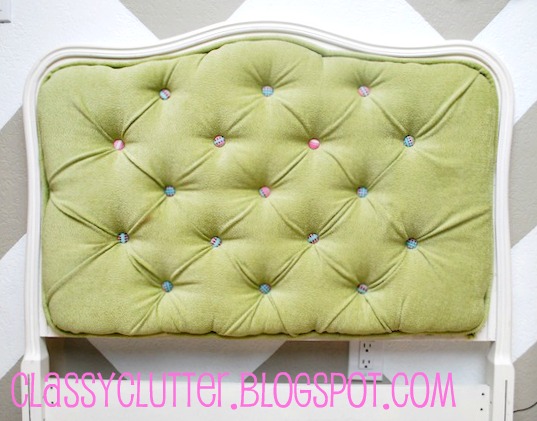
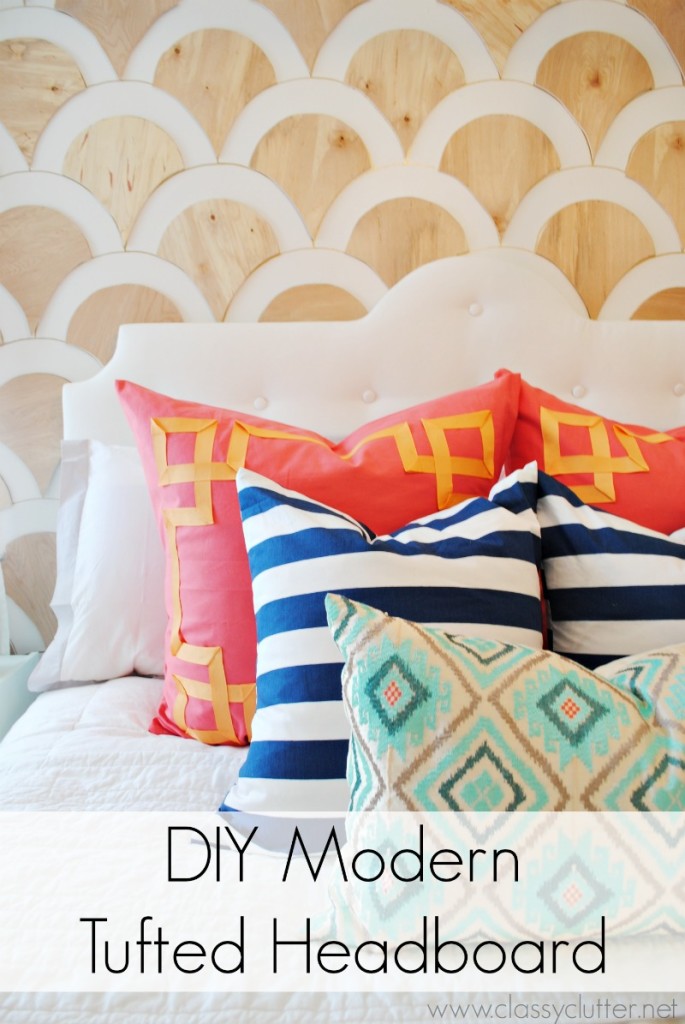
Savannah had an adorable twin bed that she found at a local thrift store for a steal. Most people would look at it and think… “great lines, cute bed, I’ll paint it and it’ll be fantastic!” well… that would be true BUT Savannah wanted to take it one step further! She wanted a white girly bed with a soft lime green upholstery and some killer cute colorful buttons! Not a tall order or anything.. 😉
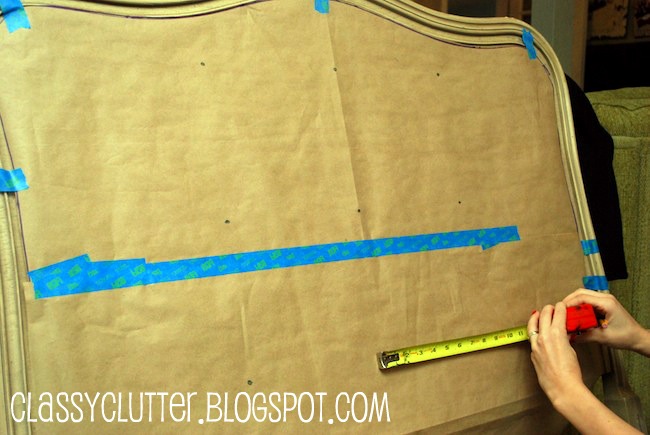
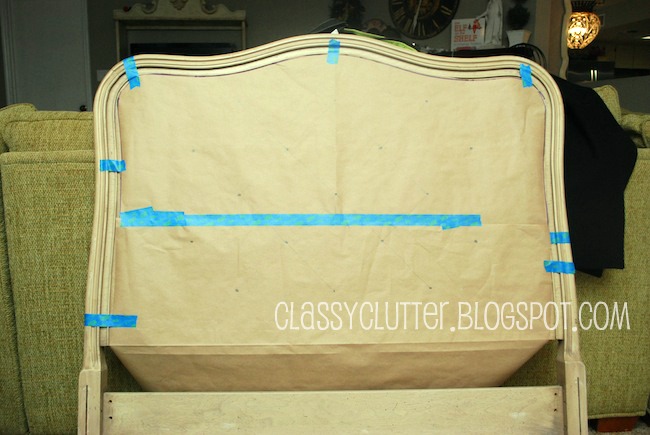
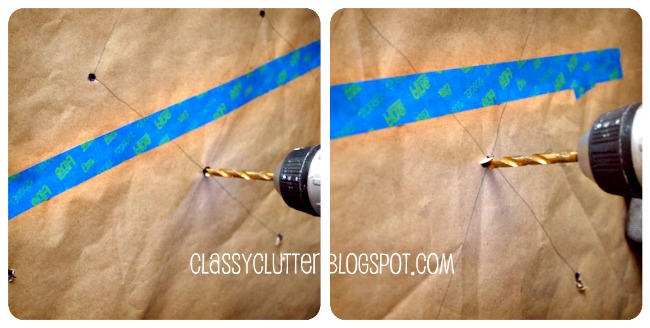
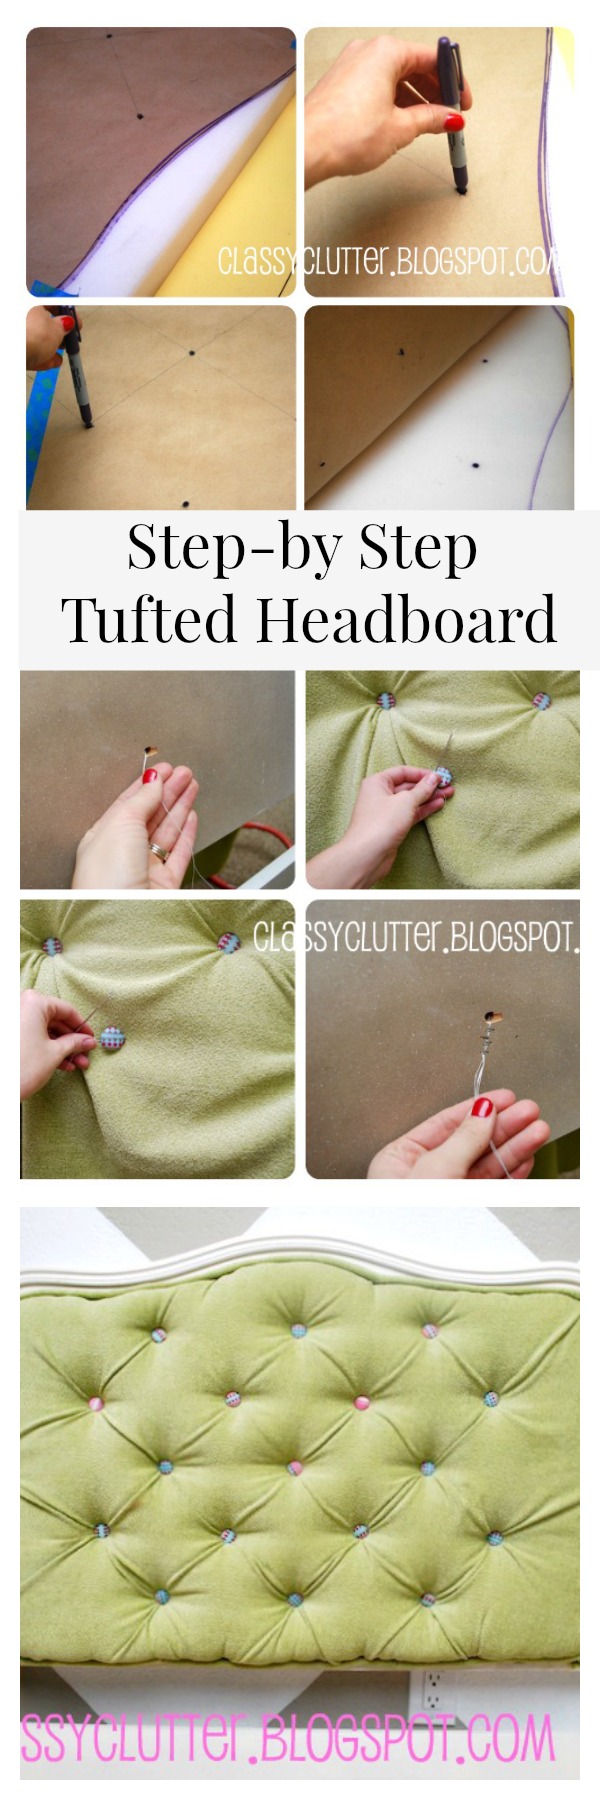
First, we made a template of where we wanted the upholstery. We used butcher paper and taped it to the bed frame.
Then we measured and marked where we wanted the tufts and buttons to be.
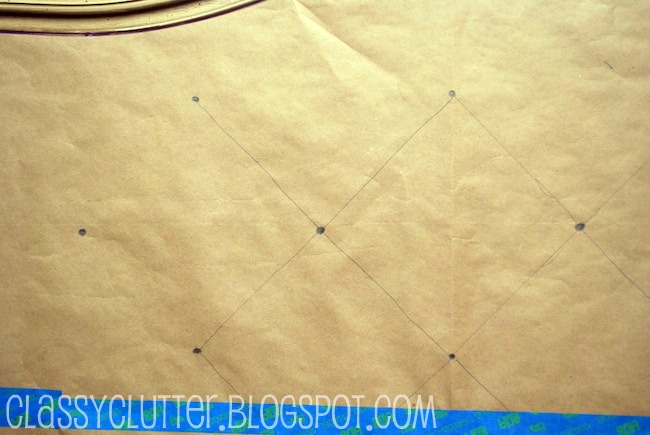
Next, we drew straight lines from each point to get an idea of where the folds in the tufts would be.
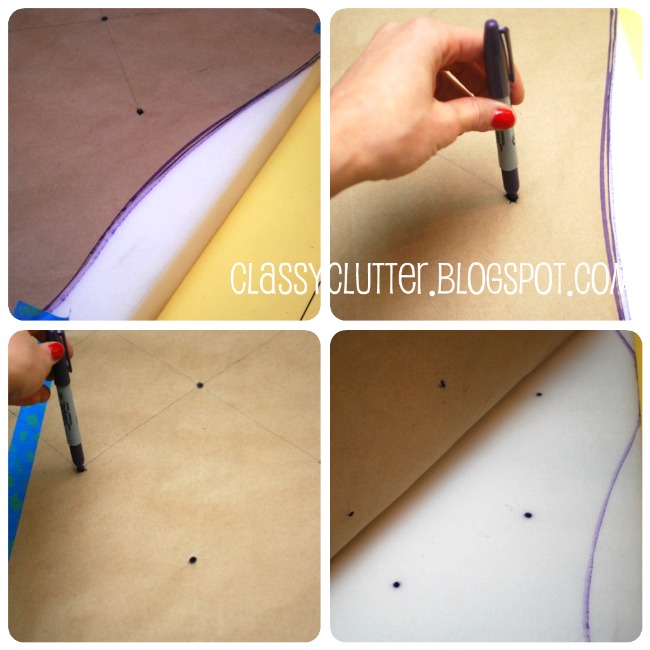
Next, we removed the template from the headboard and I traced and marked the foam while Savannah painted the headboard a gorgeous creamy white!
I laid the butcher paper template on the foam (we used 2″ upholstery foam from the fabric store) and traced in with a sharpie. (Yes, a purple one!)
Then, we cut around the traced edge of the foam using a serrated knife. We also poked holes in the tuft markings. (didn’t get a pic of this step! Sorry!)
Next, we re-taped the template to the bed, after the paint dried. Then, we drilled holes in the headboard using the template tuft markings as a guide.
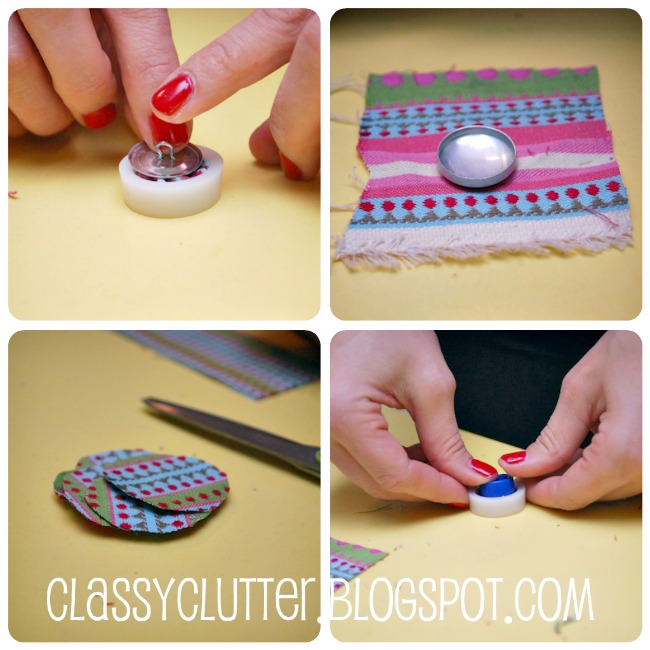
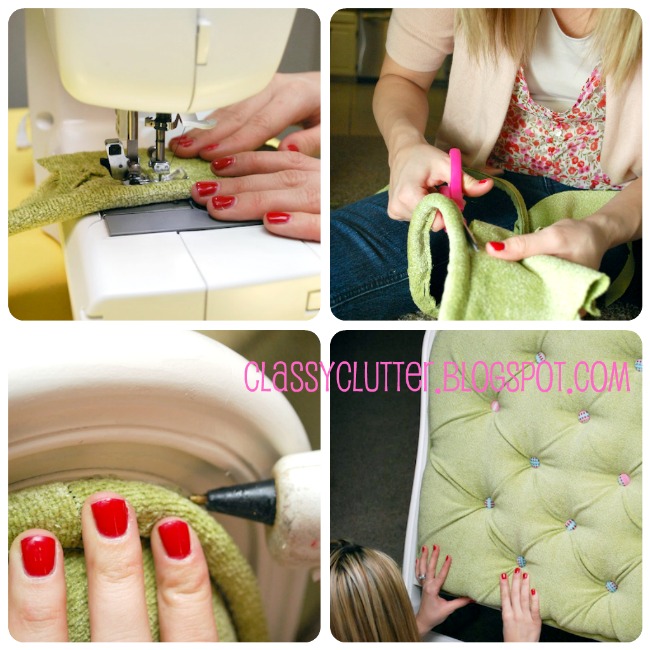
Then, we made 17 fabric covered buttons for the tufting. They were so stinkin’ cute! Totally worth the sore thumbs! You can get these button kits at a fabric store. We got hers at JoAnn’s Fabrics.
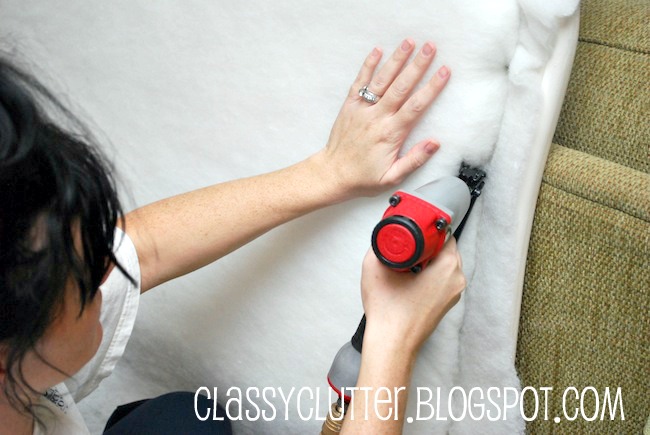
Next, the upholstering began! We used spray adhesive to attach the 2″ foam piece to the headboard. Then we stapled a large piece of batting over the foam. We used a staple gun for the upholstery.
Then, we trimmed the excess batting and we used some clamps to hold the upholstery fabric in place so we could begin the tufting process.
TIP: Do you tufting before you staple. If you staple the fabric first, your tufting may look too tight. We wanted nice deep tufts so we did not want to pull the fabric tight until the very end!
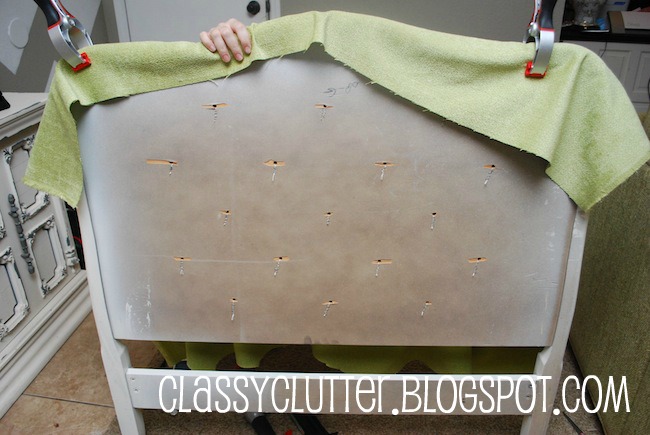
We used a long upholstery needle and upholstery thread. Start from the back fo the headboard and feed your needle through to the front, through the fabric. Attach the button and run the needle back through to the back of the headboard and staple the remaining thread securely to the back. Make sure to pull the needle really tight to get really deep tufts!
The back should look like this when you’re done with this step.
Next, we stapled the fabric to the headboard and trimmed the excess.
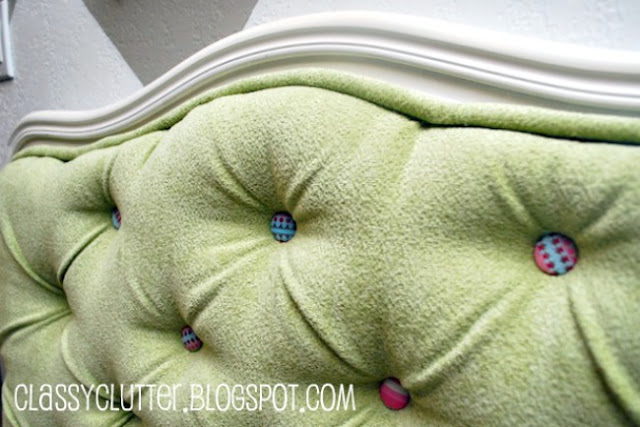
Lookin’ good! But we’ve got one more important step! Piping!
Finally, we started making our own piping so it would match the green fabric. We already knew how to make piping but if you need help, here is a great tutorial. Click here.
Then, hot glue your piping around the raw edges and TA-DA!!! DONE!
Here’s an up close picture of the piping and tufting…
We were so excited to tackle a project together since we haven’t been able to do that in about 6 months! BAH! Sad huh!? It couldn’t have turned out any better! We are a team and our team work always pays off! We both are in love with little Millie’s bed! Savannah is working her tail off to get the rest of Millie’s nursery turned into her big girl room!
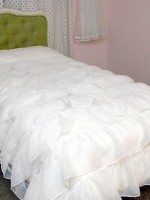
Savannah even sewed her little girl’s bedding using an unheard of technique! I’m so anxious for her to post it! Ya’ll are going to love it! She is also making some adorable pillows to match the buttons for Millie’s bed!
YAHOO! Thank you to our wonderful readers, this was our biggest link party to date! YAY!…
58 Comments
So much elegance and fun. This bed is sure to make a little girl feel like a princess. So wonderful that you did it together. Jo @ Let’s Face the Music
I love everything about this project – what an awesome job! And thank you for sharing the details on how to tuft, I have a tufted chair I want to redo, and I’m pretty sure I can adapt what you did and give it a go 🙂
Gorgeous! I love the colored buttons! One question? Could you have marked the tufting on the wood and then glued the foam and and drilled through the wood and foam at the same time? Just curious! thanks!
This is such a great whimsical headboard for a little girl! I made a tufted headboard but didn’t do the folds, and now I want to buy new fabric and “fix” it 😉 Great job!
This turned out beautifully! Love the fun color and the button fabric you chose. The tutorial is wonderful. I’d love for you to link this up to a party that I have going on at Project Queen.
That is adorably cute! I know both of my girls would still LOVE it & they’re 9 & 6… so you’ll get a lot of life out of it. I’m featuring it in the PoPP Spotlight this weekend. Thanks for linking up.
I love this! I have had this idea too, but haven’t found a headboard yet. I am so glad to see how it well it turned out. I love the fabric and colors you picked! Soo cute, great job!
Saw your feature over at HoH- love this headboard. The multicolored buttons make it extra special. Thanks for the tufting tutorial- will be pinning this for future reference. New follower! 🙂
wow.. I love how it turned out! You’ve motivated to make one too.. 😀 Thanks for linking up at friday fun party and welcome to the party 🙂 I hope you will come back too! Have a great weekend..
I was linking up to Tatertots & Jello party and your headboard caught my eye. I love it! I did the same thing to a headboard and I swear they could be twins. http://www.cre8tivedesignsinc.com/2012/03/velvet-tufted-headboard-finally-done/ I have a pin board just for DIY headboards, going to pin yours to the list. The tutorial is fantastic! Great job girls.
This is one of the most impressive tutorials I have seen on making a DIY tufted headboard! Your headboard is beautiful! I have this in mind for our king bed – yikes!! Will pin this for future reference!! Thanks for the great tuturial!
Just wanted to let you know we’re featuring you today @ Keep Calm & Link Up and hope you’ll stop by to link up again (and grab a featured button)! Congrats!!
WOW…you did an AMAZING job and what a great tutorial! Thanks for sharing! Hopped over from Furniture Feature Friday and I’m happy to be your newest follower. Would love to have you stop by for a visit. Blessings ~ Judy
Great job! I’ve seen a lot of tutorials for tufted headboards around (hello, Pinterest!) but I think yours is the best, and clearest, I’ve seen this far. Thank you for sharing it!!
I would love it if you would link up at Martha Mondays, open tonight at midnight through Wednesday night!
I love what you did with the headboard. It’s beautiful. I have a link party called Wednesdays Adorned From Above Blog Hop and would love to have you share this with everyone. It runs from Wednesday through midnight Sunday. Here is the link to the party. http://www.adornedfromabove.com/2012/12/5-fun-posts-and-wednesdays-adorned-from.html Debi @ Adorned From Above Marci @ Stone Mountain Cottage
It is so luck to see the article today, great article, great author. I learn something new on different post everyday. It is always refreshing to read posts of other forums and learn something from them. Upholstery


So much elegance and fun. This bed is sure to make a little girl feel like a princess. So wonderful that you did it together. Jo @ Let’s Face the Music
I love everything about this project – what an awesome job! And thank you for sharing the details on how to tuft, I have a tufted chair I want to redo, and I’m pretty sure I can adapt what you did and give it a go 🙂
Patty
Gorgeous! I love the colored buttons! One question? Could you have marked the tufting on the wood and then glued the foam and and drilled through the wood and foam at the same time? Just curious! thanks!
This is wonderful. I just love it! It looks daunting. I am afraid to take on such a task, but you may have just inspired me! Great job!
oh wow!!! What a great project with a beautiful end result!
It’s so pretty, and perfect for a little girl. 🙂
Beautiful project!
Super Cute! I found you guys via Pinterest and Im now following along! Happy New Year
Such a fun, whimsical take on tufting. You girls did an AWESOME job!
I tackled turning a coffee table into a tufted ottoman a while back and still love it!
Would also love it if you stopped by for a visit!
P.S. I’m your newest follower. ; )
~Abbie (www.fivedaysfiveways.com)
This is such a great whimsical headboard for a little girl! I made a tufted headboard but didn’t do the folds, and now I want to buy new fabric and “fix” it 😉 Great job!
I love the whimsical look of the buttons. Nice job. Tufting is tricky.
Girls! That is AMAZING!!! You have taken the fear out of tackling a project like this right out of me. Thanks for linking it up!
Kelli
This turned out beautifully! Love the fun color and the button fabric you chose. The tutorial is wonderful. I’d love for you to link this up to a party that I have going on at Project Queen.
http://projectqueen.org/welcome-to-link-party-15-turning-the-daunting-into-the-do-able
I’m a new follower.
Great tut and beautiful job! It will help make a gorgeous bed!
God, I’m dying! That is so amazing. Found you over at Power of Paint Party. Awesome, awesome, awesome.
maxwellhouseinteriors.blogspot.com
This headboard turned out BEAUTIFUL! You did an awesome job with the tutorial too!
I’ve featured you on my blog. sunnyvanilla.blogspot.com
Happily following you 🙂
That is adorably cute! I know both of my girls would still LOVE it & they’re 9 & 6… so you’ll get a lot of life out of it. I’m featuring it in the PoPP Spotlight this weekend. Thanks for linking up.
Hi Mallory and Savannah, I’ll be featuring your amazing, fun headboard at Project Queen tomorrow night. Thank you so much for linking up and sharing!
Mandy
Great project…I came over from remodelaholic. I made something similar recently, feel free to check it out. http://orange-sugar.blogspot.com/2011/12/diy-nailhead-chunky-leg-bed-frame.html
This is absolutely gorgeous! Great job!!
Stopping by from Remodelaholic’s linky party.
I’d love for you to stop by and visit me!
http://www.adventuresofourfami-ly.blogspot.com
I love this! I have had this idea too, but haven’t found a headboard yet. I am so glad to see how it well it turned out. I love the fabric and colors you picked! Soo cute, great job!
Great tutorial!
This project is fantastic, and the tutorial is very straight forward. I am dying to make one now.
That is adorable! Thank you for the great tutorial – I think this would be perfect in my daughter’s room!
Love it so I pinned it 🙂
Saw your feature over at HoH- love this headboard. The multicolored buttons make it extra special. Thanks for the tufting tutorial- will be pinning this for future reference. New follower! 🙂
I LOVE it. Great tutorial. Congrats on the feature at HoH!
I’m happy to be your newest follower!
Karah
one word…WOW!!!!
This is ah…mazing!!! The color is fantastic. If you get a chance share it over here:
http://www.decoratinginsanity.com/2012/02/furniture-friday-6-and-link-party.html
xo…mONICa
Great tutorial…
Have a great weekend!
Gorgeous! Came over from Tatertots and Jello!
Your headboard is beautiful, nice job! I have this linked to my headboards post as well today, for inspiration!
wow.. I love how it turned out! You’ve motivated to make one too.. 😀 Thanks for linking up at friday fun party and welcome to the party 🙂 I hope you will come back too! Have a great weekend..
I was linking up to Tatertots & Jello party and your headboard caught my eye. I love it! I did the same thing to a headboard and I swear they could be twins.
http://www.cre8tivedesignsinc.com/2012/03/velvet-tufted-headboard-finally-done/
I have a pin board just for DIY headboards, going to pin yours to the list. The tutorial is fantastic! Great job girls.
Amazing! I loooove tufting. Great job!
This is one of the most impressive tutorials I have seen on making a DIY tufted headboard! Your headboard is beautiful! I have this in mind for our king bed – yikes!! Will pin this for future reference!! Thanks for the great tuturial!
SOOOOO fun! i love this! the color, tufting, everything!
Awesome!! you girls make it look so easy 🙂
This tutorial was super helpful over the weekend, as I was working on my own tufted headboard.
Love the color! Great tutorial!! Thanks for joining the party at Keep Calm and Link Up!
Barbara at Chase the Star
chasethestar dot net
Just wanted to let you know we’re featuring you today @ Keep Calm & Link Up and hope you’ll stop by to link up again (and grab a featured button)! Congrats!!
Lucky girl! You all really outdid yourselves. This is beautiful!
Liz
So cool! I’ve always wanted to attempt one but I still have to find a good place to put one!
Wow, how beautiful! You did an amazing job on this headboard! Love it!
Oh and I found you on miss mustard seed’s FFF 😉
WOW…you did an AMAZING job and what a great tutorial! Thanks for sharing! Hopped over from Furniture Feature Friday and I’m happy to be your newest follower. Would love to have you stop by for a visit. Blessings ~ Judy
This is so cute! You did so much work and it totally paid off!!!
Great job! I’ve seen a lot of tutorials for tufted headboards around (hello, Pinterest!) but I think yours is the best, and clearest, I’ve seen this far. Thank you for sharing it!!
I would love it if you would link up at Martha Mondays, open tonight at midnight through Wednesday night!
http://www.watchoutmartha.net/2012/11/martha-mondays-link-up-party-features.html
~Amanda
http://www.watchoutmartha.net
I love what you did with the headboard. It’s beautiful. I have a link party called Wednesdays Adorned From Above Blog Hop and would love to have you share this with everyone. It runs from Wednesday through midnight Sunday. Here is the link to the party.
http://www.adornedfromabove.com/2012/12/5-fun-posts-and-wednesdays-adorned-from.html
Debi @ Adorned From Above
Marci @ Stone Mountain Cottage
It is so luck to see the article today, great article, great author. I learn something new on different post everyday. It is always refreshing to read posts of other forums and learn something from them.
Upholstery
Hi Mallory and Savannah,
I love this tufted headboard that you made. I would like to discuss with you the possibility of featuring it in an upcoming issue of my magazine.
Thanks,
Dianne
Hi Dianne!
We just sent you an email. Thanks so much!
Mallory & Savannah
Thank you for sharing the step by-step process of your project. It looks beautiful and I love the elegance of it.