
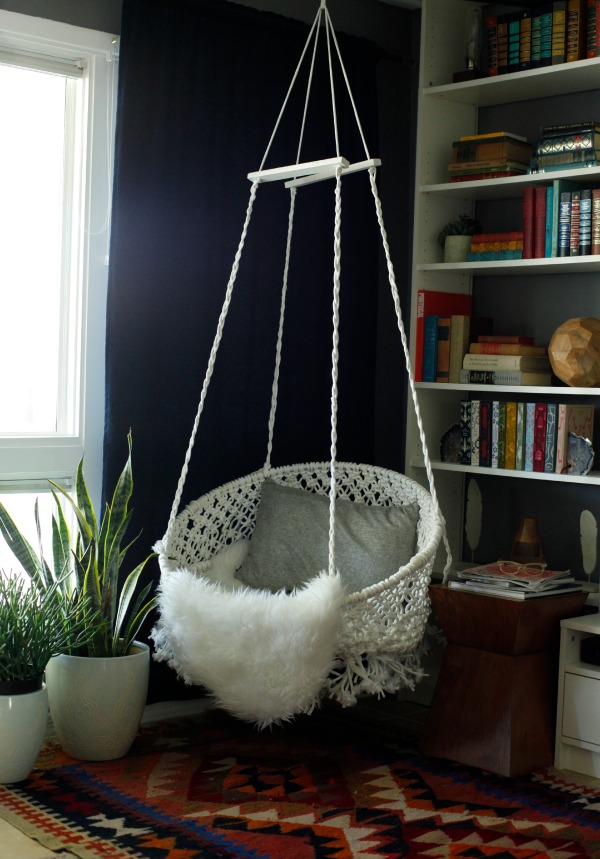
DIY Hanging Macramé Chair
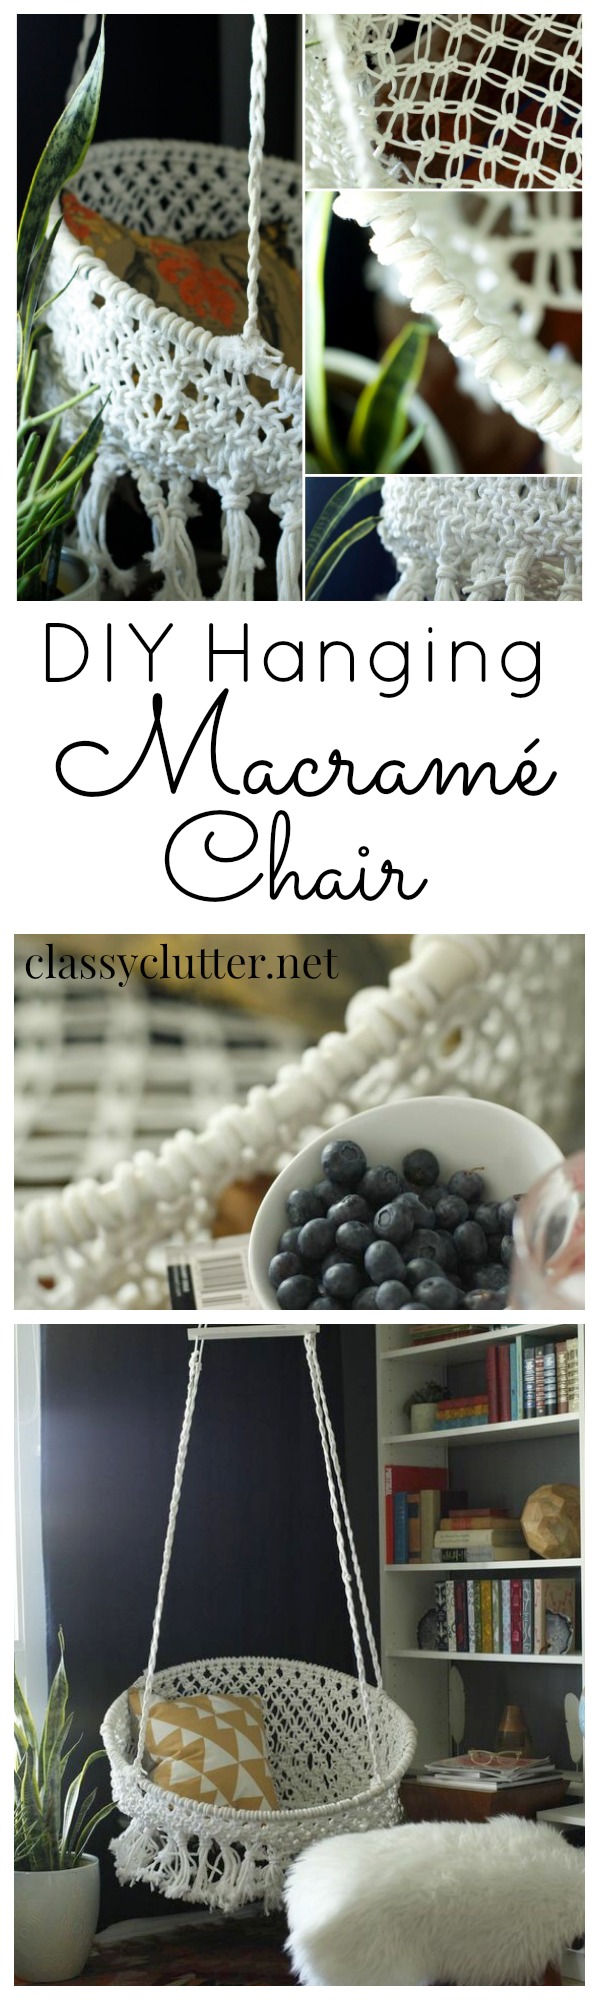
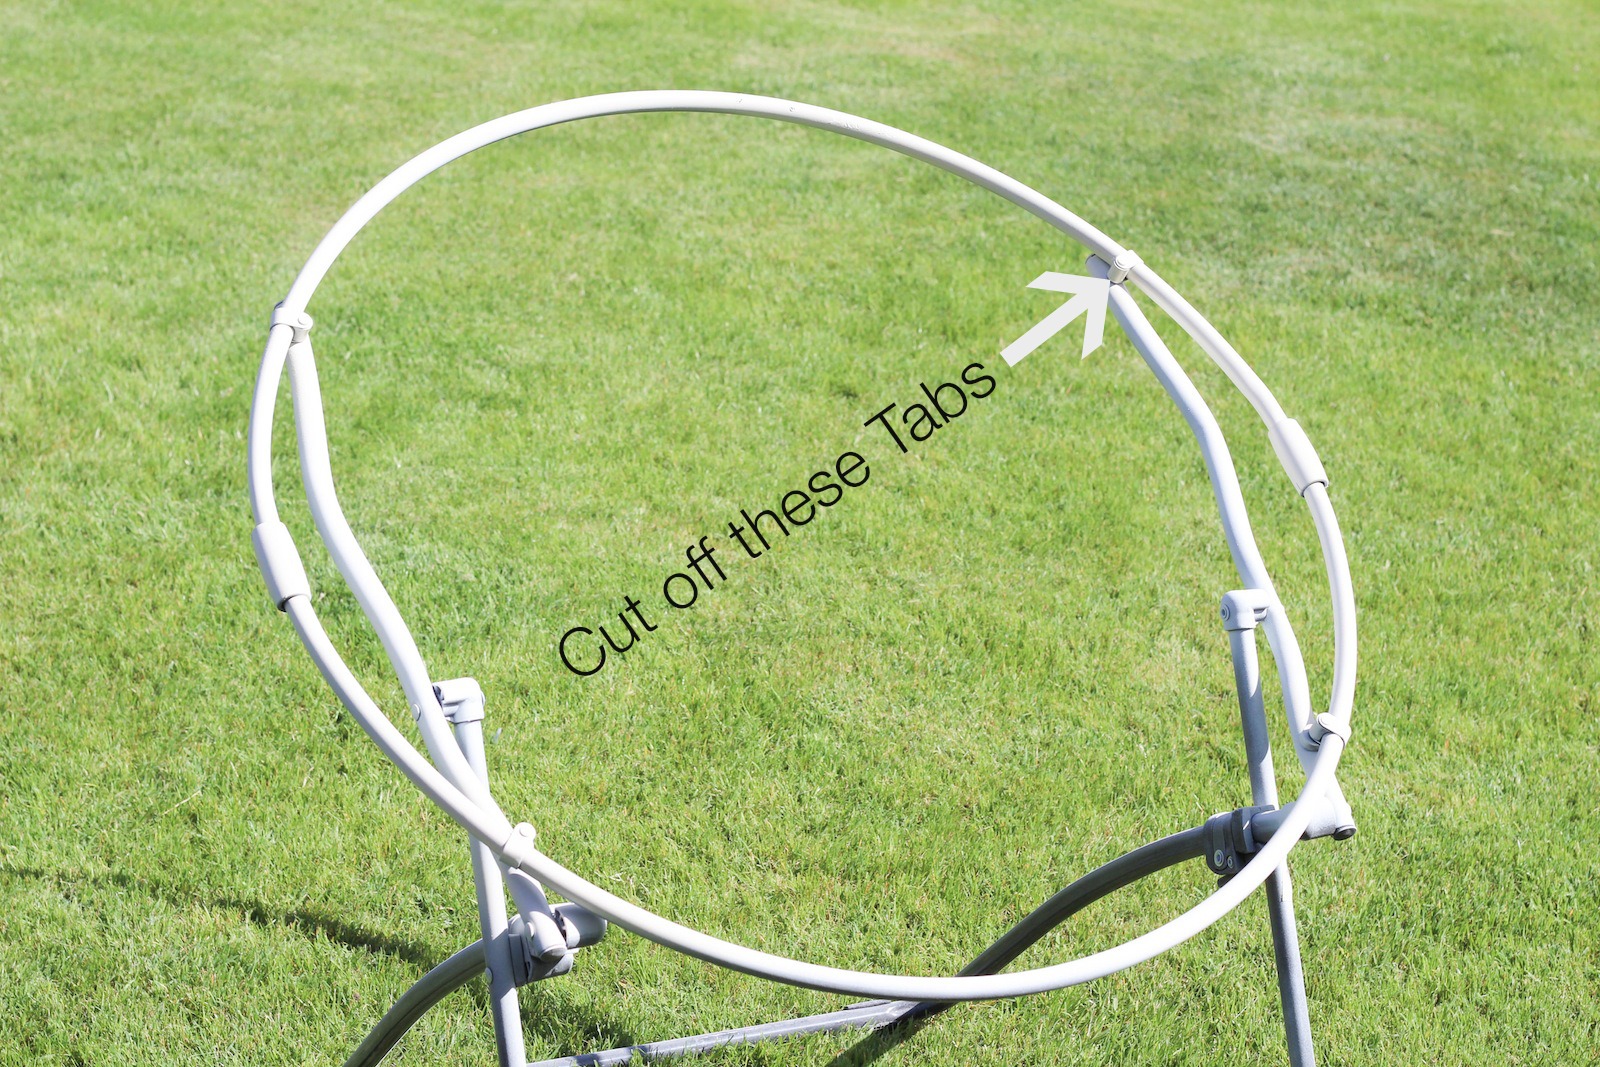
This chair was not my easiest DIY. Only because there was no tutorial anywhere to follow which means there was A LOT of trial and error which is always hard. I did this chair after Mallory and I were selected to compete in the Creating with the Stars 2014 contest. We were very excited but nervous. The very first round was knock-off and with the help and guidance from our amazing star, Mandi from Vintage Revivals. We were so excited that we were able to work with Mandi. She has always been one of our favorite bloggers out there and we were totally star struck the first time we even talked to her. Anyways, after searching everywhere on the web we decided that we would knock off THIS chair that was from Urban Outfitters. Macramé is big right now, and I was totally up for the challenge to create this DIY Hanging Macramé Chair . To start the chair I used this chair from Target. I spray painted it white and I had to cut off the legs. I thought they would unscrew but I was wrong so using a little saw I cut off the tabs which removed the hoop part of the chair legs.
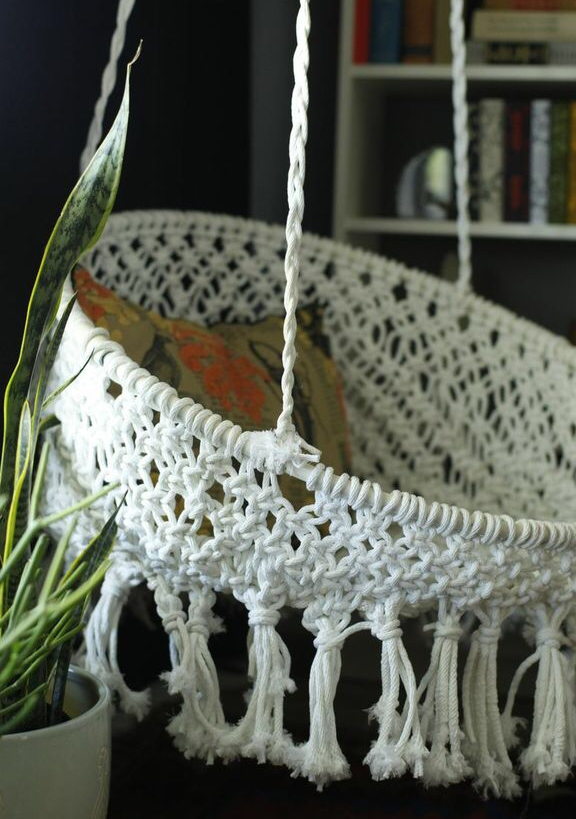
The clothesline I used for the project was from the Home Depot and I used over 8 packages of this rope. I believe I used 8-9, 200 feet packages plus another 100 feet package. That amount including the rope that I used to hang the chair which is braided as well. This is a large chair and it used a lot of rope. The biggest thing I would say is make sure you have enough rope and that the rope is long enough. I started out by cutting 60, 10 feet pieces of rope, that was not enough. I lost count after a while but I believe I ended up using around 120, 10 feet pieces of rope for just the walls of chair. But before you just cut away, use plain tape and put it around the rope and cut on the tape that way you don’t have the rope unravel.
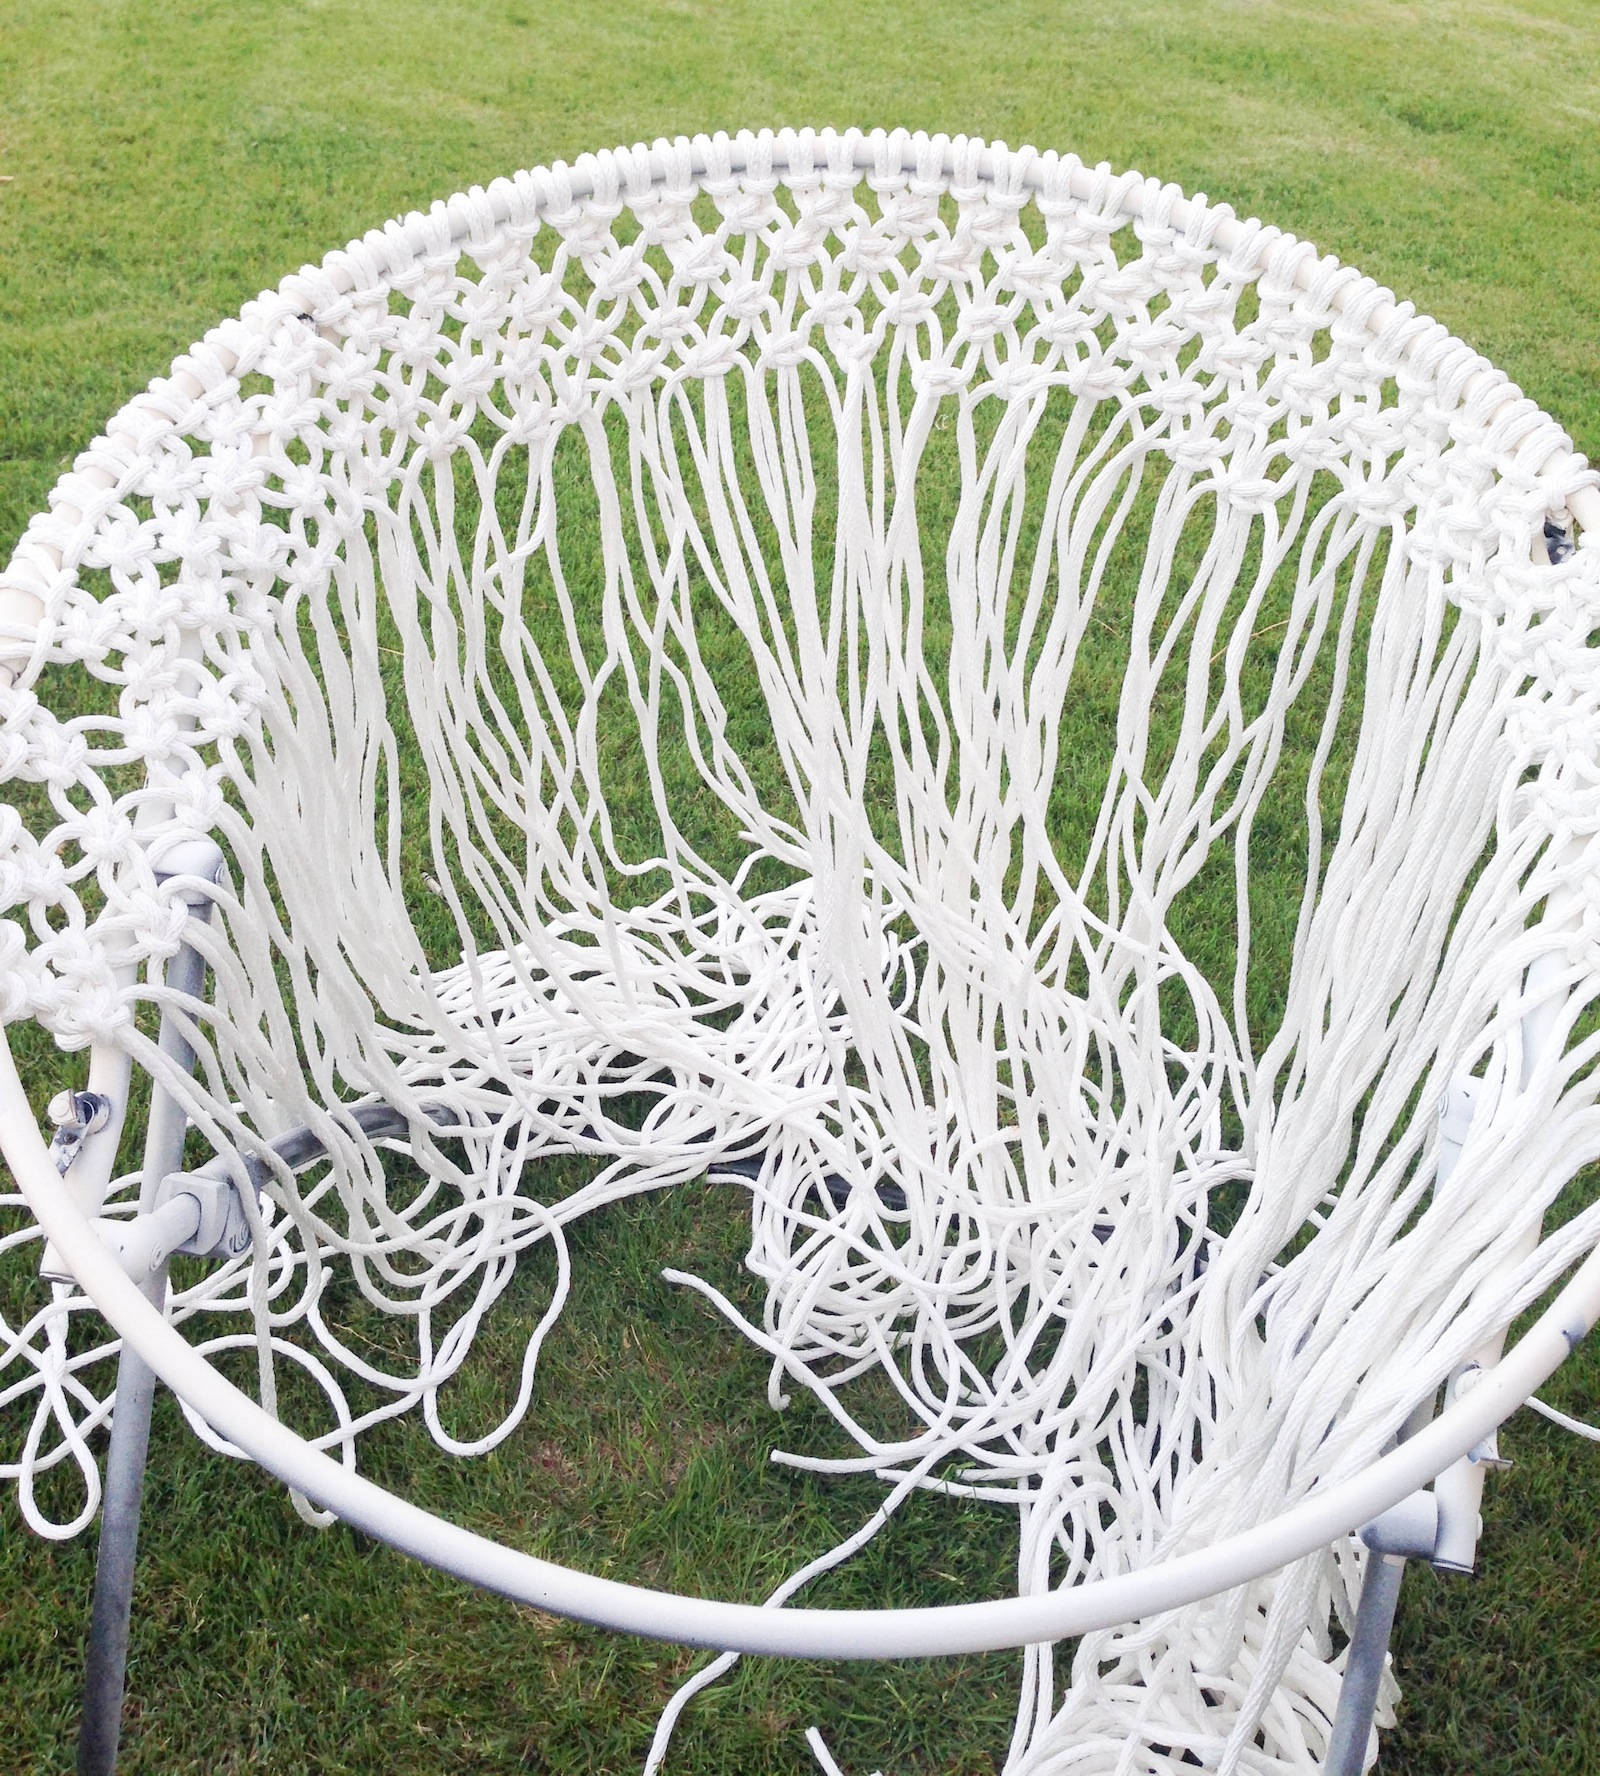
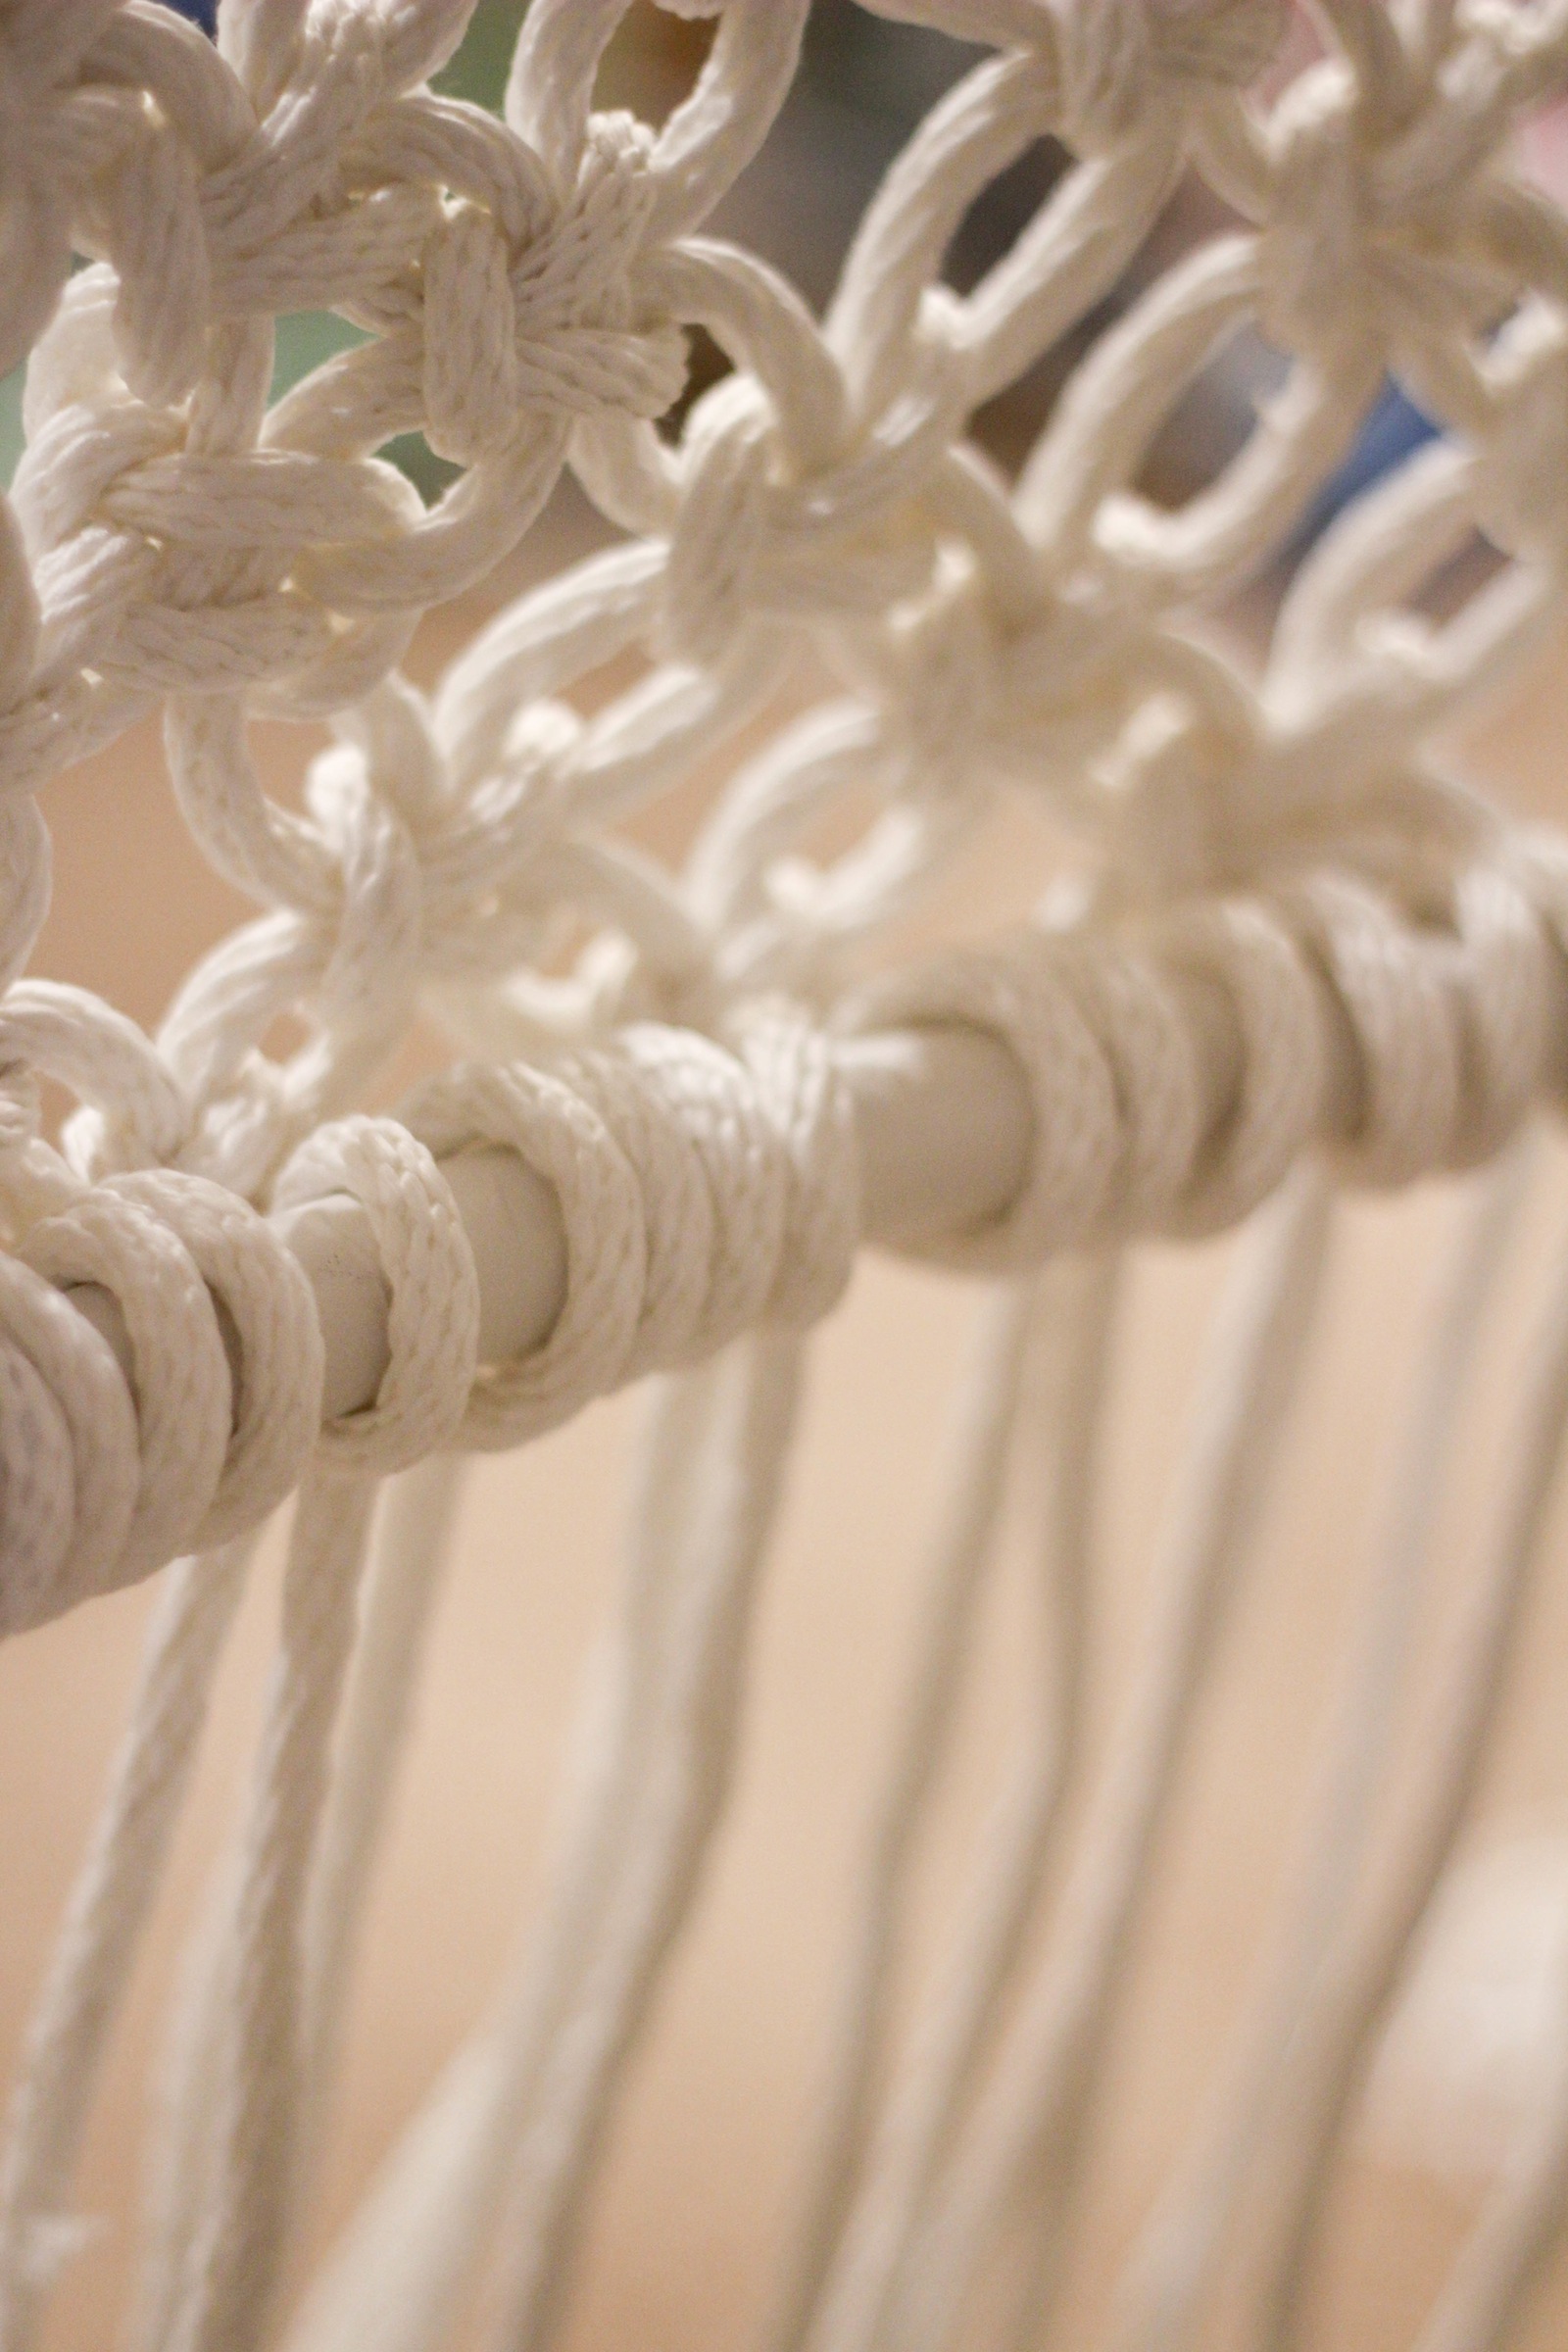
I started with doing a Basic Square Knot around the hoop. I then did Alternating Square Knots around the whole chair. I started on the left and I worked my way around.
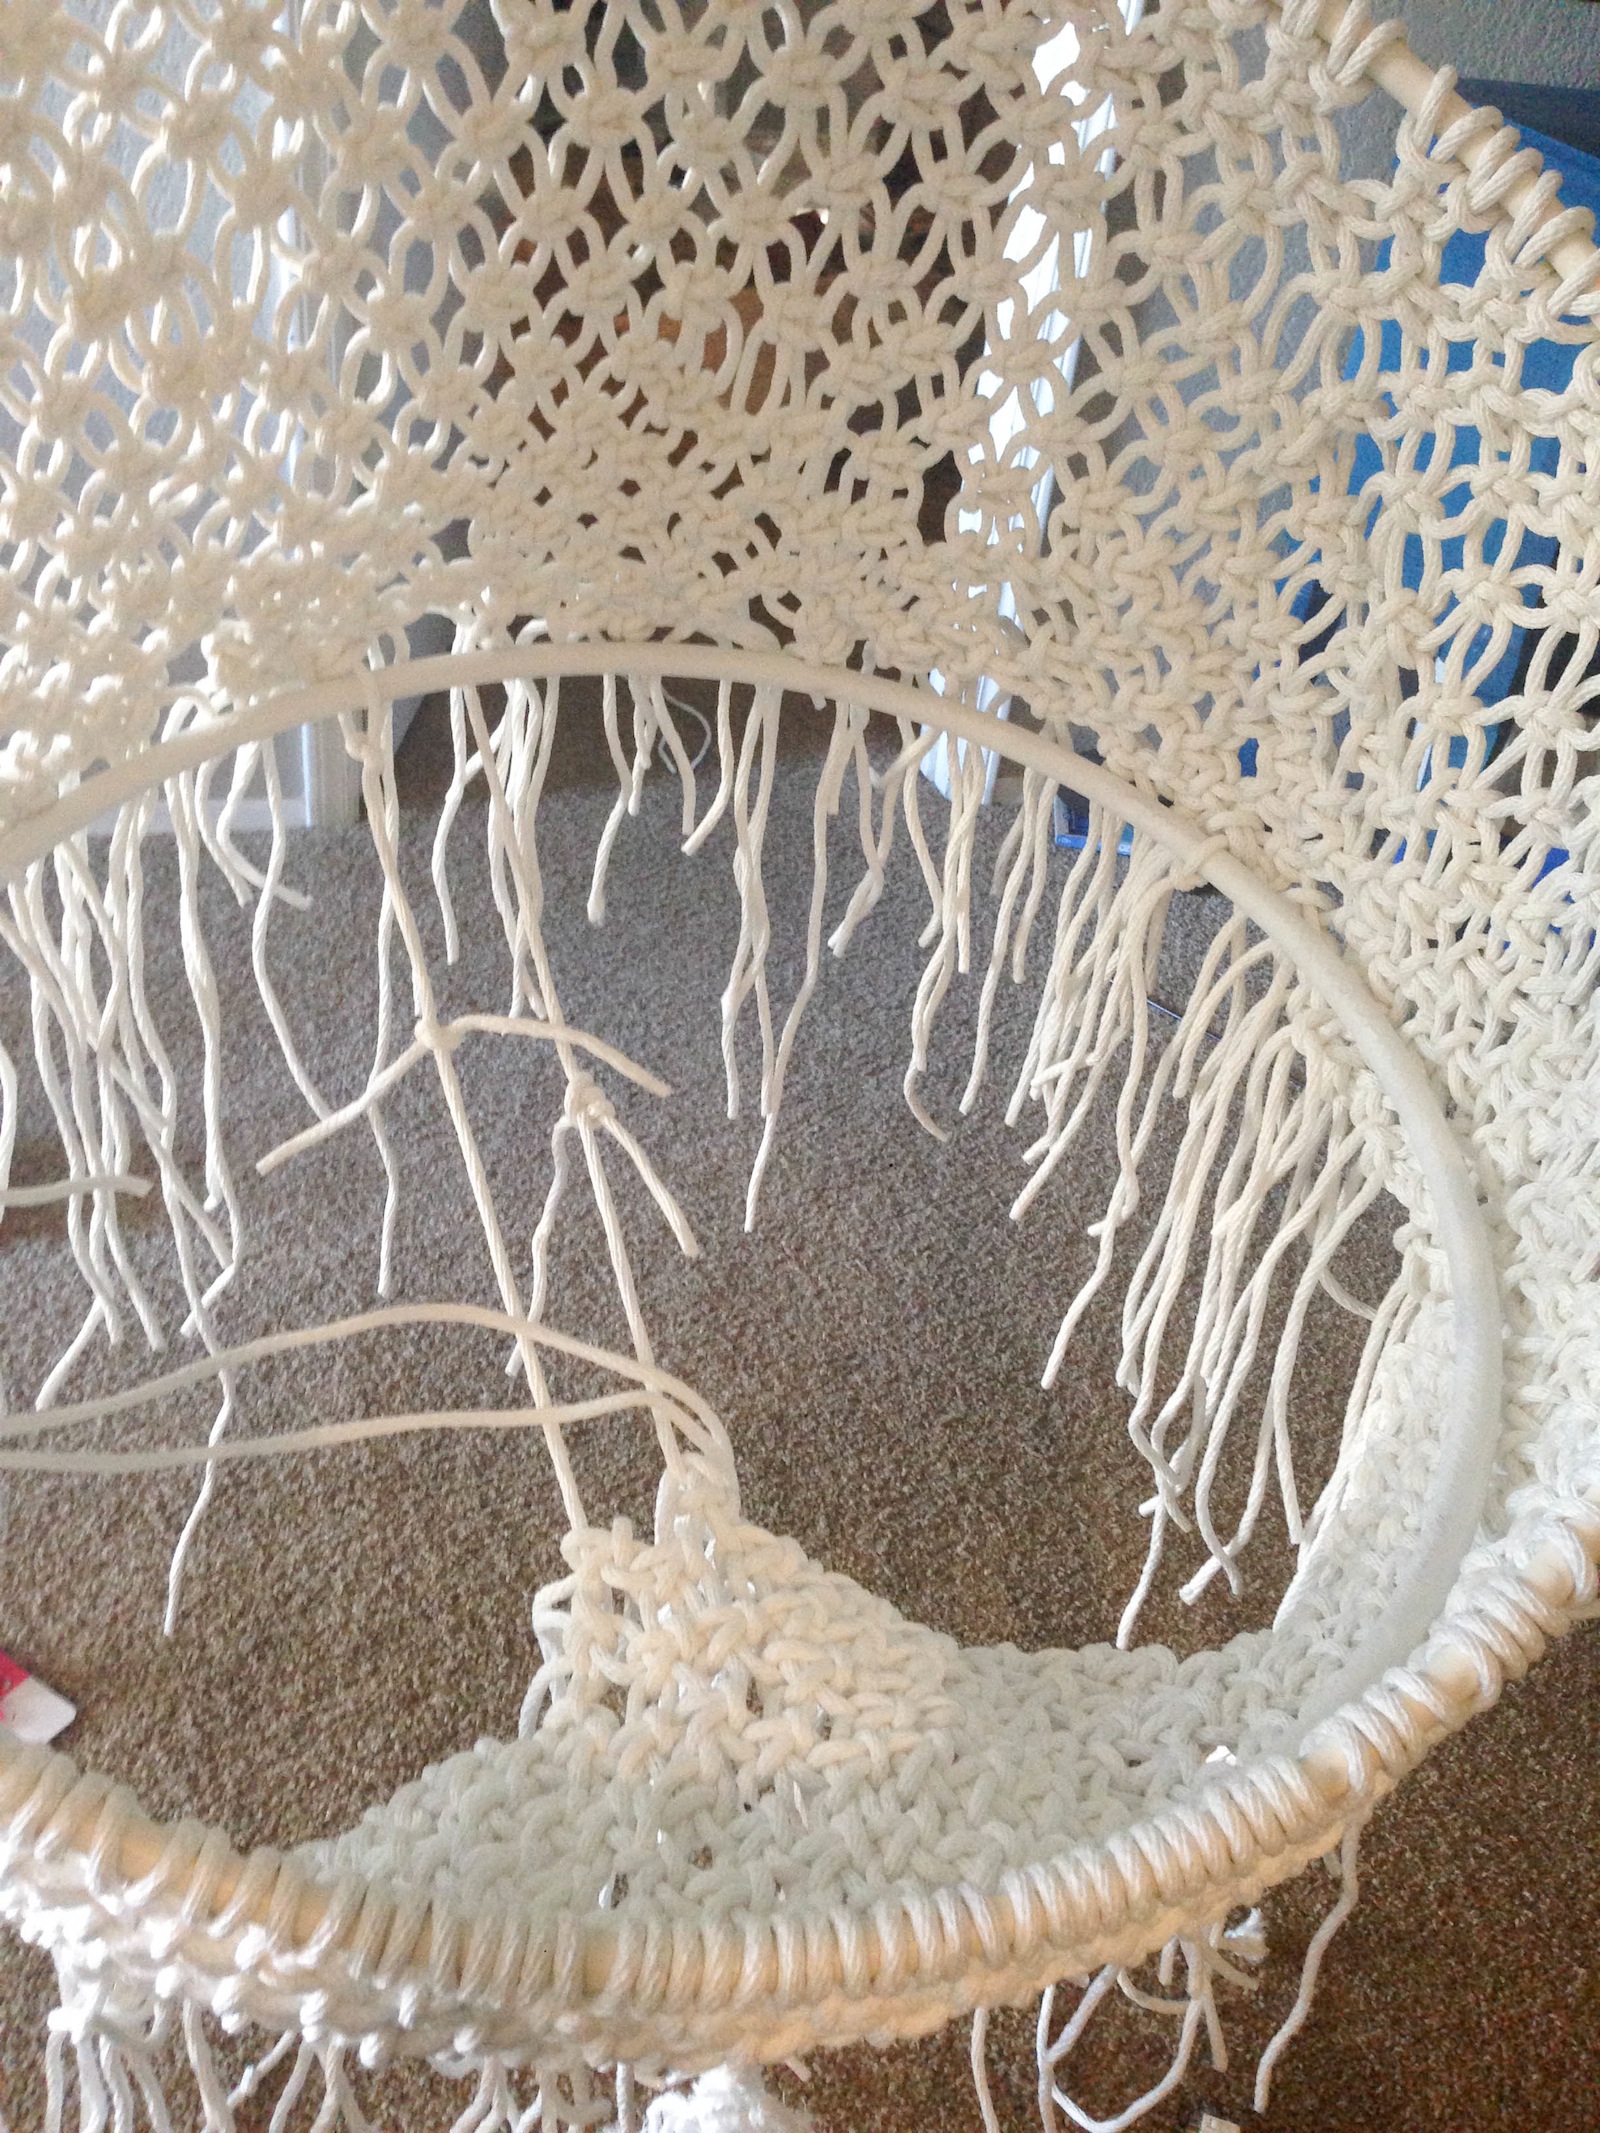
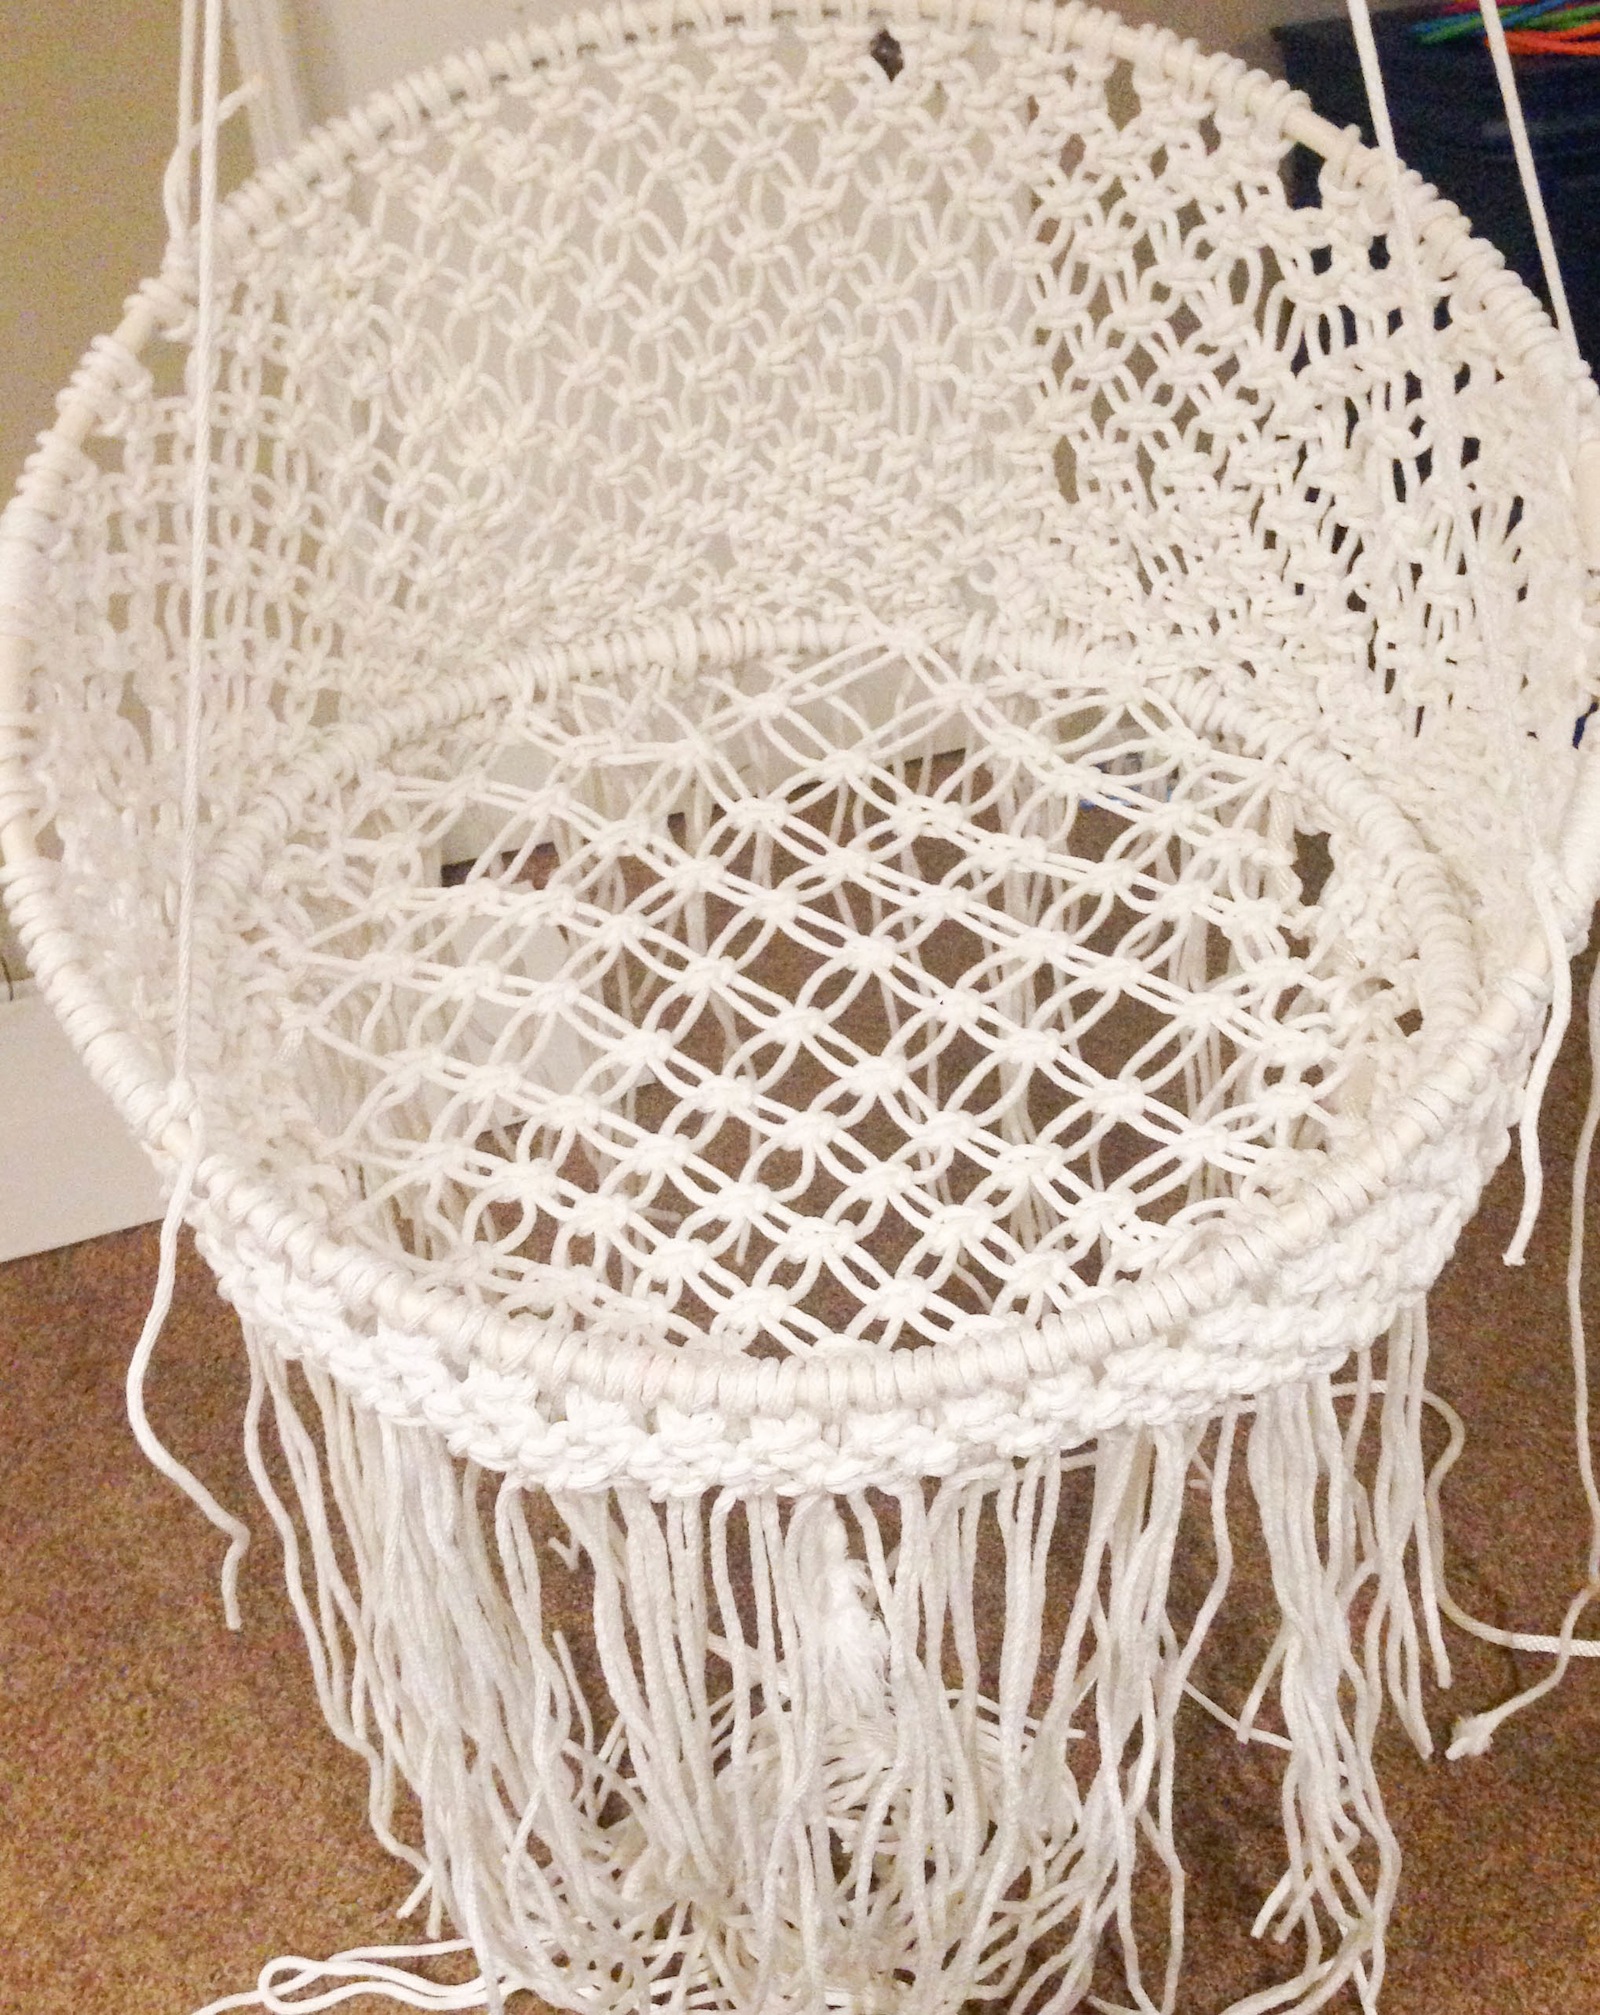
At this point I was feeling very excited and hopeful that I was going to be able to pull this chair off. After quite a few hours, I started to get closer to the seat part of the chair and this is were my first bit of trial and error happened. This failed because I just kept on making my way down to the seat using that same knot.

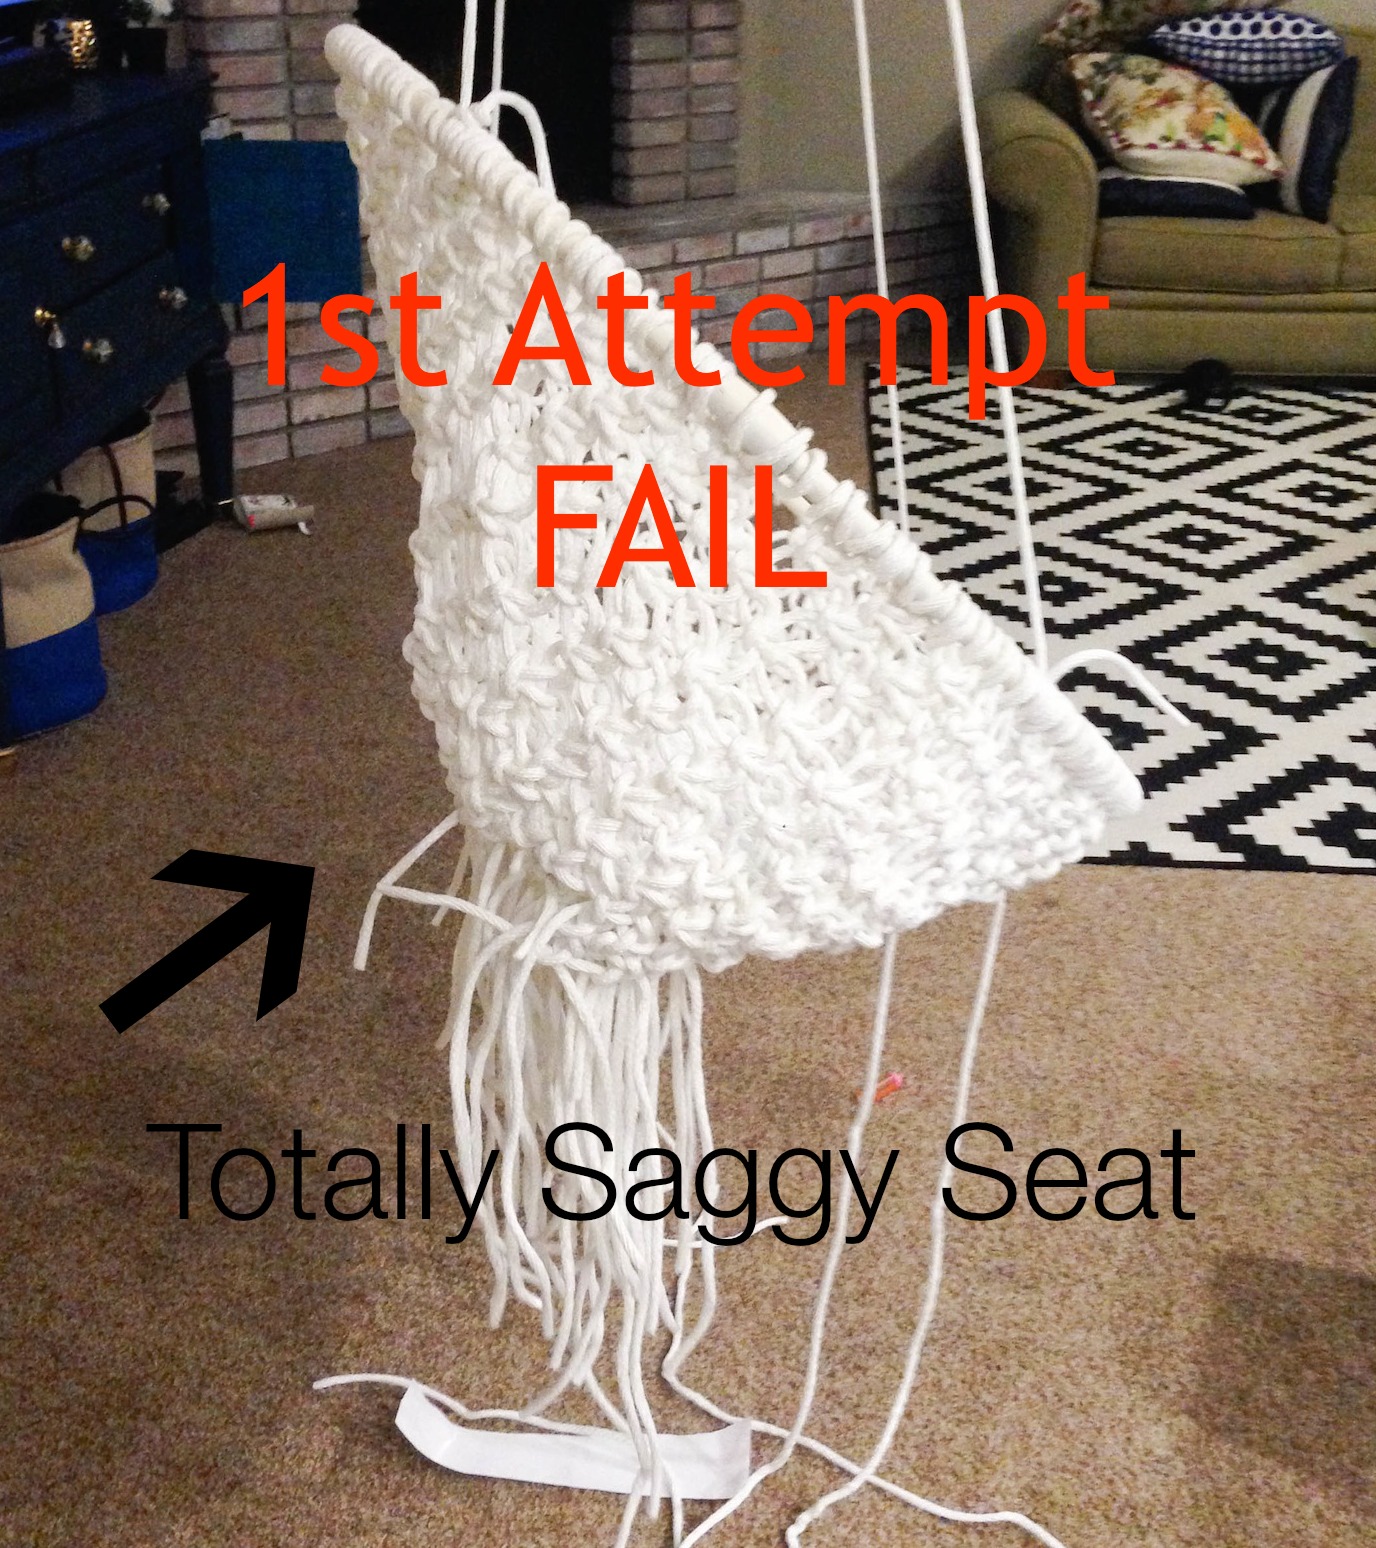
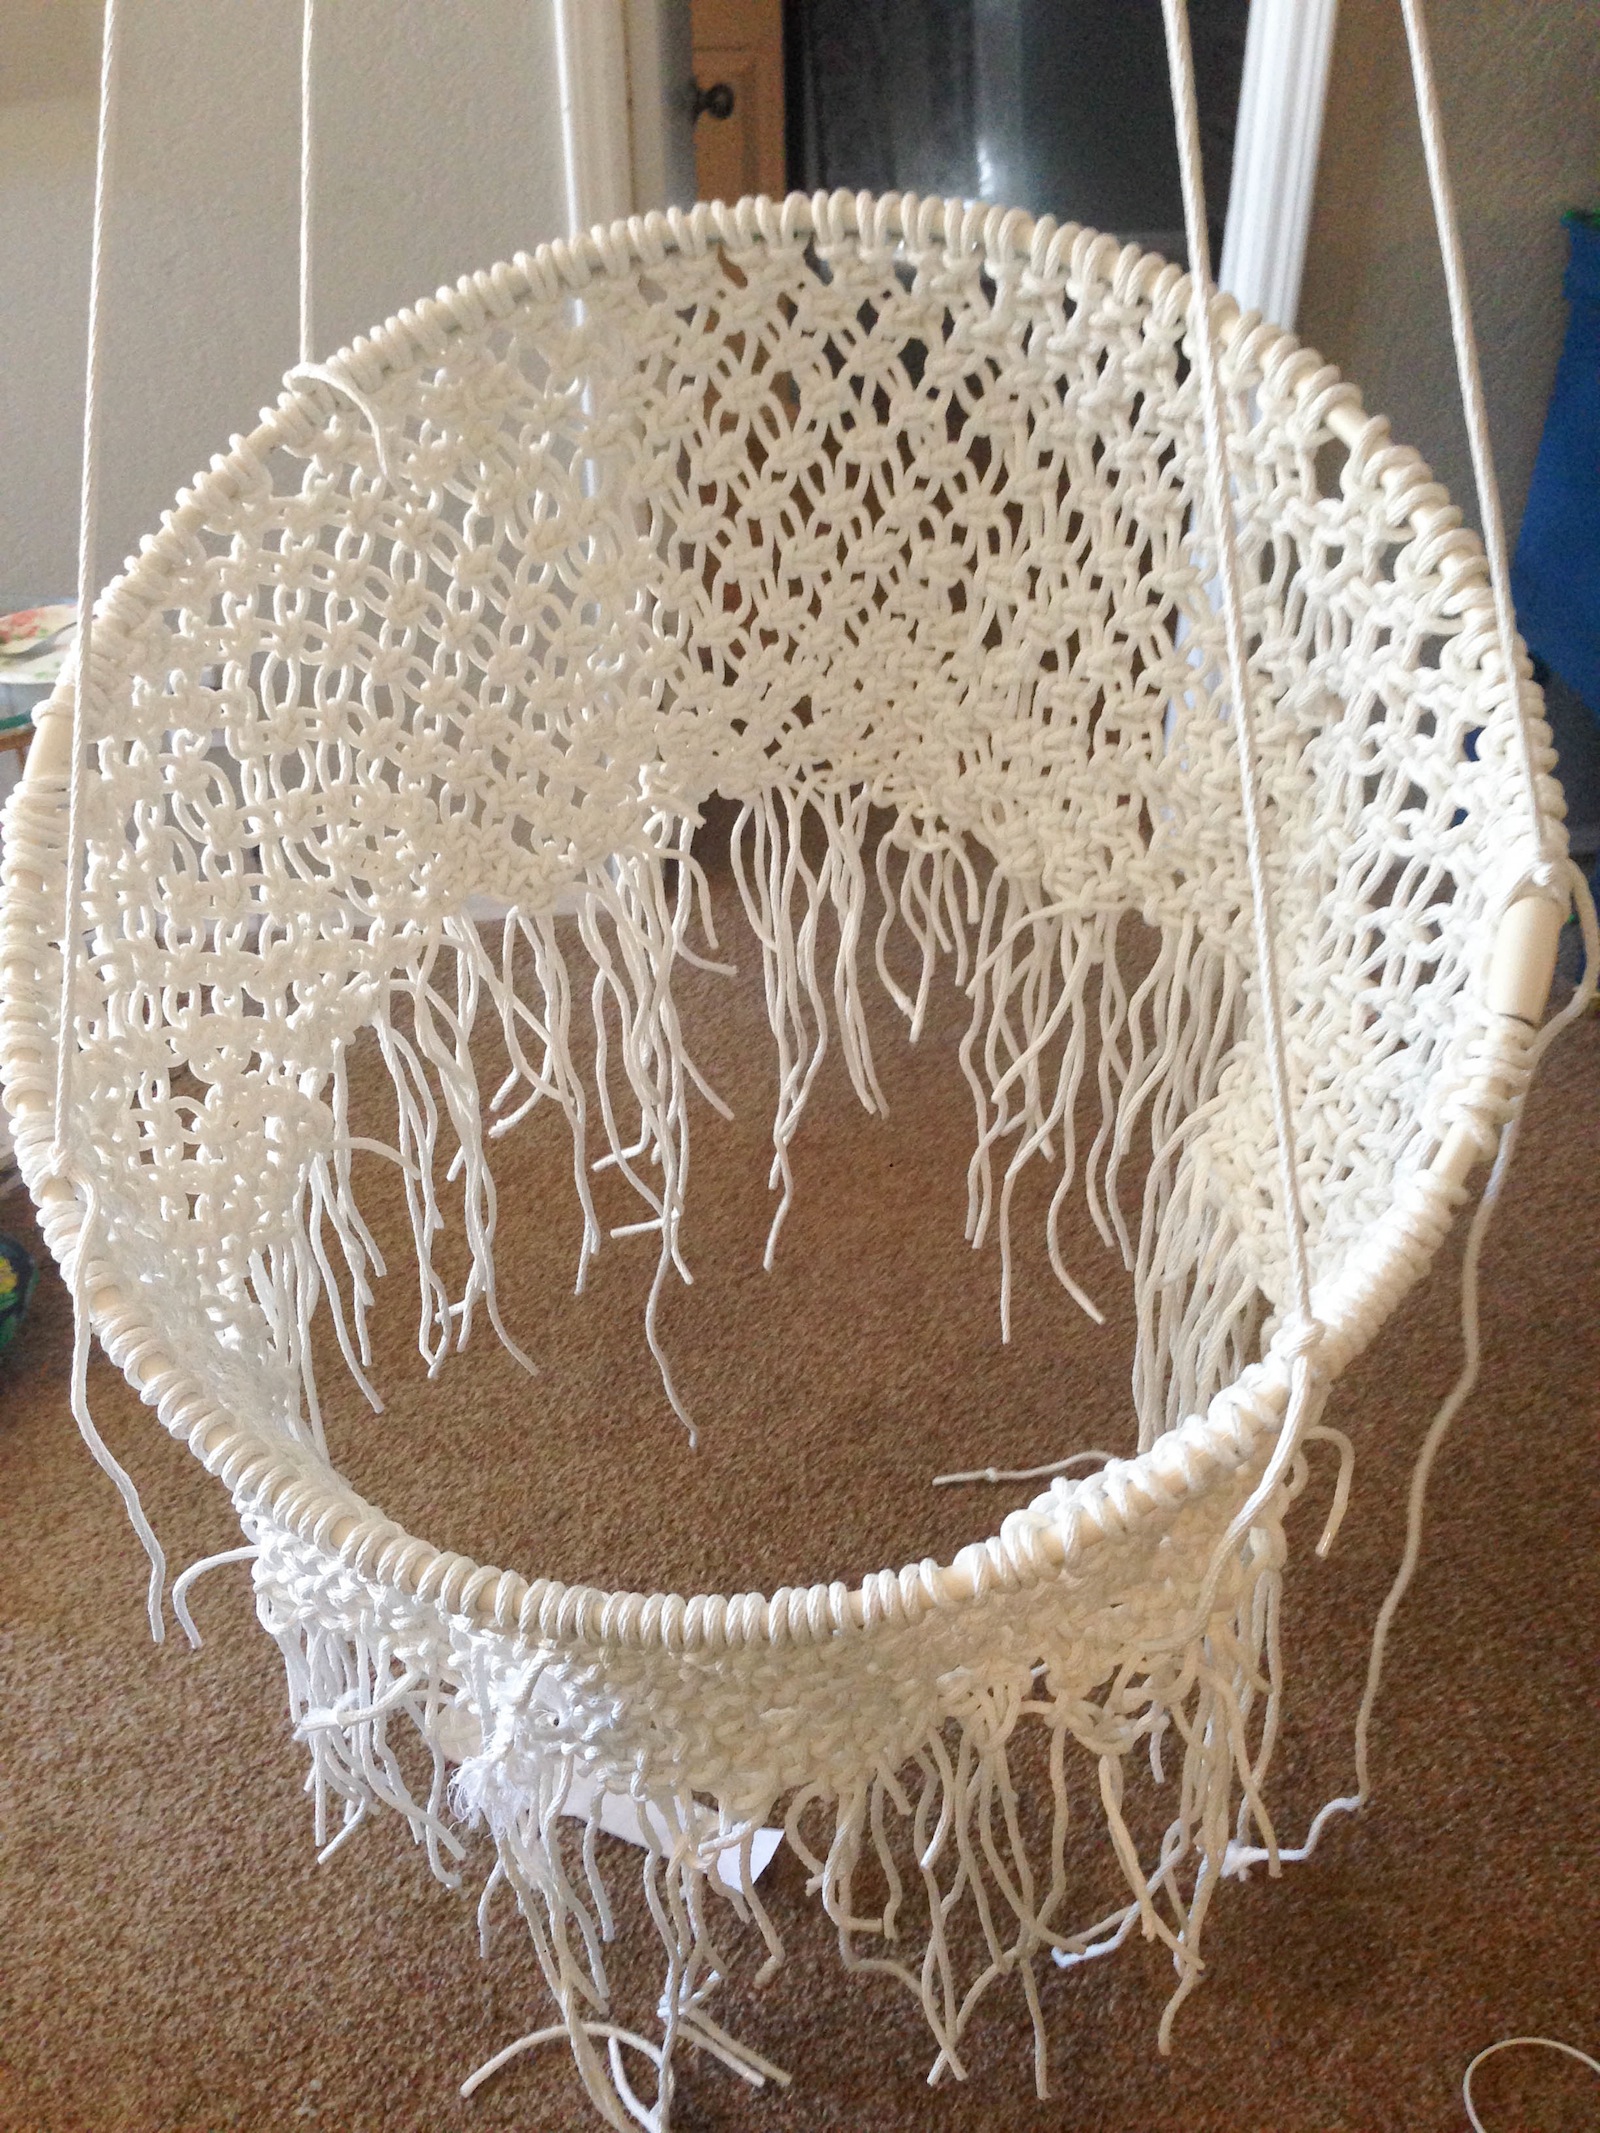
So I had to take that apart and I was left with the picture above.
After thinking about it for a while I figured out I needed a second hoop but I also needed it to be a bit lighter.So I used a smaller Hula Hoop and after I sprayed that white I placed it where the seat would go and to make sure it would fit.

After I made sure the hoop would fit I then took it out and did the seat as a totally separate piece. In order to do the seat I used a piece of Poster board and I Pinned the a piece of rope on to it. The only reason I did this was because I wanted to be able to make just a straight piece about the size of the seat to be able to then tie it on to the loop. The poster board helped.
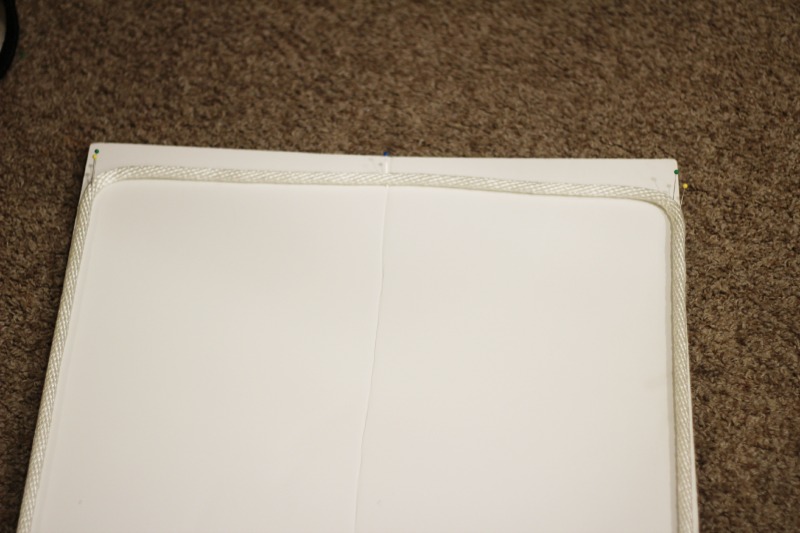
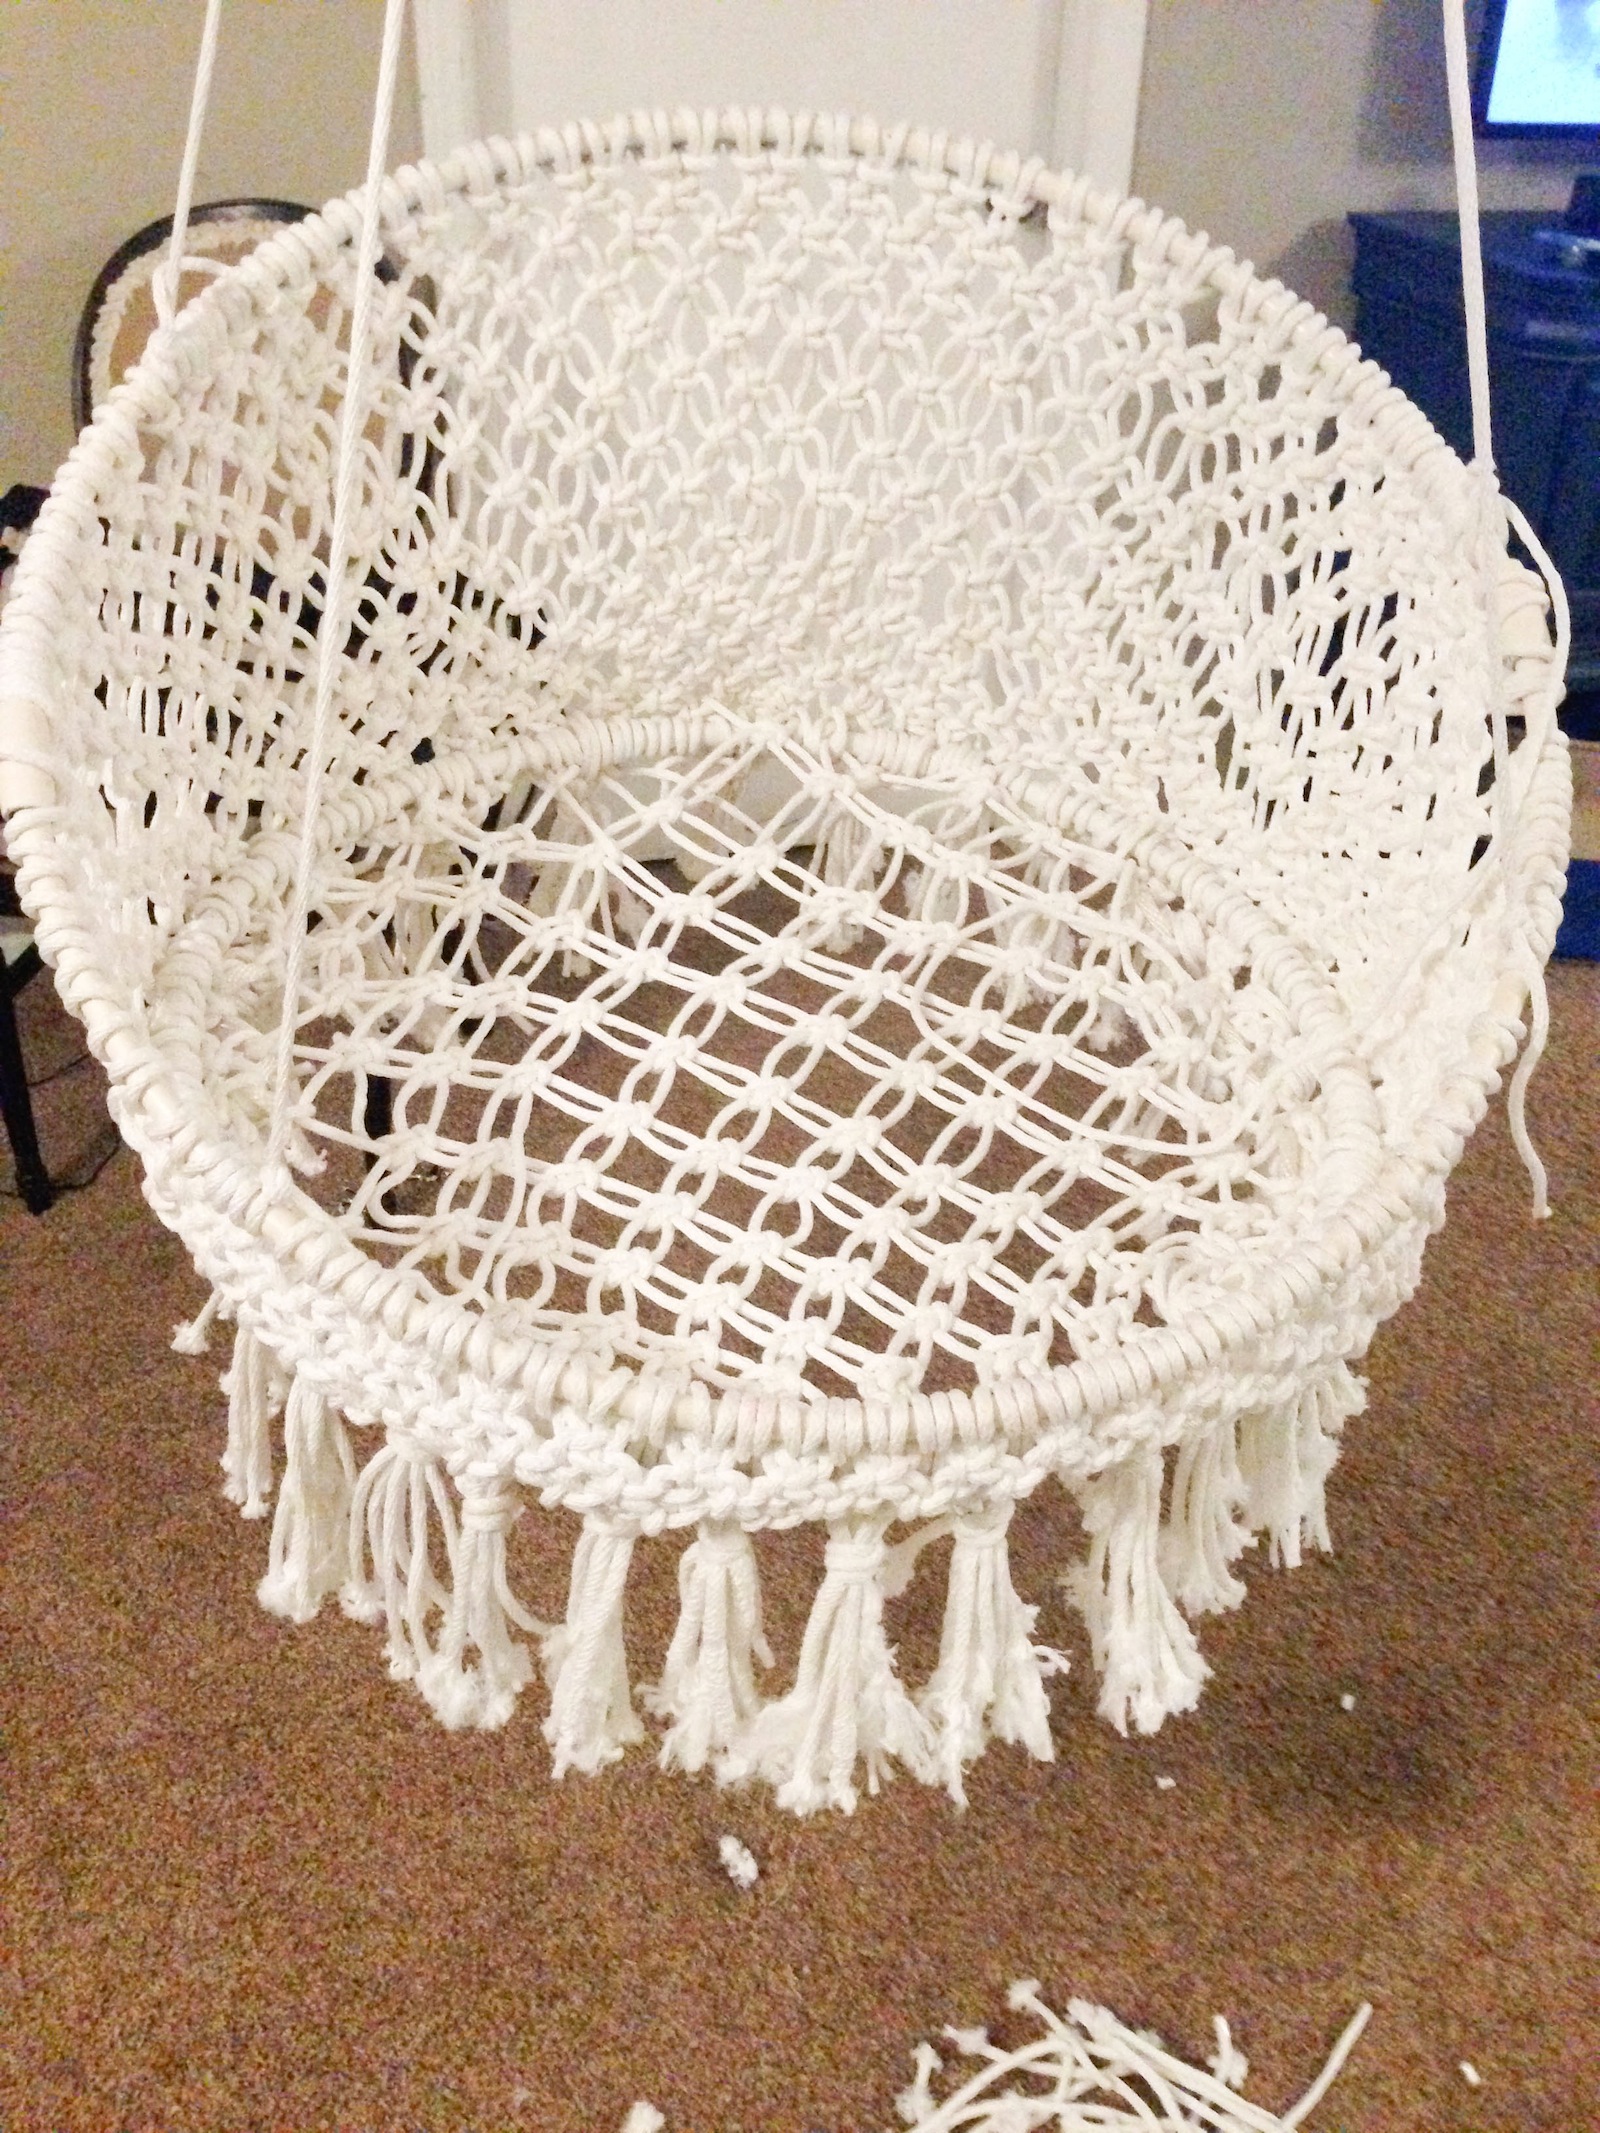
To do the seat I just used this rope on the poster board to help hold the shape I wanted. I still did the Alternating Square Knot. I tied the seat knots a bit more spaced out because I wanted to have a different look on the seat. After I finished the seat I tied of the walls of the chair by doing a basic knot around the small hula hoop then I did another basic knot to tie the seat onto the hula hoop as well.
After the seat and walls were both tied to the hula hoop I then tied the tails from the walls and the tails for the seat together just so I could have a bit more support. The tails needed to be cut. Just like when I cut the rope for the chair I had to tape off every piece before I cut it.
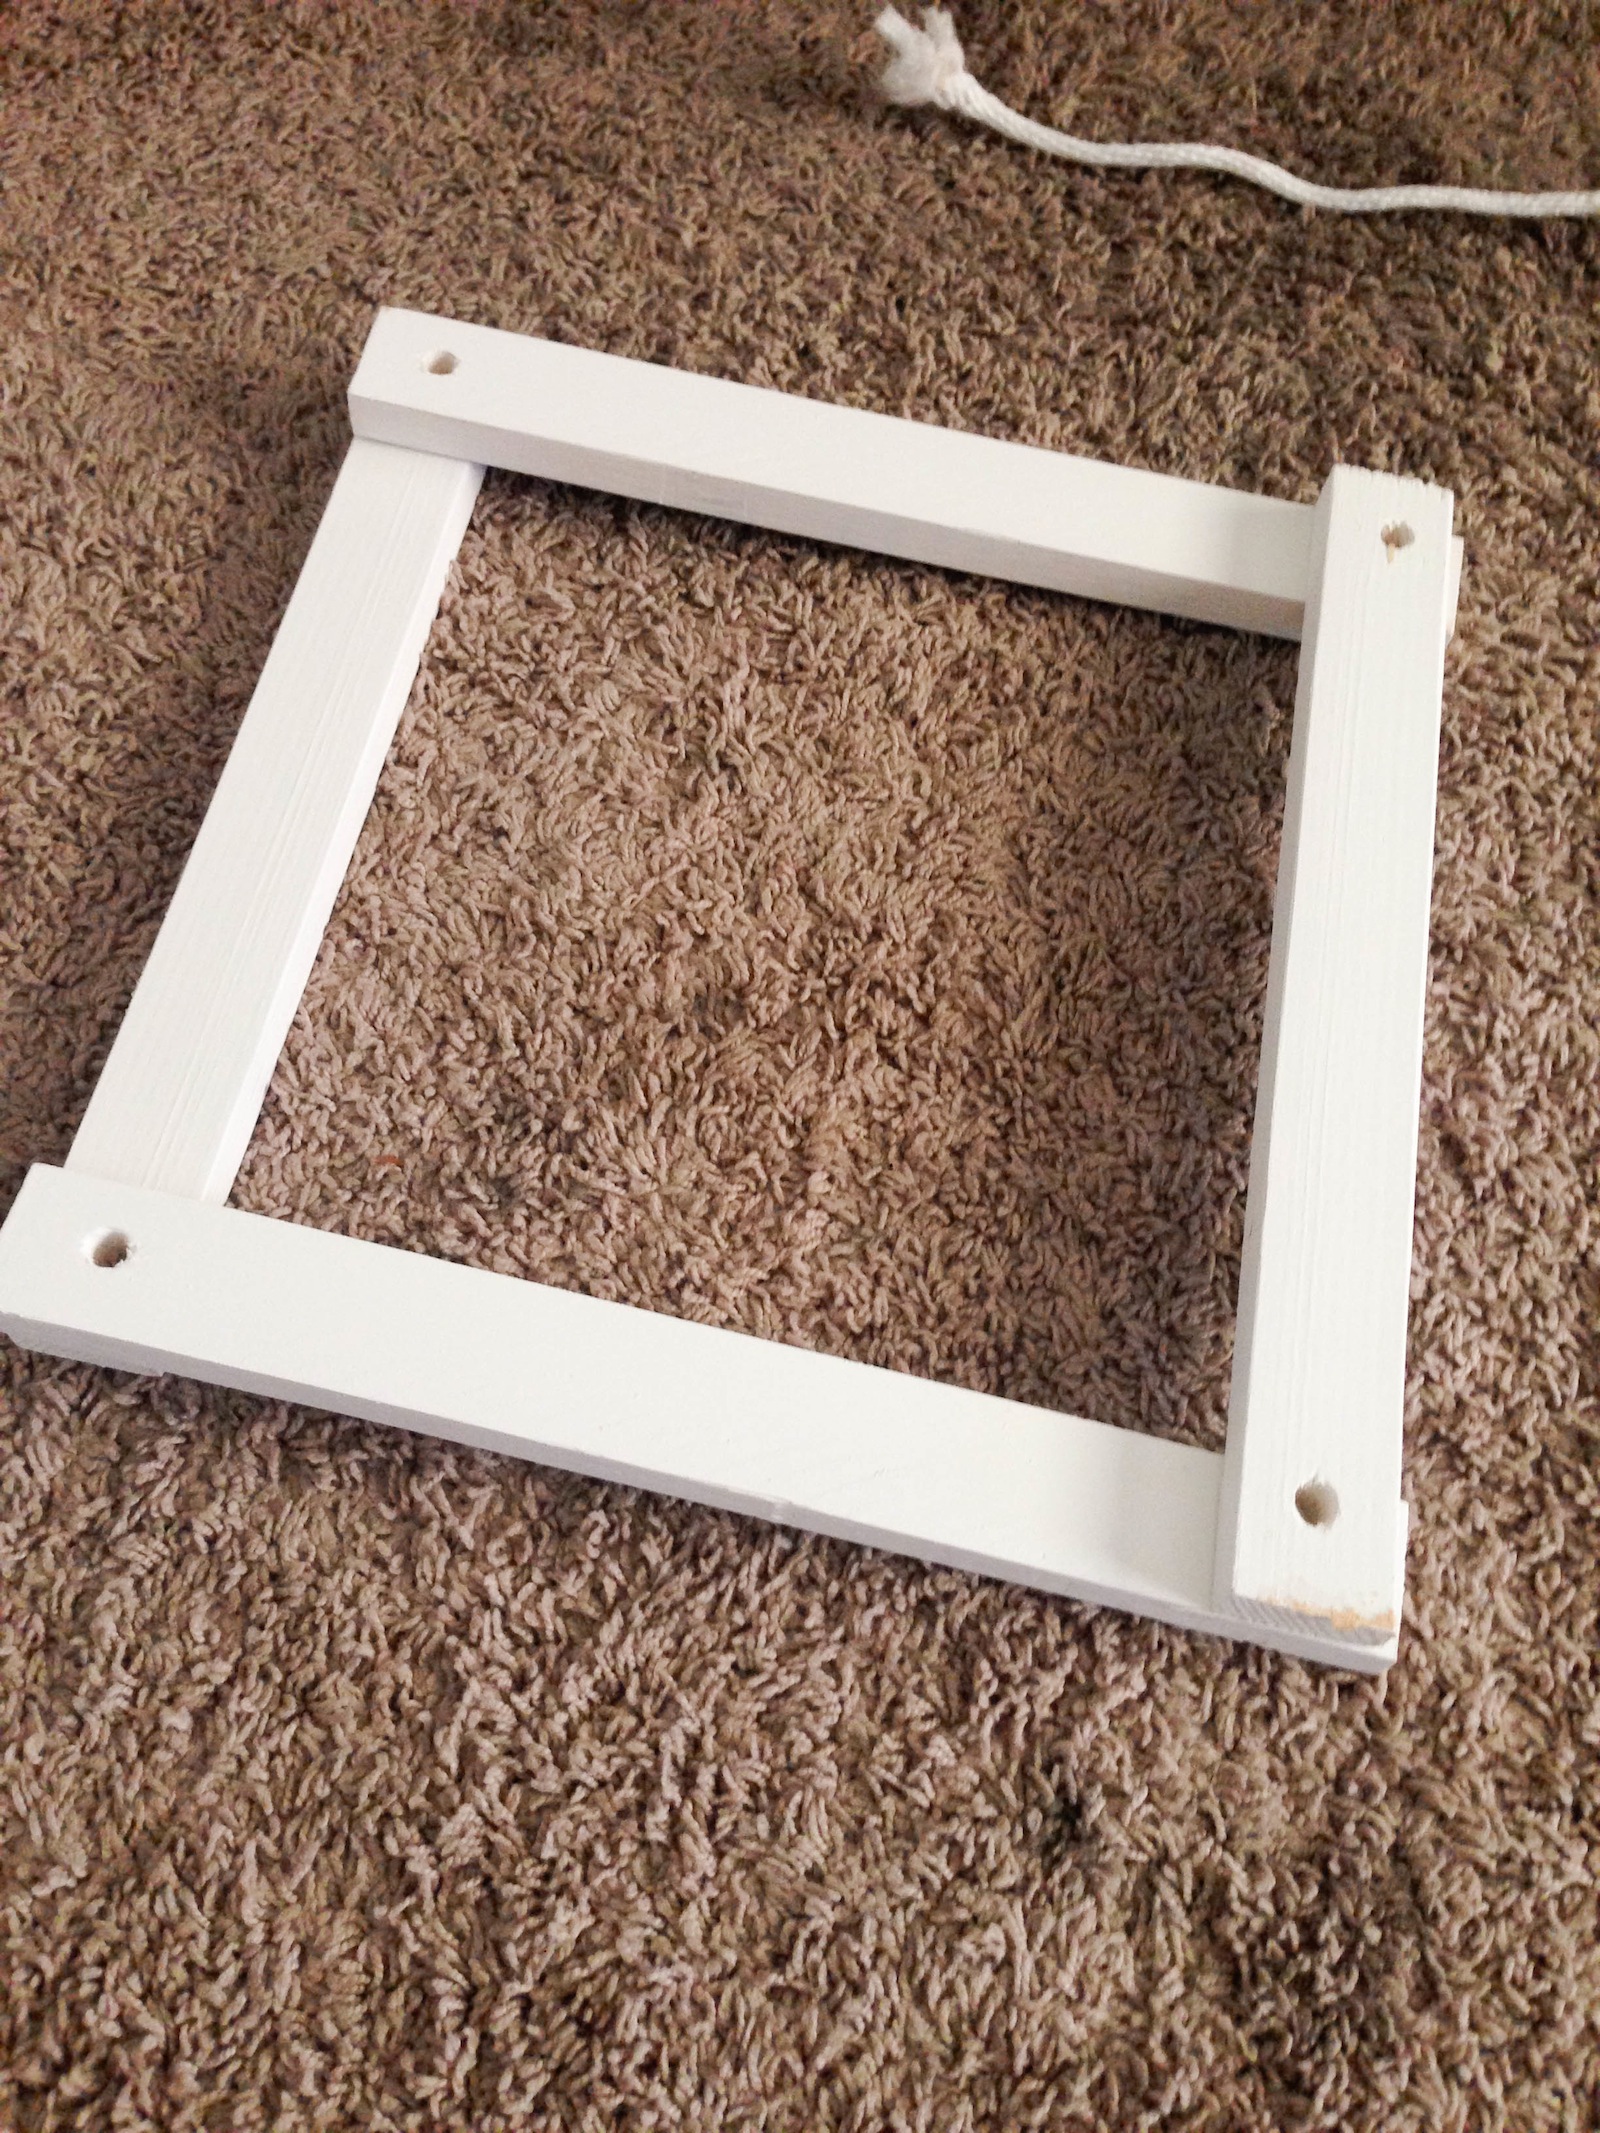
I just did a simple braid for the ropes that hold the chair up and I using a few piece of wood I had around my house I cut 4 pieces of the same length and drilled holes where the rope would go. The hardest part was making it level and tying around the wood evenly.
This chair is a lot of work. But I will say it’s not that hard and it can be enjoyable. It just takes time. Hopefully you will learn from my mistakes. It looks hard but once you start knotting it’s easier then it seems. Before I started this project I watch different videos and I looked at many different tutorial but STOP reading all that stuff and just start knotting! It makes WAY WAY more sense once you start.
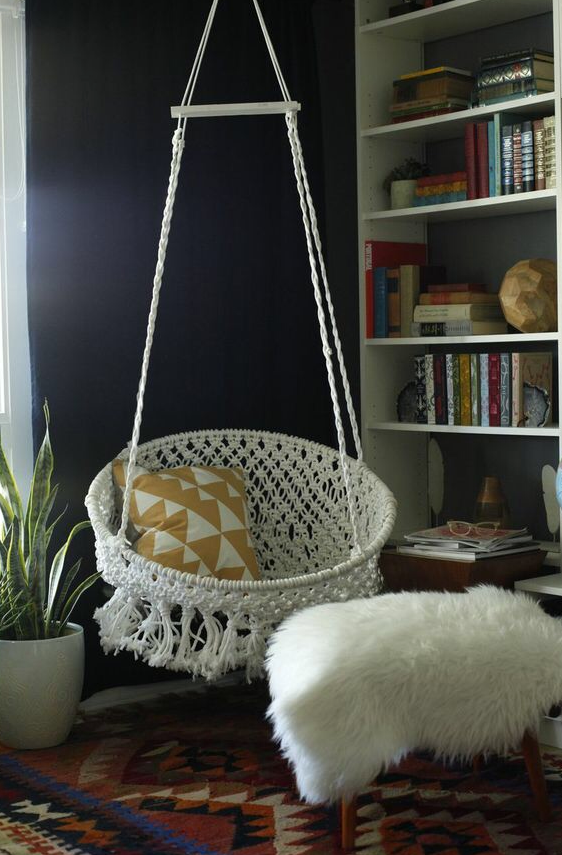
I do want you to know before you commit to this chair is that it took me about 40 something hours but that is with my different trial and errors. Please email me if you have an questions! I had soooo many during this project, don’t be afraid to ask.
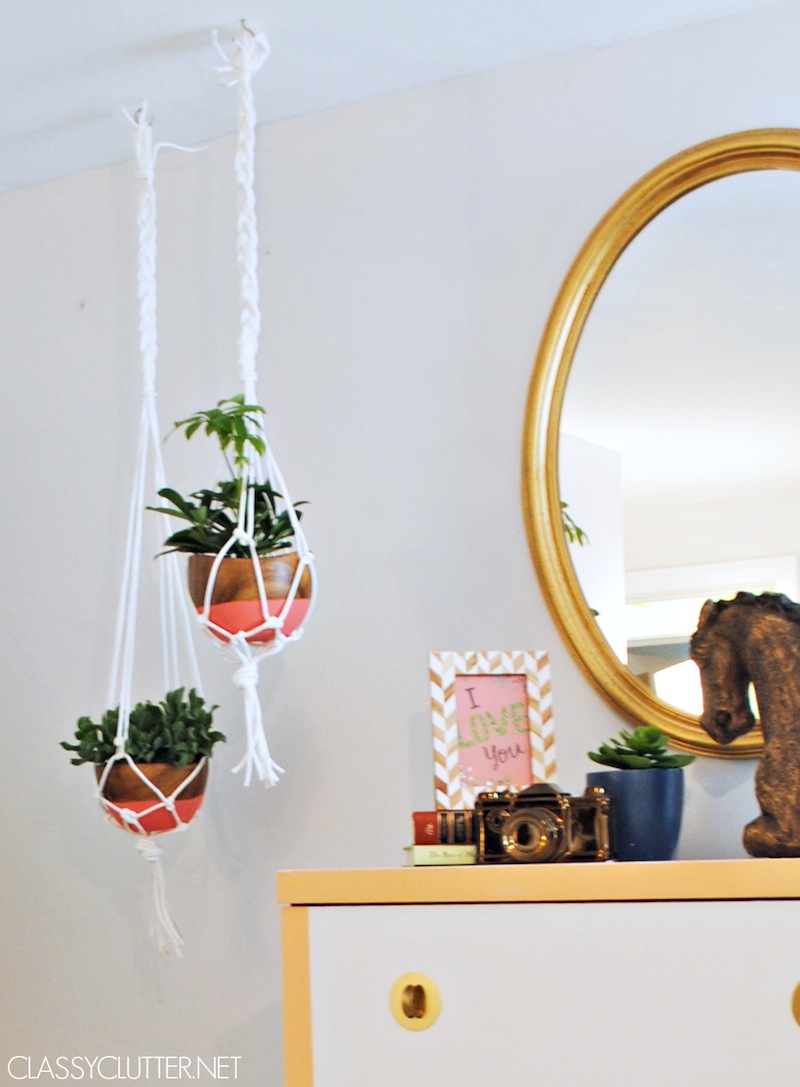
If you love the Macrame look but don’t want to do this chair, check out the cute planters that Mallory made while we worked on the last and final round of Creating with the Stars.


Shut up!!! That is so AWESOME!!!!i have been looking for one for my daughters room but they are so pricey! I will def give this a try:) thank you for the direction although I have a feeling I will be emailing you with questions.
Stopping by from baycreekboutiquehomedecor.wordpress .com
Does it feel stable when you sit in it? It looks awesome by the way.
This is amazing! What a FUN chair! I don’t think I have the patience for such a long project–but I might just have to try 🙂
Wove!!! You have amazing patience. absolutely love it. Awesome work!!
Dudettes! Seriously this chair is amazing. I honestly can’t imagine how hard this project was. You did a fantastic job! It’s gorgeous!
I would love to try this fantastic idea. Thanks for sharing.
The infamous macrame chair! Holy cow! Once again, it looks fabulous…and time consuming. My hat goes off to you Savannah. Consider mind blown!
I lov3 thie idea I am going to try it out if I can still find the rings
How much did all the the supplies cost you?
200 million dollars
You are totally rad / crazy / amazing Savannah! You killed it and the chair is amazing!!
Great chair. With such a chair, a book I can read for hours 🙂
Are you kidding me?? I never, ever would have thought to DIY one of these chairs! It came out AWESOME!! Amazing job!
Thank you!
Thank you for posting this. It motivates me. I have been dreaming of it. I just need to stop dreaming and make it happen. Your chair is amazing.
Super cool!
I want one (:
I love the chair, I too have been wanting to make something like this. Honestly, I don’t even know how to do Macramé but you did such a great tutorial and it looks so wonderful that i’m willing to learn now. I appreciate your offer to answer our questions and I do have some. I’ll try and ask them all now so hopefully I wont have to bother you again. (your laughing at me saying yeah right aren’t you? 🙂 First, I’m making (going to attempt anyway like I said I don’t even know how to Macrame yet) this for a tiny preteen girl. If I can find smaller hoops do you think I should go smaller or is it more comfy big? Also, how comfy is the chair? My daughter loves to read, would you think she could comfortably sit there an hour or so? I guess what i’m trying to ask is how stable is it? Does it tend to “sag” the longer you sit in it? Or if say, a heavier mom size person wanted to relax in it while she was at school, would I umm… I mean that mom stretch or ruin it? Is there anything that you would do or use (material) differently such as make the walls shorter to allow for stretching or use thicker rope or even a different material to macrame it? Lastly, would you be willing to share a picture of someone or even better two someones sitting in the chair? Preferably a small person and a mom size person? You know just in case a mom size person was to see that gorgeous chair calling to them from her bay window and decide to break in my house with a book and a cup of coffee and sit in my daughters hanging chair while she was at school and I of course wasn’t home. 😉 Darn, that wasn’t the last one, OK Lastly, If you have any other Ideas, comments, wish you would have’s etc… I would love to here them. About the chair that is. HaHa 🙂 Wow, I’m playful today. Thanks so much!!!
I love this chair but I doubt that I could ever do this alone.
Can you make me one! Lol I don’t have the patience for this lol!
WOW! this is amazing! looks harder than what I can accomplish! Ever think about selling these, I would be on the waiting list! it looks so comfy!! I NEED ONE!
I LOVE THIS!!! I’ve made very small versions of this for plants/fruit basket but a chair would be utterly divine.
You can also do the rope work in the way you would do a dream catcher, it works fantastically and switching colors of rope is pretty too. (You can dye the rope if you can’t find a color you like or make it completely then do a ombré deep dye. 😉 ). Another way is to do a decrease in your rope work, like in crochet. It is a great method of getting it smaller as you work toward the seat bottom.
Off to find the supplies to make my son a new reading knook chair. I may add one to our living room for myself a crochet corner. 😉
Im curious what you used to hang it from the ceiling. That kind of dead weight is certainly more than a planter or a TV
Wowwwww!!! That’s awesome 🙂 Your patience and the spirit to not give it up are commendable. Great Job!!! It looks lovely 🙂
Roopini
Let’s Make It Lovely
Shut the front door! This chair is one of the most amazing things I have seen on the Internet lately. I know I could never make it myself, but I have a hanging chair from Pier I and it is so comfortable. More than you would ever thonk just to look at it. Incredible job on the macrame chair.
Where did you find the hula hoop? I’ve looked all over and the smallest one I could find was 34″ and I feel like it’ll be too big for the chair frame I have.
i have been looking for a chair for my room and i am in love with this one is there any way u could make a vedio on ow to make it or could u email me and maybe u could make me one u dont know how much i would lovvvvvvvvveeeeeeee that email me @ achiforme@aol.com plz i would pay u to make it if it will be cheep
Appreciate your effort, Totally love it!
Hi ladies! I’ve featured this post in my Friday Favorites for this week, Enjoy! http://therusticwillow.com/fridays-favorites-links-love-13015/
hi. Could you please tell me how big those hoops are, in cm ? 🙂
Hi there,
My name is Chloe Allen, i am a year 12 student living in Perth, Australia. I am trying to create a chair using the steps you have posted here and am wondering if you can help me to understand when to attach the second hoop. I would like to know if you braided the rope evenly the whole way round before adding the small hoop, or did you leave one side longer than the other to give the chair a tilt?
Thank you kindly for your time and i look forward to hearing from you.,
Chloe
Hey there ladies! I absolutey adore this chair. I was wondering how you attached it to the ceailing and if that would be possible in a rental apartment. I’ve thought of trying to create some sort of stand but I really like the idea of it hanging. Thanks!
is the chair comfortable to sit it?? I wouldn’t want to go to all this trouble and then find out it is not really very comfortable. 🙁
Thank you.
I would love to try this but Is it sturdy? Or does it start to sag?
What’s The weight limit on this chair?
I love it, appreciate your effort!
Do you have a pattern for the seat bottom? I have a small rectangular outdoor metal frame foot stool that I want to paint turquoise and bought white marine grade thin rope to do a cute macrame top on. I really like the pattern you created for the seat.
Nancy
This is absolutely gorgeous. Do you have a step by step guide you could email???
What if you don’t have that chair frame, what would you recommend to use instead?
Approximately how long did you make the walls? And what is the diameter of the hoops that you used? I really want to make one i just need all the measurments. Thanks!
Hey if u made me one of these how much would you charge or could u do it for free?
Oh man! Unfortunately we’re not making anymore and we do not offer them for sale. Thank you for stopping by!
Hello,
I love the swing chair. you have done an amazing job. I wanted to ask you about the rings you used. What are their measurements? I would love to give it a try.
Thank you in advance..
We now have links on where to purchase the items we used to create the Project! If you have any further questions you can email us at classyclutter4@gmail.com!!
Hey
First of all, woww !!!! It looks so amazing! I might give it a try though I’m not sure if I have the time and capabilities do so. I know that this is unusual and the whole idea of posting this is so that people can make this diy themselves but I thought I could always ask. Is it possible if you’d make another chair and I’d buy it form you though I don’t want to spend to much so I don’t even know for how much you’d like to do that… Well anyway if maybe you’d like to do that send me a message. Thank you!
And keep up the lovely work you’re creating
Hi, I am sorry at this time I won’t be making anymore. I am so glad you love it though.
What’s the weight limit on the chair? Also do the braids and woods support it well or do you recommend using a chain or something?
I do recommend using a chain for safety if it will be in used a lot! I do not know the exact weight limit for the chair it self though! Thanks for stopping by! xoxo
if you don,t no how to macrame just get some elastic strips from a crafts store and get the thickest thread you have and sew them on to the hoop 😀
That chair looks great in your house. I think it would also look neat outside, hanging from a tree. It would be a great thing to sit in while reading a book in the fresh air.
The chair looks amazing! I’ve always liked the idea of hanging chairs. However, I don’t think I’d be willing or able to put 40 hours into making one. The fact that yours turned out so beautifully is amazing to me! I don’t know how you do it. I do really want a hanging chair of my own now, though. Thanks for sharing!
This DIY hanging macrame chair is truly nice creation. I just like the white fabrics you’ve used to make the chair. I’m sure making this type of chair is very difficult, so hats off to you for great work.
https://www.missionhammocks.com/
what did you use the poster board for?
I love this so much and want to make it for my room, but I have a few questions. What is your email?
i can’t find the saucer chair like the one u used. i’m thinking to use double hula hoop. is that gonna work u think?
Awesome chair xD, really good job!
Can anyone tell me more about the seat area do I do it separate and it looks like it’s square on the the poster board se used to pin it to. Then it looks circle I wish there were more pics of the bottom seat part and how to assemble it.
Nice Article Thanks for Sharing!!!!!!
The hanging chair is beautiful! Are you making them to sell? If not, can you direct me where I could buy one? Thanks so much!
Unfortunately I am not making them to sell.. I have provided the tutorial but do not still make them! Thanks for stopping by xox
We all know about trial and error but your end result is MAGNIFICENT. That chair is beautiful. You obviously have a lot of patience. You forged ahead until done. You should be proud. I love the end result.
Hi,
What is the seat attached to the ceiling with?
Are your ceilings concrete?
Thx, Nicole
Hi! You can screw it on to a Bolt with a loop or hook at the end. You need to make sure it is in a ceiling joist because dry wall will not hold. Thanks!
I can’t seem to get the tutorial to load? I’ve tried clicking on the link to the tutorial from different sources and all I get is the finished picture of the hanging chair (which is beautiful by the way). Is the page broken or does it need updating?
Perhaps it’s a problem on my end and I’ll try again later. I’d love to use this tutorial this summer and hope I can find it!
hello!
i’m in love with your macrame chair, and was wondering if i could have a little bit more informative about it? i don’t have the exact same chair “shell” or hula hoop that you used for your chair, but i would assume that what i have currently (which is a little bit larger) would work. also i did some calculations and based off of the rope that you used, this chair costs around 200$… do you have any ideas about how to make it any cheaper? (i’m already repurposing my hoops but rope is expensive, man). also, did you make the back of the chair any larger than the front? it looks angled, but that might just be the angle of the photos…
again, this is such a cute chair!!!
clara 🙂
Hi,
I was wondering what kind of saucer chair do you recommend that allows you to detach the legs? The one you bought isn’t sold at target anymore. ):
Also how much in total did you spend on this project?
Hi. I can’t find that chair. Can I use something else? Help me out please.
Hi,
Am making this chair for a school project and I have been looking for large metal hoops to replace the hula hoop so that it is stronger but there isn’t really anything anywhere. I was just wondering if when your using the chair, the hula hoop is supportive and doesn’t bend, twist or seems it might snap.
Thanks,
Alysha
Im so happy to have found this tutorial. I don’t want to buy a chair at target and my husband swears he can make the big hoop….But…am I just missing it? what are the dimensions of the largest circle?
Looooooovvvvvveeeeeddddd this !!!! You know I want to gift this thing to someone as it would also help me learn.. I’ve recently started admiring macrame work and I am really looking forward to making some amazing stuff… Please please help me ! If I could get some detailed video tutorial or something for this one.. it would be of great help…
HI, I loved the chair but is there enough strength in the plastic hoop to not break when an adult sits on it
Do you have a video on this! I really want to give this a try but am not sure how to do. No offense but some of your directions confused me a bit.
I’m in the middle of making this. I see a lot of comments on where to find the ring. If u have or know someone that has a small trampoline. The one that u use for yourself to exercise. That is what I am using and very sturdy.
Heyy, I’m here with the material and I dont know how you finish the knots on the second ring? How to make it perfect?