
Gift Idea: Happy Birthday Sign!
We participated in Crazy Christmas Crafters
This week, we were featured by kicking off the “Gift Ideas” with a Happy Birthday Board! This is a GREAT gift because it can be used year-round to remind us of upcoming birthdays! No one likes sending out “Belated Birthday” cards anyway right?! This is a super cute way to remind yourself of the birthdays for friends and family members! Heck, you could add Holidays and Anniversaries too!

1. Gathered materials:
For the board you will need: a board, knob or hook, knock-off texture spray, paint and vinyl and vinyl machine (optional)
For the tags you will need: ribbon, cardstock and a way to write on the names and dates. We used vinyl but you could write it on or use scrapbook stickers or whatever! The possibilities are endless!

2. We used knock-off spray texture to cover the board, let dry completely.


4. Spray the board with your base color. We used Krylon white. Let dry completely.
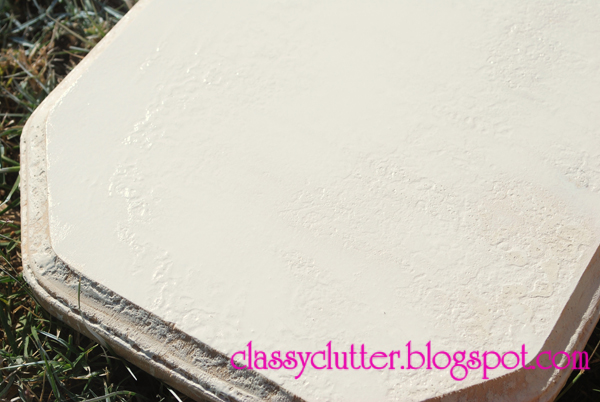
(See the texture it leaves on the board. It looks great painted! L.O.V.E!)

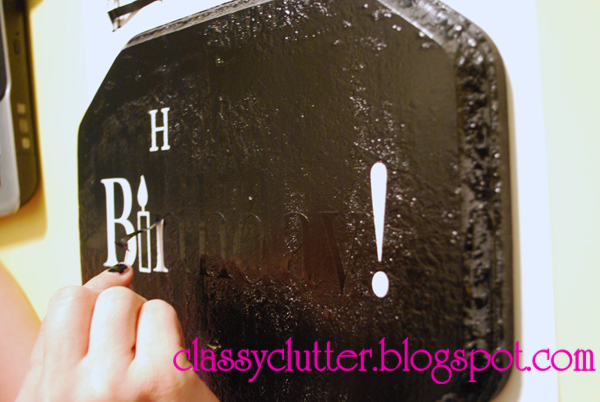
5. While the paint is drying, use your Silhouette, Cricut or create a stencil by hand. We used the Silhouette and vinyl to create the text “Happy Birthday!” Don’t you LOVE the birthday candle for the “I”?
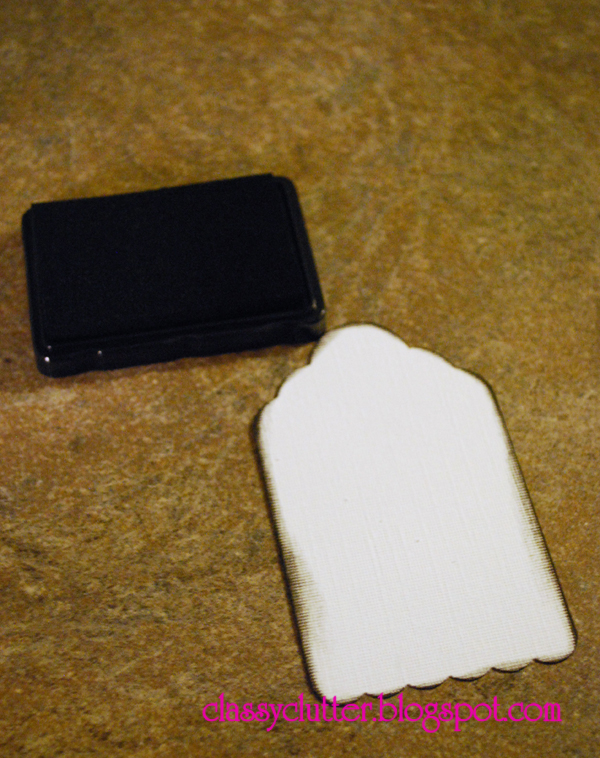
We cut these tags out with the Silhouette and added some ink to the edges for a distressed look!

6. Apply your stencil to the board and use your top color of spray paint to cover the entire board. We used Rustoleum Black spray paint. Again, let dry completely.


10. Then you’re done! You have a fabulous gift to give for Christmas! We plan on giving this one to Savannah’s mom!
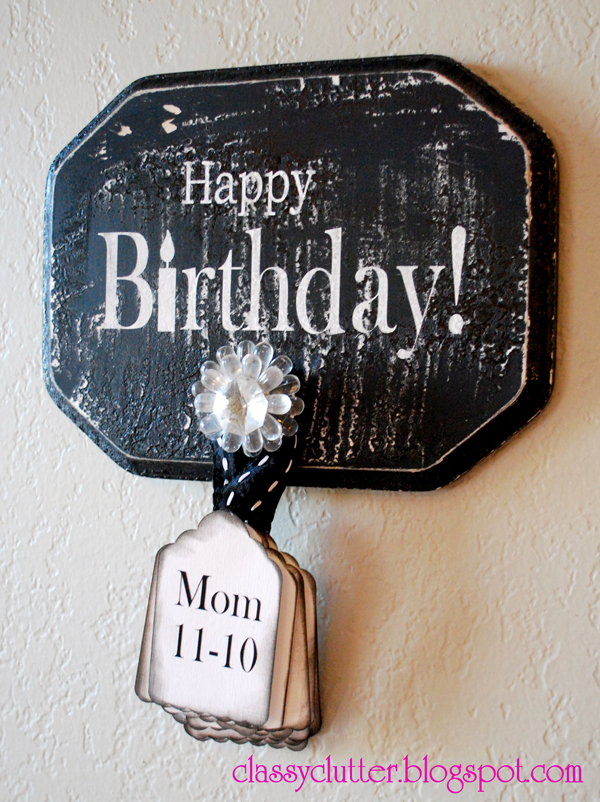
The VERY BEST part of this project is that between the two of us, we had EVERYTHING we needed for this project on hand!! Total cost: $0! That makes the hubs veeeery happy!
Jamielyn, thanks so much for inviting us to participate on Crazy Christmas Crafters! Thanks for stopping by and don’t forget to enter our Giveaway! We’d love to have you!


How clever is that! And it is so cute to!
Wow! This is a great idea!!! I’m a follower now 🙂 Can’t wait to browse more of your projects!
LOVE YOUR BLOG YOU HAVE SOME VERY UNIQUE IDEAS
Really well done for the blog.these are so sweet and pretty!
Birthday Gift Ideas
I love this, it’s so cute! Great Christmas gift idea. Did you make the silhouette yourself? I looked at Hobby Lobby & could not find one. Any suggestions?? Maybe stickers that spell “Happy Birthday” but then the paint might peel off as the stickers come off?
Where did you get a board like that?? geetaraub@yahoo.com
i LOVE this. saw this on pinterest today, and it took me awhile, but i finally found the original! don’t suppose you’d be selling these?!
I just love the plaque! such a good idea!!
Great job. I love it! Please consider sharing this with my readers over at http://sassafrassalvation.blogspot.com/2012/02/sasss-sunday-salvation-show-10.html
Hugs, Kathy
Birthday Gift Ideas
i LOVE this,so cute!Love your post you have some unique idea.thanks sharing….
By giving gift we expressed our way of love to our dear and near ones.It is the symbol of our affection because mostly we will give what our loved ones like.