
DIY Capiz Shell Chandelier {Fave projects repost}
This is one of my favorite projects I have done in my home so far and for our birthday celebration, I thought I’d share it again for those that may have missed it last year! Hope you enjoy my tutorial on how I made this Capiz Shell Chandelier for under ten bucks!!!
I got this wild idea that I could make my very own chandelier for my Master Bedroom after seeing some pretty amazing ones here and here. Not to mention, save myself about $100-200!

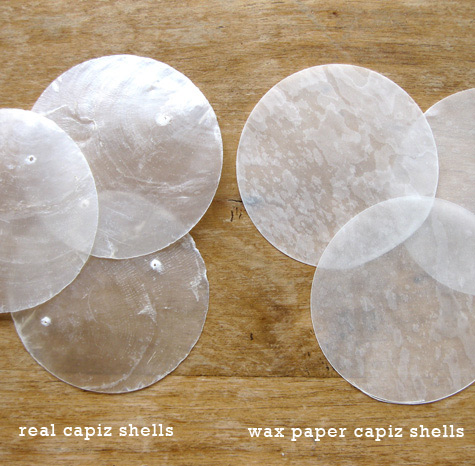
When I saw how close the real capiz shells look compared to the wax paper shells, I knew this would be the perfect touch to my bedroom! I almost like the look of the wax better! AND the wax paper shells aren’t fragile and noisy when hanging!
Here’s how it all went down…
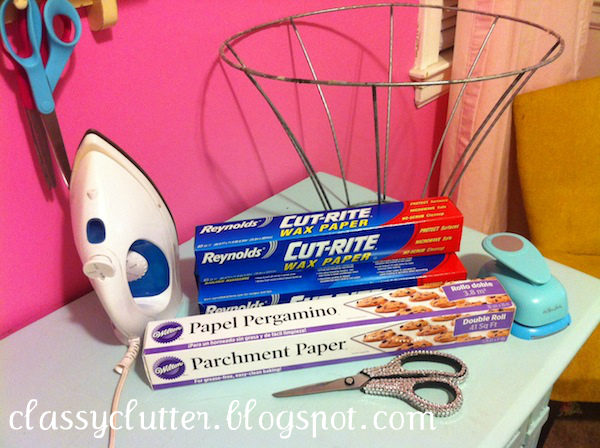
You’ll need:
2-3 rolls of wax paper
about 42″ of parchment paper
scissors
iron
hot glue gun/glue
2-2.5″ circle punch
old lamp shade
optional:
sewing machine
spray paint
First, remove the old fabric from your used lampshade (get one from a thrift store for a couple bucks! – you can find super ugly ones for super cheap that will work perfectly.) Spray paint the frame of your old lampshade if you want. I sprayed mine white.

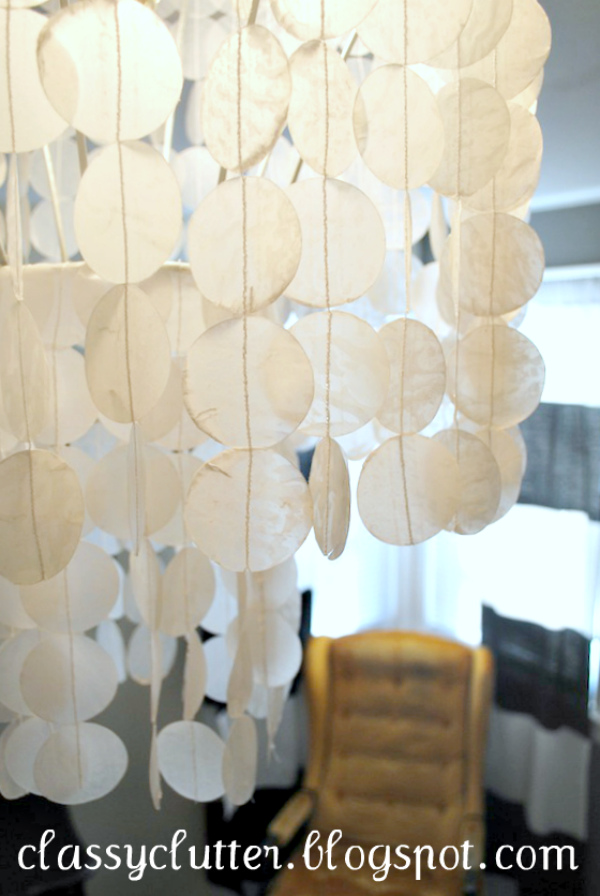
1. Make a parchment paper and wax paper sandwich. Parchment paper is your bread and 3 sheets of wax paper is your PB and J. I used ~18″ sheets of wax paper and 20″ sheets of parchment paper.
2. Lay your paper sandwich on a flat surface
3. Iron on low setting – this melts the 3 sheets of wax paper together to make one fatty piece of wax paper.
4. Remove your parchment paper and repeat, repeat, repeat. You will need lots! I probably did like 8-10 18″ sheets.

Next, I cut my wax paper into 2.5(ish) strips. Mine is a 2″ punch from Hobby Lobby. I got it while it was on sale for 50% off. I think it ended up being like $3-4 after the discount.
BIG GIANT TIP!!!! When punching your circles out, do FOUR strips at a time. if you do less.. your punch will do this to your wax paper.

Total nightmare. Seriously.
I then separated my circles into a muffin pan. I used 8 circles per strand for the top tier and 6 circles per strand for my bottom tier.
Then, sew (or hot glue) your circles into strands. I loved the look of the stitching down the center of the circles as a sewed them so I just ran mine through my sewing machine. I put my tension at 4 to sew through the paper. It worked perfectly! I used the video on Freshly Picked to show me how to sew them together.
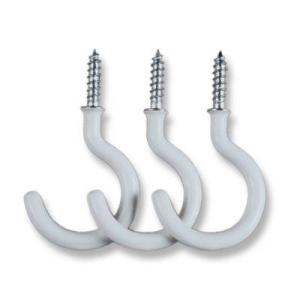
Finally, hot glue your strands to your lampshade and hang it up! I hung mine right over the existing fixture using these hooks available at Home Depot. I already had some on hand.
Then stand back and admire! OHHHHH my HECK I love love love it! Even my husband came in our room and saw it and said “Babe! That is AWESOME!” I may or may not have had a big juicy giddy smile on my face! It’s perfect for this room! YAY!
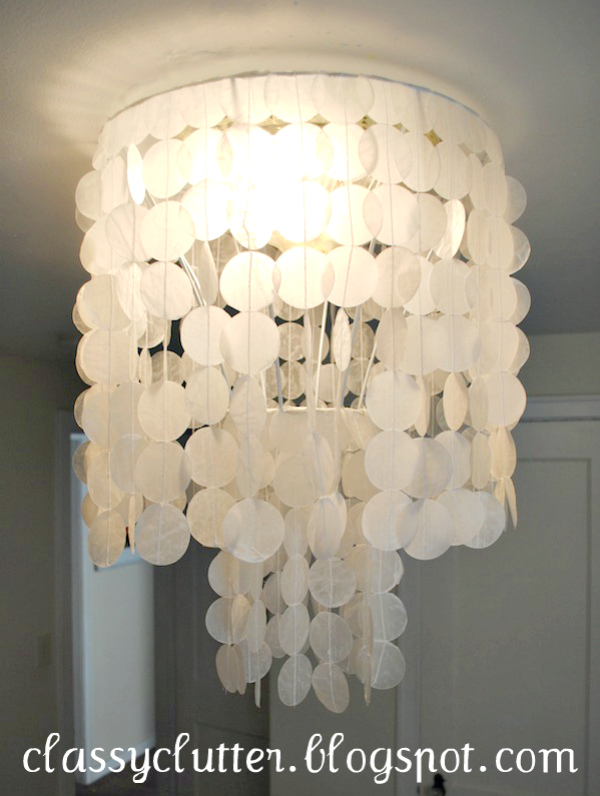
Such an improvement to your typical builder grade light fixtures!
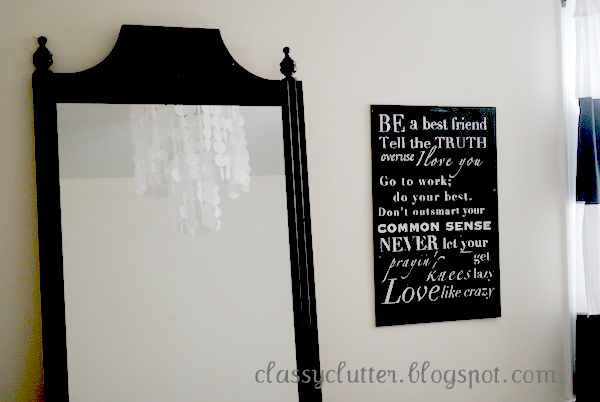
Love like crazy sign tutorial coming soon! 🙂

Like my new mustard yellow wing back chair!? That’s a new find!
Alright my bloggity friends! What do you think!? Like? Love??
I think I need one in every room! lol!

See my full master bedroom post here.

You did an awesome job! It looks so good!!!
huge LOVE!!
Love love love it!
Amazing! Who would have thought waxed paper would work out so well!!
Good morning! I followed your write up in this post to attempt to make my own DIY capiz chandelier. Yours looks beautiful! Thanks for the great tutorial =) I linked to this post in mine so I wanted to give you a heads up!
Brady
http://atightsqueeze.com/2013/05/08/diy-capiz-chandelier/