Striped Accent walls are just SO cute! Today we’re going to show you how to paint stripes on a wall. This striped accent wall tutorial is an easy DIY project that gives you a major impact in any space! Painting Stripes on walls is easy and fun!
How to paint stripes on wall
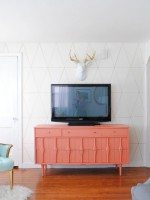
This room was already painted with Glidden Pebble Grey. Grey is a hard color to find the perfect shade but I lucked out here! I LOVE the paint color in my living room!
Striped Accent Wall Project Materials
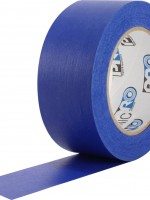
Painter’s Tape
Paint (I used Behr Swiss Coffee for my white and Glidden Pebble Grey for the grey paint colors)
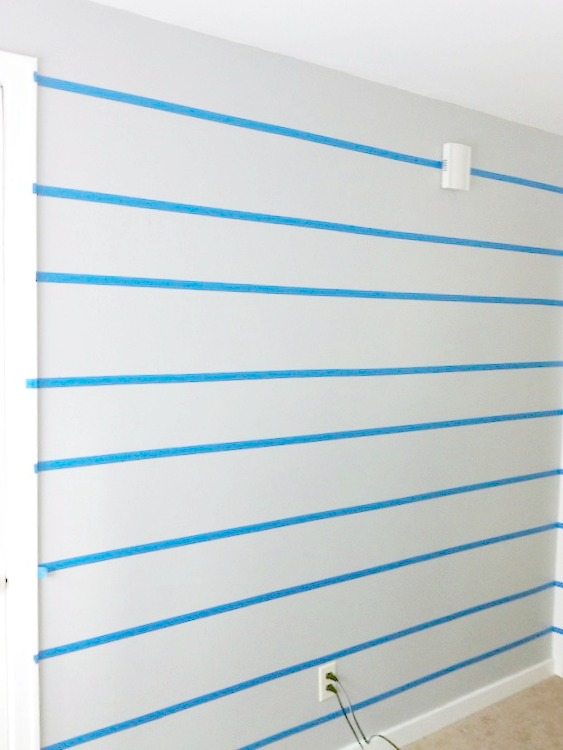
When painting stripes on walls, you’re going to first paint the wall a solid color. I did the entire room grey and wanted to add white stripes on one wall as an accent wall. This is the first step to painting stripes on a wall.
Step 2: Measure
Next, comes measuring! My goodness, this can be difficult but I figured out an amazing system to make this easier! I DID NOT use a laser leveler. I heard that it was a nightmare and honestly, I didn’t even want to try since I know others that didn’t have good luck with it.
This method is only works if you do NOT have a slanted or vaulted ceiling! My ceiling is level to the ground so I was able to use the ceiling and baseboards as a guide. Check with a level before you start.
I started at the top of my wall against the ceiling and measured 9″ down and used a pencil and made a tiny mark at 9″. Then, I scooted down about 6 inches and repeated this step all the way down the wall. I repeated this step all the way across the wall and then started on the next stripe down. I ended up with 5 white stripes and 5 grey stripes.
PRO TIP: Label which color goes where. When you’re staring at the taped wall for a couple hours it can get distracting and you can lose track of which color goes where.
Step 3: Level
Use a level (a level that is 24 inches or longer is best!) and a pencil to lightly draw your horizontal stripes on the wall. Re-measure the spaces between your pencil stripes to be sure they are all even. Measure twice, Paint Once!
Step 4: Tape / Mask Sides
Tape your lines making sure that your tape is on the opposite side of where you will be painting. The width of the stripe is most important so make SURE you’re taping the correct side of the line.
PRO TIP: Use a popsicle stick or credit card to smooth any bubbles out of your tape and seal it to the wall.
Next, I taped off the sides of the wall on the “white” labeled stripes to get a clean look against my other grey wall. If you are doing stripes on multiple or all of your walls this step isn’t necessary!
Step 5: Dry Brush
I used a nearly dry paint brush (a fresh, clean paint brush with very little paint) to LIGHTLY coat the edges of your stripe where the painter’s tape is. I did this and let it dry and then used a Dollar Tree trim roller to roll the rest of the stripe and my lines came out AMAZINGLY straight. It did not bleed ANYWHERE!
Step 6: Roll second coat of paint on the striped accent wall
Not gonna lie, I LOVE IT! I was so proud of myself to do it while my hubby was at school! I ran out of paint and he brought me some more on his way home and helped me with the last little bit of painting! I could tell he was skeptical when I told him I was doing stripes on the wall but he said he really likes it! YAY! Finally, when you’re done painting, you want to peel of the painter’s tape before it is totally dry. I get impatient and peel it off pretty much right away and I was BLOWN AWAY that my lines were perfect! No bleeding at all! It was amazing!
What do you think!? Have you every thought you’d be painting stripes on walls?? When I’ve read other tutorials for how to paint stripes on a wall, I heard that it was difficult to challenging but painting stripes on walls definitely isn’t hard! I couldn’t be happier with my striped accent wall!
If you liked this How to paint stripes on a wall tutorial, check out these other DIY accent walls similar to this striped accent wall:
WHOA! #30!! That’s crazy! Can’t believe we have had 30 link parties on this ole blog!…
39 Comments
Looks awesome Mal! I did pink and white stripes in Navy’s room and love it! We used the green painters tape cuz it sticks better and had no bleeding at all! Just another idea!
These look great! I love the gray and white together as well. I have not tried the horizontal yet but I am sure I will eventually. I however have done the checkers, the vertical stripes and the diamond patter that for some reason I can’t think of the name right now lol. Darn. Anywho they are all a pain in the rump lol. But so worth it in the end. You made it look easy peasy 🙂
Wow this looks great. Everytime I try to paint and use the blue tape for clean lines, it always bleeds through and becomes a mess. Is this dry brush teqnique the key to getting around that? Would LOVE any tips you have on that, I don’t have much faith in the blue painters tape, especially if you have wall with any type of texture… So I would love any tips on that. Thanks!!
Hello! I hopped on over from Lemon Tree. I painted my hallway gray a few months ago and I am in love with the color. Can you have too many gray walls? lol Stripes are on my list to attempt. You did a great job! I love the new look.
I LOVE this! I am too chicken to brave stripes yet. I want to do it really really badly as I think it gives a room some attitude, but I don’t have the guts! lol.
Wow, striping that wall made a big difference in that room. To help you with your striping, making it easier with the width, there is a new painting tool called the U-Stripe It & Design Tool. Who ever loves the stripes and want to paint them, check this site out. All you will need is the Delicate painters tape and this tool. Mallory’s project then becomes easy to do and Everyone will be able to do it. http://www.ustripeit.com
We just decided to do stripes on our dining room wall, so this was really helpful. Esp the dry brush part. Thank you so much! You’ve been pinned.:) everydaygameplan.net
Ha! I bought some sample paint pots today and one was Pebble Grey and it turns out to be my fave. 😉 Good eye! I’m also doing stripes just not in white.
Christy, take a look at this new amazing design tool called the U-Stripe It & Design Tool. It is so easy to paint stripes on your walls using this tool. With this tool you don’t have to worry about putting marks on your walls or making sure every line you do is the correct measurement. It does it for you, while you take all of the credit, looking as if a professional painter did the stripes in your room. http://www.ustripeit.com
Another great tutorial! Wow you girls can rock the home decorating department! I love the tips you gave, one of these days I am going to do a stripe or chevron wall.
If you want to make your home really look really beautiful , paintings are the best way to do it believe home looks very well decorated . If you are looking to find Oil Paintings Reproductions at very economical price or cheap rates, you must visit wahooart.com
Hello. I have popcorn ceiling in the room I am doing stripes in. How do I accomplish the stripes being straight when the popcorn ceiling makes it difficult to measure down? Should I use the baseboards? Please help?
Measuring from the ceiling isn’t a bad way to measure the stripes on the wall. I’ve never tried painting anything besides a solid color, but it would be fun to add more interest to our living room. Luckily for us, I’m pretty sure our ceiling is level to our floor as well, so this method should work. We should give it a try. If it doesn’t work out, we can always hire a professional to fix it for us.
I did something similar in our first home when we were too impoverished to afford paint. We had a couple of part-used tins of magnolia and grey paint in the cellar, but not enough of either to do the whole room, which was plain boring white. I did a wall at a time, so I knew I had enough paint to finish, and alternated grey, white, magnolia vertical stripes all round the room on three walls, but varied the width of the stripes. It looked really classy when it was done! (the white were just not painted lol)


Looks awesome Mal! I did pink and white stripes in Navy’s room and love it! We used the green painters tape cuz it sticks better and had no bleeding at all! Just another idea!
I have been struggling with what to do in my office. & this is it!
Love how it turned out!!!
I LOVE it! You’re right, that’s the perfect color of gray.
These look great! I love the gray and white together as well. I have not tried the horizontal yet but I am sure I will eventually. I however have done the checkers, the vertical stripes and the diamond patter that for some reason I can’t think of the name right now lol. Darn. Anywho they are all a pain in the rump lol. But so worth it in the end. You made it look easy peasy 🙂
Deb
Dejarenew.blogspot.com
I love it! The stripes are stunning! Man I love gray! Such a good color!
Great job Mallory! Gives me some motivation to do some stripes somewhere. They are so fun. Your new house is looking adorable!
Wow this looks great. Everytime I try to paint and use the blue tape for clean lines, it always bleeds through and becomes a mess. Is this dry brush teqnique the key to getting around that? Would LOVE any tips you have on that, I don’t have much faith in the blue painters tape, especially if you have wall with any type of texture… So I would love any tips on that. Thanks!!
love it mal!! looks great
I featured you this week at my Hookin Up with HoH party!
Feel free to stop by and grab a button if you’d like!
xoxo
Allison @ House of Hepworths
Your stripes are PERFECT for sure! Love it!!
Hello! I hopped on over from Lemon Tree. I painted my hallway gray a few months ago and I am in love with the color. Can you have too many gray walls? lol Stripes are on my list to attempt. You did a great job! I love the new look.
Looks good!!! I can never get my lines to be perfect. Visiting from Lemon Tree
They turned out fantastic, love your choice of colors!
I LOVE this! I am too chicken to brave stripes yet. I want to do it really really badly as I think it gives a room some attitude, but I don’t have the guts! lol.
I loveee how this turned out! bookmarking..because I already have the paint and tape ready to go for this project..just waiting for the guts. haha.
Wow, striping that wall made a big difference in that room. To help you with your striping, making it easier with the width, there is a new painting tool called the U-Stripe It & Design Tool. Who ever loves the stripes and want to paint them, check this site out. All you will need is the Delicate painters tape and this tool. Mallory’s project then becomes easy to do and Everyone will be able to do it. http://www.ustripeit.com
The stripes look fabulous and really make the room! come visit me-
http://www.alivedinhome.blogspot.com
We just decided to do stripes on our dining room wall, so this was really helpful. Esp the dry brush part. Thank you so much! You’ve been pinned.:)
everydaygameplan.net
So lovely! Thank you for sharing tutorial! I just {LOVE} stripes on walls!! Thank you again! Have a beautiful and blessed Fall!
I’ll be sharing this tutorial with my lovelies over at my {Marvelous Monday} today, feel free to check it out!
http://polkadotbungalow.blogspot.com/2011/10/marvelous-mondayno-7.html
{HUGS},
Stephanie
Nice modern touch to your living room.
love the stripes!
Ha! I bought some sample paint pots today and one was Pebble Grey and it turns out to be my fave. 😉 Good eye! I’m also doing stripes just not in white.
This comment has been removed by the author.
Christy, take a look at this new amazing design tool called the U-Stripe It & Design Tool. It is so easy to paint stripes on your walls using this tool. With this tool you don’t have to worry about putting marks on your walls or making sure every line you do is the correct measurement. It does it for you, while you take all of the credit, looking as if a professional painter did the stripes in your room. http://www.ustripeit.com
Another great tutorial! Wow you girls can rock the home decorating department! I love the tips you gave, one of these days I am going to do a stripe or chevron wall.
Great tutorial! I would love for you link this up at my first LINK PARTY!
http://www.thecreativeorchard.blogspot.com/2012/08/tutorial-link-party.html
If you want to make your home really look really beautiful , paintings are the best way to do it believe home looks very well decorated . If you are looking to find Oil Paintings Reproductions at very economical price or cheap rates, you must visit wahooart.com
Perfect wall as i describe it.
carpet cleaning phoenix
Wow!!! It’s awesome! Wall Panels
This comment has been removed by the author.
I appreciate your creative thought to decorate your home. Wall lighting
Hello. I have popcorn ceiling in the room I am doing stripes in. How do I accomplish the stripes being straight when the popcorn ceiling makes it difficult to measure down? Should I use the baseboards? Please help?
Measuring from the ceiling isn’t a bad way to measure the stripes on the wall. I’ve never tried painting anything besides a solid color, but it would be fun to add more interest to our living room. Luckily for us, I’m pretty sure our ceiling is level to our floor as well, so this method should work. We should give it a try. If it doesn’t work out, we can always hire a professional to fix it for us.
I love your stripped wall tips. Can’t wait to try.You
I did something similar in our first home when we were too impoverished to afford paint. We had a couple of part-used tins of magnolia and grey paint in the cellar, but not enough of either to do the whole room, which was plain boring white. I did a wall at a time, so I knew I had enough paint to finish, and alternated grey, white, magnolia vertical stripes all round the room on three walls, but varied the width of the stripes. It looked really classy when it was done! (the white were just not painted lol)
Knowing all these information will likely let you have
a larger borders on the game.