
Printable Organizing tags – Free printable and how to customize them!
I recently received some questions from a reader on how to add text to the printable instead of just writing on the tags which is for sure an option but I definitely don’t have the cutest handwriting so I wanted to share a way to add text digitally. I found a super easy, super cute way to do this using picnik!

First, you will want to save the tags printable to your computer.

To save this document, right click and click “Save image as” and choose a name and location to save your document somewhere that is easy to remember so you can upload it into picnik.
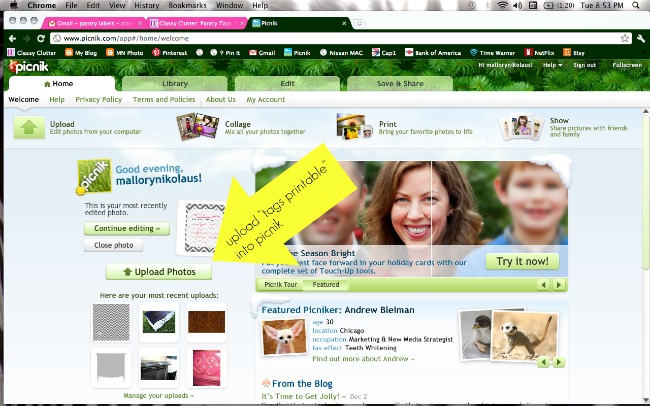
Then, Head on over to picnik and upload your “Tags Printable” from wherever you saved it.
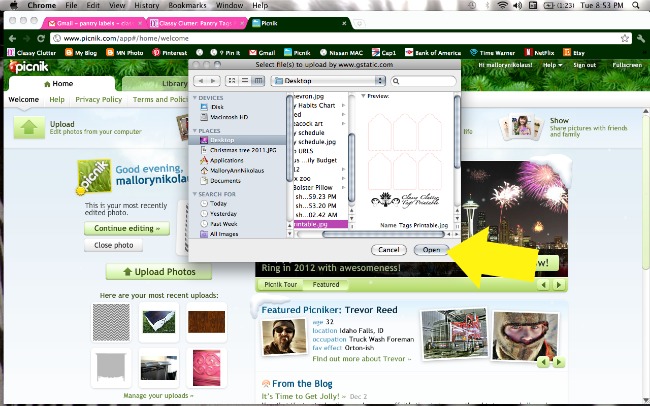
Click “Open”.

Your screen should look like this once your document is uploaded.
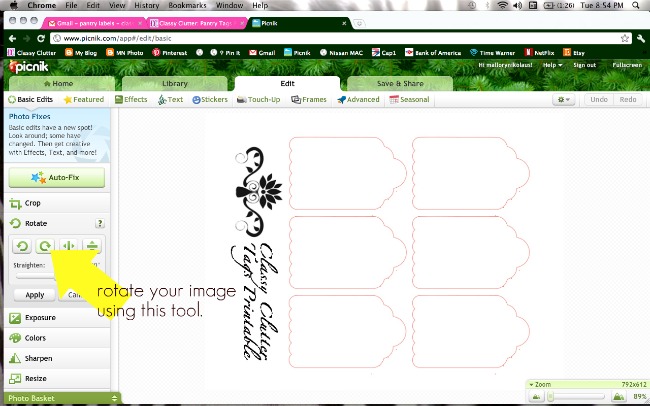
Use the “Rotate” tool to make your entire document rotate clockwise so it looks like this.
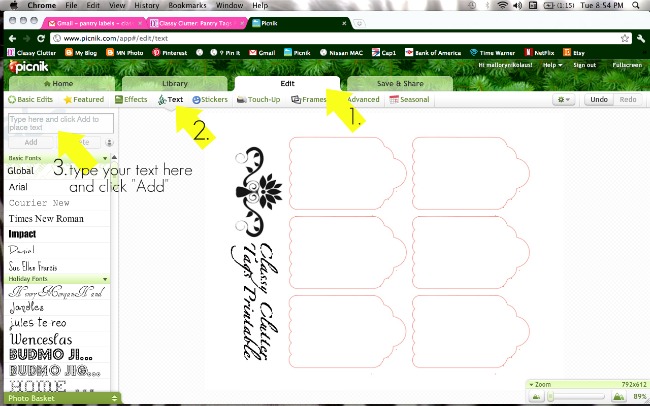
Make sure your in the “edit” tab (1.) and click on “text” (2.) then type in whatever you want your tag label to say and click “add” (3.)

Use the tools to adjust the size, font, color, etc to your liking.
Repeat until you have the text you want on all of your tags.

When your tags look good, click “Save Photo” and save it to your computer!
Then, you’re done! Print your document on white cardstock (textured cardstock works best!) and cut out your tags on the red line.
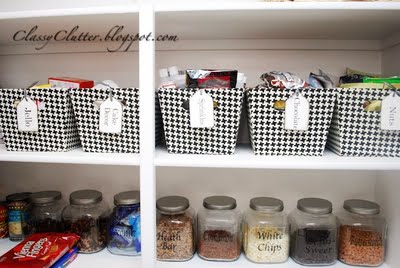
We added a little distressing ink and a ribbon to tie the tag to the basket! I love how the tags make the room look so tidy and organized! Not to mention, everyone knows where to find everything and more importantly, where it goes when you’re done!
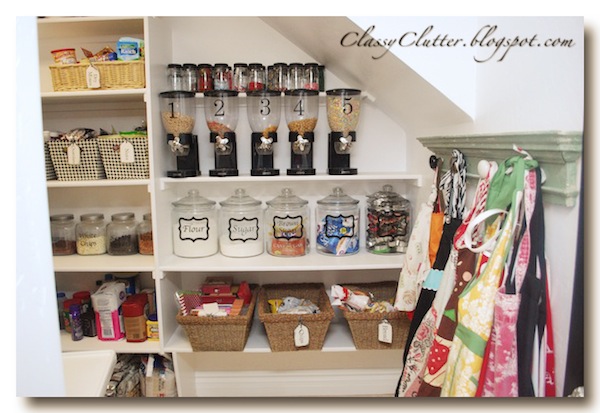
See the full pantry post here.

We also used these tags on our Birthday Board!
Keep in mind, you can use these anywhere! They don’t need to be used only in the pantry! Look around your house and see what needs labelled! Good luck! Let me know if you have any questions on the process!


O my goodness….your pantry makes me feel so ASHAMED! Literally the most organized and best looking pantry I have EVER seen!
Thank you thank you!! I was needing tags in my mud room and just printed these!! I love them!! 🙂
Oh my goodness, Thank you!!! I have such terrible handwriting and I’ve never thought to add text in Picnic. I can’t wait to use these once I think of something that needs a tag 🙂
I didn’t know you could do that with Picnik. I love it even more now. Thanks for the help.
The tags are great (love them, already used some and gonna use more) but your tutorial of Picnik was fantastic! I would have been lost without it. Thank you so much for making it easy.
Lynn @ Scrapity Anne
http://www.scrapityanne.com
twitter – scrapityanne
facebook = scrapity anne
Would love to get your feedback on my blog, I am new and seem to know nothing!
thank you for these!!! and your birthday board is *such* a good idea! I am the *worst* at remembering birthdays!!
http://munchtalk.blogspot.com/
AHHH love it! I have a tag hole punch this exact size! Might need to print a few lables with your template — Thanks!!! La la loving your blog so far!
xoXOxo
Jenn
WOW…this is great! I love how easy this is yet it will make organizing fun and classy! Happy Monday…almost Tuesday!
thanks for sharing the inspiration to be more organized come see what I shared at http://shopannies.blogspot.com