
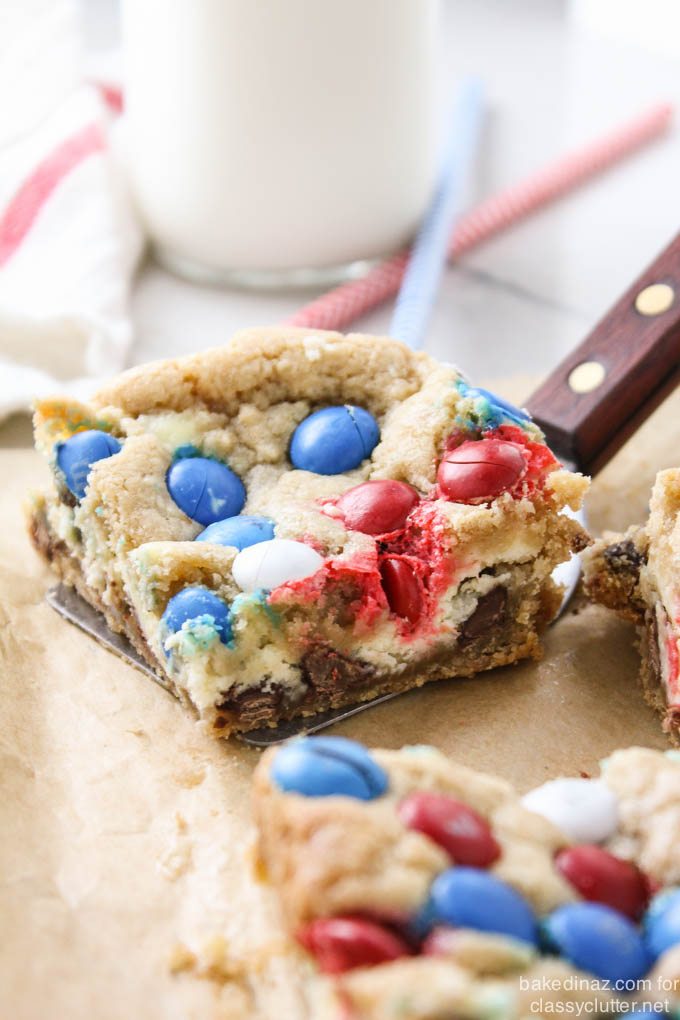
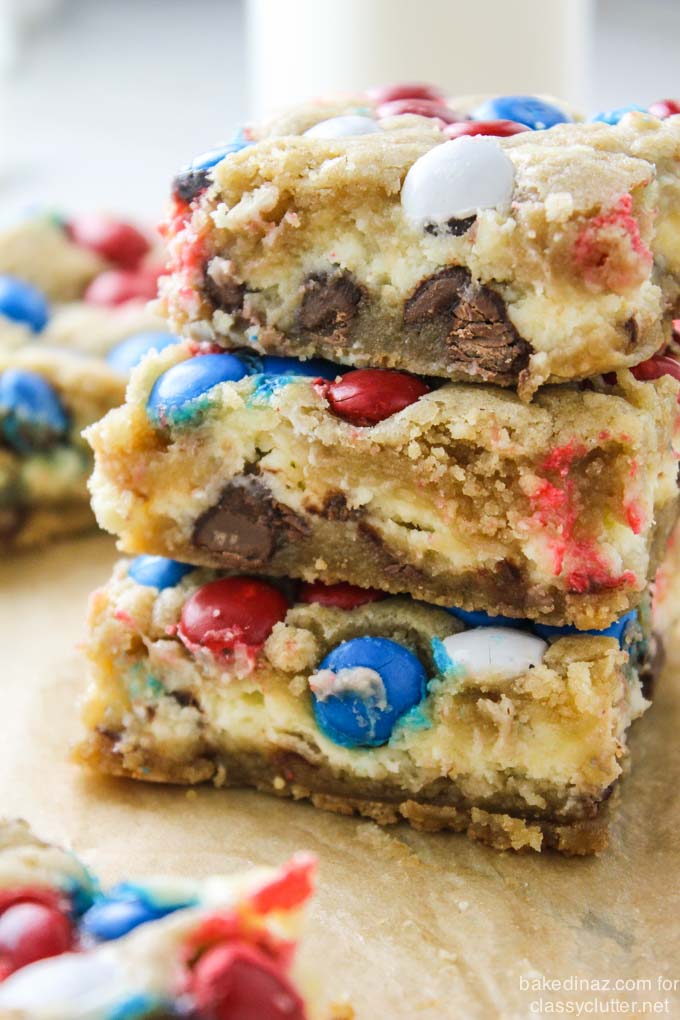
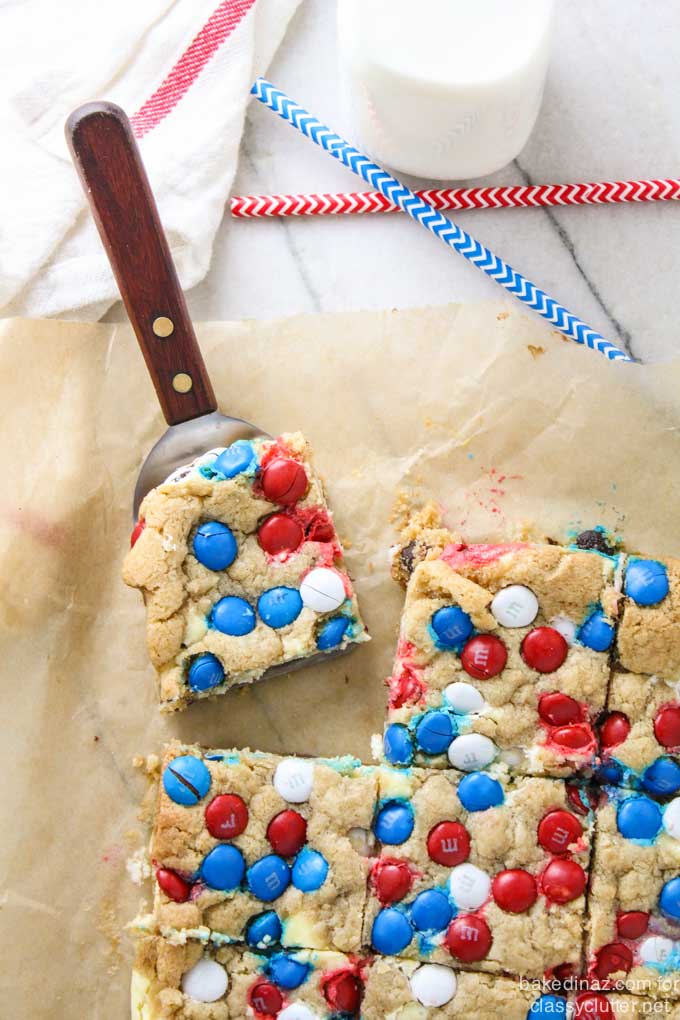
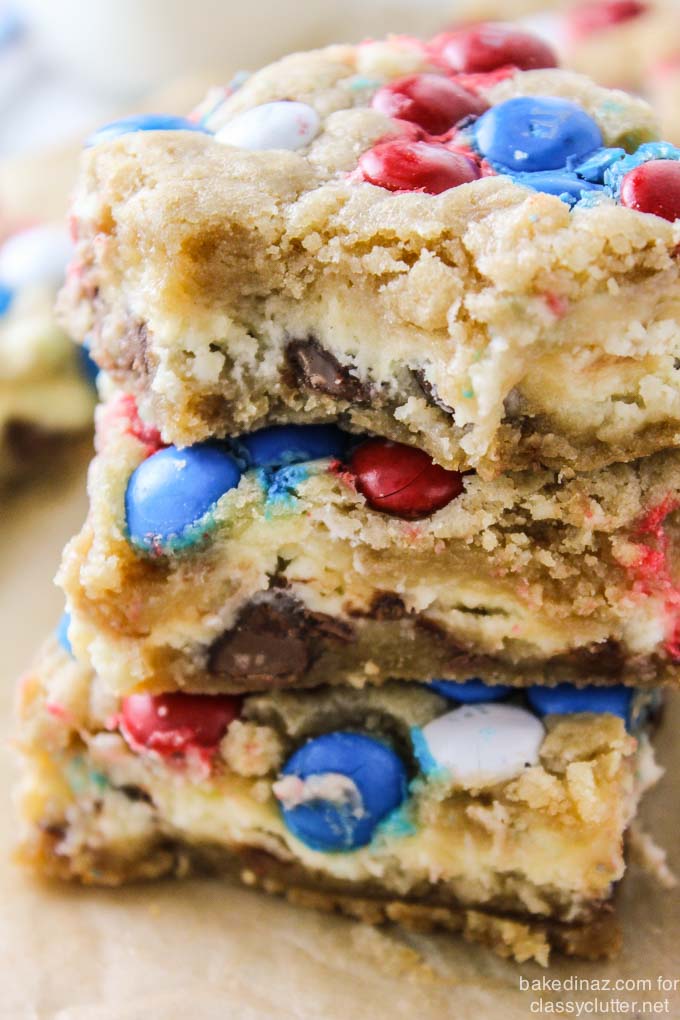
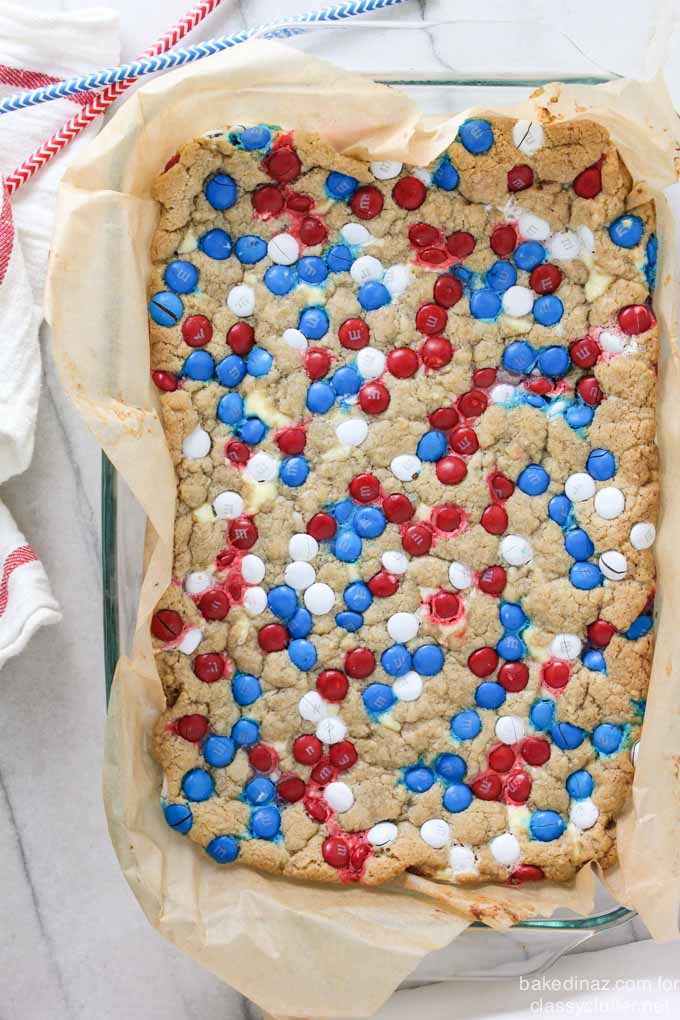
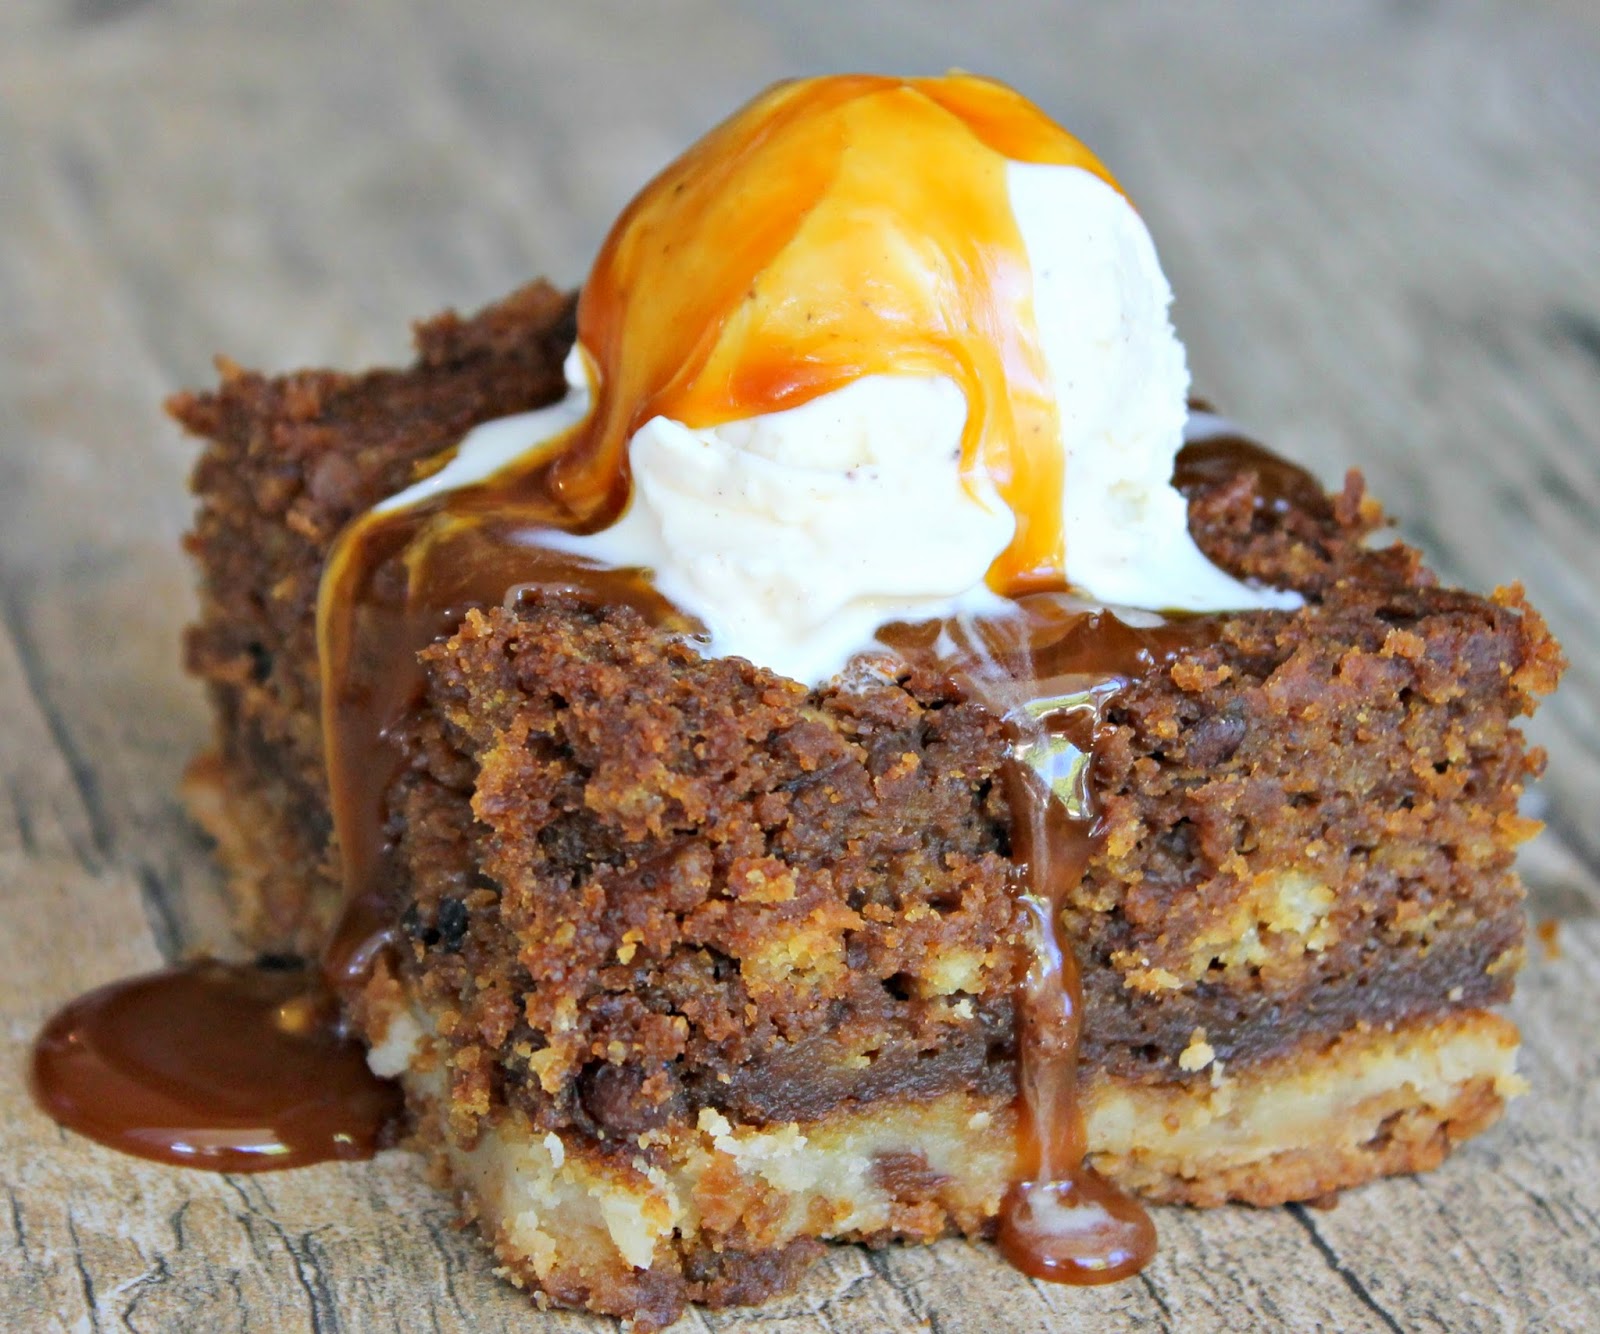
Patriotic Chocolate Chip Cookie Cheesecake Bars
These chewy chocolate chip cookie cheesecake bars are topped with red, white & blue candies, making them the perfect treat for your 4th of July parties!
Hey guys, it’s Adell from Baked in Arizona! I am so happy to be back sharing another recipe here on Classy Clutter!
I LOVE holidays! The 4th of July is one of my favorites. Family, friends, food, fireworks, what is better?! Also, just noticed those all start with an F 😉 Anyways, I’ve got a great dessert that will be perfect for your 4th of July party. These bars are great chilled or room temperature. You need to let them chill for about 3 hours after baking, so they are the perfect make ahead treat too!
Chocolate Chip Cookies were “invented” in America. Do you know the story? Maybe I am a baking nerd, but I thought it was so cool! I’ll give you the short version. Basically they were an accident. In 1930, Ruth Wakefield and her husband ran the ‘Toll House Inn’. She was famous for her desserts. One day, she was out of bakers chocolate for a cookie recipe, so she cut up a Nestle semi-sweet chocolate bar and when the chocolate didn’t melt into the cookie, the chocolate chip cookie was born! That is why they are call the Toll House Chocolate Chip Cookies! Ruth sold the recipe to Andrew Nestle who then provided her with a lifetime supply of chocolate. Cool story right?
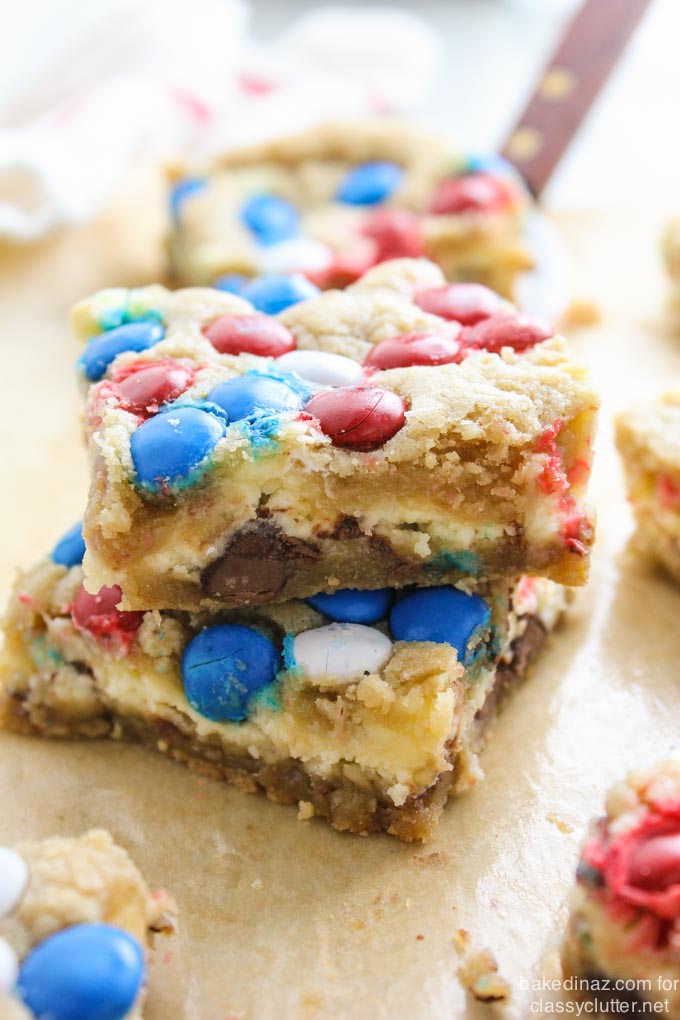
It doesn’t get much better than cookies and cheesecake. You will love these bars!
- For the cookie layer:
- 2⅛ cups flour
- ½ teaspoon salt
- ½ teaspoon baking soda
- 12 tablespoons butter (1½ sticks), melted and cooled slightly
- 1 cup light brown sugar
- ½ sugar
- 1 large egg
- 1 large egg yolk
- 2 teaspoons vanilla extract
- 1 cups milk chocolate chips
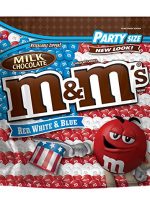
- 1 cup red, white & blue m&m candies
- For the cheesecake layer:
- 8 ounces cream cheese, softened
- ¼ cup sour cream
- ¼ cup powdered sugar
- 2 teaspoons clear vanilla extract
- 1 egg
- Preheat the oven to 325 degrees. Spray a 9X13-inch baking pan with cooking spray then line with parchment paper.
- Mix the flour, salt, and baking soda together in medium bowl then set aside.
- Whisk the melted butter and sugars in a large bowl until combined.
- Add the egg, egg yolk, and vanilla mixing well. Using a rubber spatula, fold the dry ingredients into the egg mixture until just combined; do not overmix.
- Press half of the cookie dough into the prepared pan.
- Sprinkle the chocolate chips on top of the dough then press them in slightly. Now make the cheesecake layer.
- For the cheesecake layer: Beat all the ingredients together until smooth. Spread over the cookie dough & chocolate chip layer. Drop the remaining cookie dough in small pieces all over till mostly covered. Press down slightly. Sprinkle the m&m candies all over and press in lightly.
- Bake for 30-35 minuets or until the top of the bars are light golden brown, slightly firm to the touch, cheesecake looks set and edges start pulling away from sides of pan. You don't wanna over bake them.
- Place on a wire rack to cool to room temperature. Then let them chill in the fridge for about 3 hours.
- Remove the bars from the pan by lifting on the parchment paper and transfer them to a cutting board. Cut into desired size squares or rectangles.
- Serve cold or room temperature.
- Store in the fridge.
I would LOVE it if you followed Baked in AZ on:
FACEBOOK, INSTAGRAM, PINTEREST or TWITTER!
Magnolia Bakery Banana Pudding
The Best Chocolate Chip Cookies
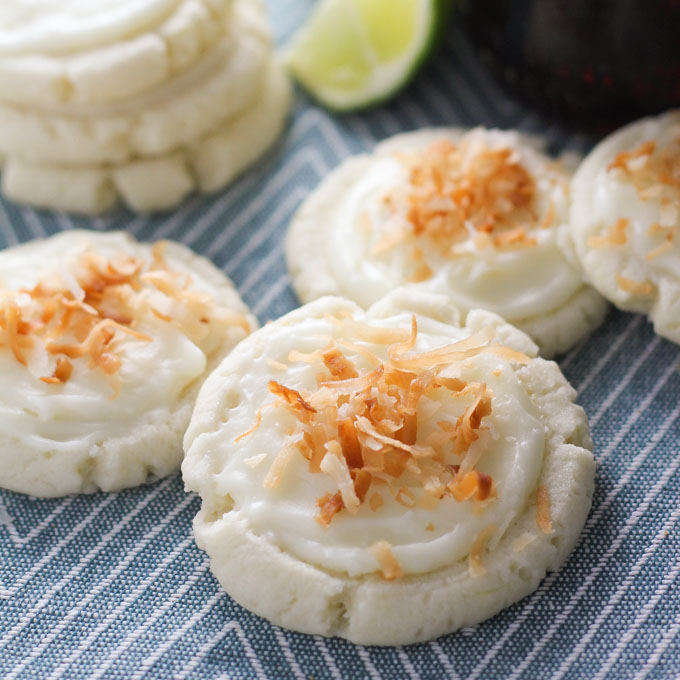
Coconut & Lime Swig Sugar Cookies


Here’s what I will surprise my wife and my daughters in my day off 🙂
wow! i think i will make it for my honey.