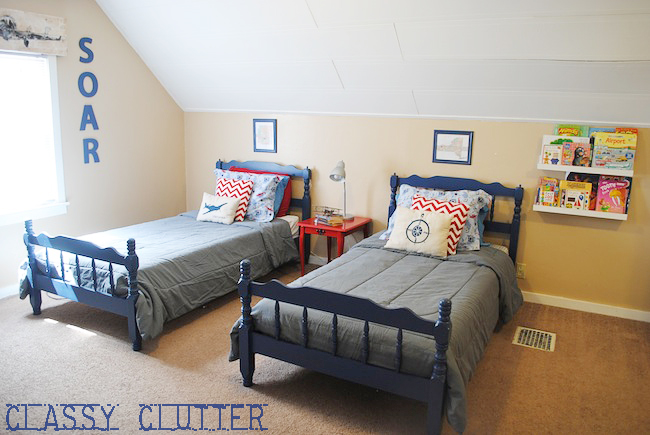
My two little boys share a bedroom and it is a vintage airplane themed room. My kids love airplanes so we knew it was perfect for them. They have loved it! You can see the full post and lots of photos
here.
Fast forward… and baby boy #3 is expected to arrive in March!
This bedroom is super super spacious so we aren’t worried about squeezing the little babe and his stuff into the room. I have a list of about 800 million projects for baby but I needed to start with painting his dresser since we will be losing our warm weather here in New York pretty much any day now.
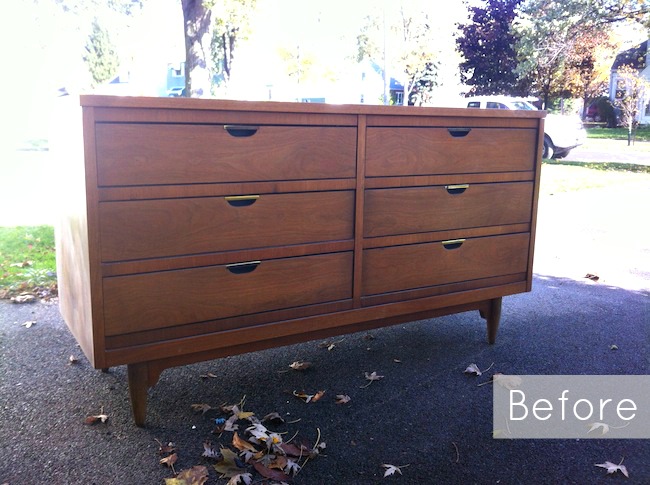
I looked for a dresser with a “flat front” for a month or so. I knew what I wanted to do with it but finding it was not easy. Craigslist and thrift stores were not helping me out. Then, one day I stumbled into a nearby thrift store “just to check” after the gym one day and there she was! It was marked $55 which is more than I normally spend but I was desperate! Then, I went to pay for it and they informed me it was 40% off! YAY! Made my day!
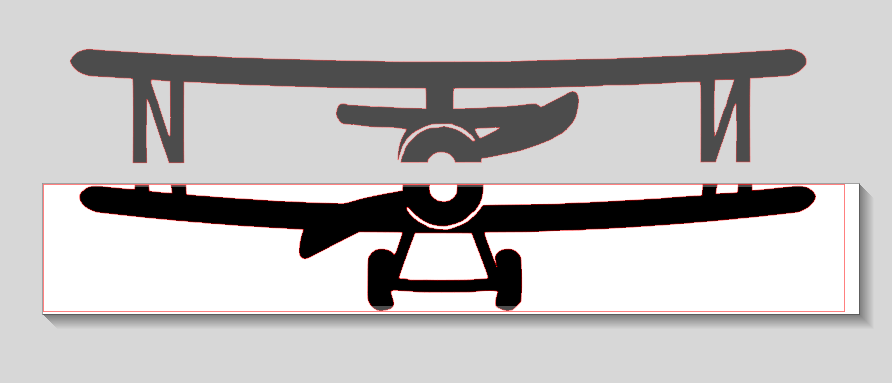
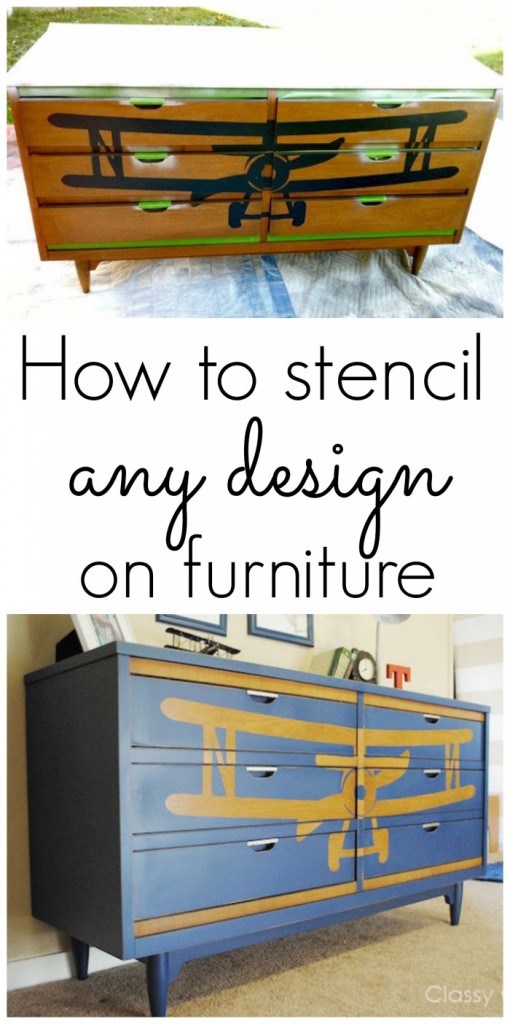
First thing I did was came up with a stencil for the front. I wanted to cover most of the front using a biplane reverse stencil. I got busy on my Silhouette software and after finding this image online, I was ready to go!
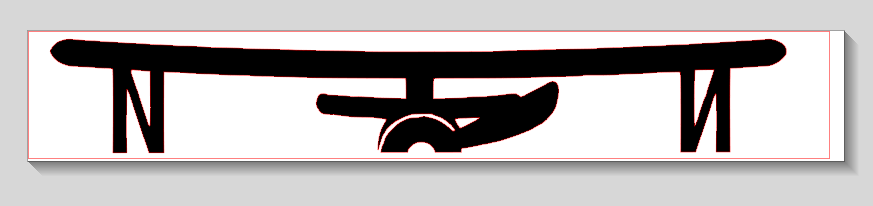
I cut it into two long pieces to make it easier to attach and to handle. Have you ever worked with a giant sticker? They can be tricky so cutting it into smaller pieces is always a good idea!
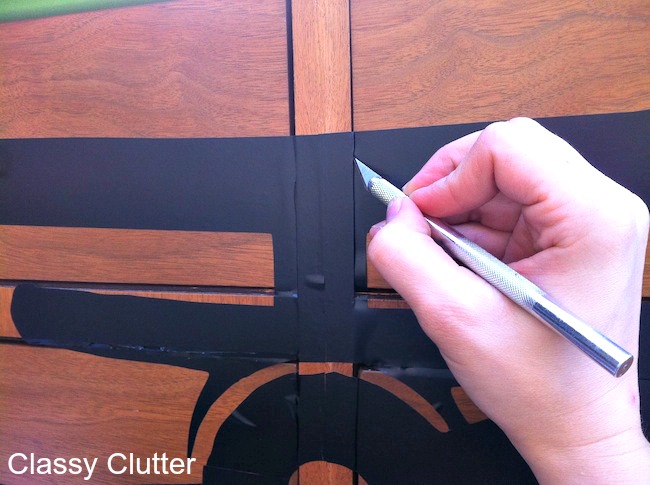
Next, I stuck the vinyl to the dresser front. I took an Xacto knife and trimmed the vinyl where each of the drawers opened make make sure everything was stuck down properly and everything lined up correctly.
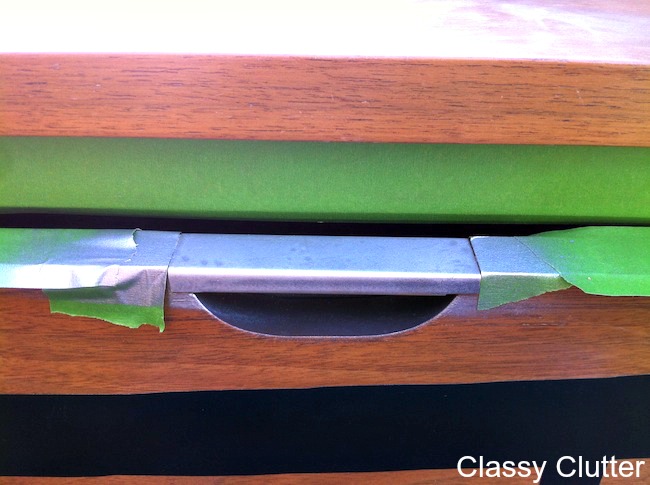
Now, the drawer pulls were kinda tricky. Normally, I remove hardware and paint it separately then reattach. Well, these babies are nailed in really well and I really didn’t want to mess with removing and reattaching them.
So I did it in reverse. I taped off the pull so no paint got inside the drawers. Sprayed them with Krylon’s brushed nickel and a clear coat spray paint. Once it was dry, I taped the newly painted pulls off so I could spray the dresser Navy.
I also taped off the top and bottom strips of wood so a little more wood grain would tie it all together once it was all painted. You’ll see what I mean in a minute. 😉
Here she is all ready to paint. I primed the top with Kilz spray primer since that will likely get the most wear and tear. I don’t prime ALL my pieces but it never hurts to and it’s a really simple step.
I used my HVLP spray gun and air compressor to spray the dresser. I used latex paint and I did several coats of the blue to make sure I had good coverage on the entire piece. I only used about 1/3 of a quart of blue paint. Dark colors cover well when using a paint sprayer.
Finally, I used my Xacto knife again to go around the edges of the now painted vinyl to make sure it didn’t peel up the paint as I peeled the stencil off. I learned that the hard way really fast. Luckily, my friend, the steady hand, was able to fix the spot I messed up a bit. Phew! Thanks Jen! 🙂
Ahh! I love it! See the “T” up there on the dresser. Let’s hope he “looks like” the name we picked. I have issues with choosing baby names! haha.
Do you see the stripes I added to the bay window area? The train table will relocate to the developing playroom and Baby “T”s crib will sit in the window area. Learn how to paint stripes here.
I really like the slight distressing I added. I think it makes the clean edges look more finished.
The possibilities are endless when it comes to stenciling on furniture. You could do virtually any design!! All you need to do is find some vinyl in the shape/size you want. Look on
etsy or contact me for custom vinyl orders. You can visit my etsy shop
here.
I hope you like it! I am super excited to be getting these baby projects done!


Fantastic job. Love the way it turned out.
I’m crazy about this dresser! Such a great project!
It turned out great, Mallory! You did an awesome job!
So cute! And wowza on that room size, I wish my master was that big…so lucky! ;D
WOW!! That dresser is the cutest ever! Well done, Mallory! Way to go!
~Jen
What a great idea!!!
WOW!!!! it’s amazing!!!
NICE!! Ok, that was an understatement… BRILLIANT!!! I love how this turned out! You’re a rock star!
Jeannine @ The Concrete Cottage
I LOVE the dresser. Awesome. What a wonderful room! Great job!
That turned out really great!! I have a question though – can you reuse the stencil??
I really like it. 🙂 Very cute!
that is ridiculously amazing and super impressive. wowza!
Wow…double WOW! What an imaginative and creative transformation! Gotta love those finds when they are 40-50% off! It was meant to be. 🙂 Your airplane valance post is how I found your blog months ago. I want to do something similar but with a train image. My little guy (3) loves all things transportation / construction, but trains seem to have a soft spot for him.
Fantastic work…again. 🙂
Have a Super Saturday!
Julie
Oh my! This is adorable. You did an amazing job! I’d like to invite you to link it up to my Twirl & Take a Bow party at http://www.houseontheway.com. Hope you can stop by!
Leslie
This is an amazing assortment of very special furnishings nice sharing well done thanks for this one.
Dallas mattress sale
Mattress sale dallas
office furniture fort worth
This dresser is so cool! My husband loves vintage aircraft, and I bet he would really like something like this!
This is brilliant!! Love it!!
Katie
http://www.funhomethings.com
It’s adorable! So unique and great tutorial too! I’m sharing a link back in the DIY highlights, ladies! 🙂 Thanks so much for sharing!
AMAZING! I love it so much!
This is such an adorable idea! Makes me want to have kids 🙂
Wow I love this and going to have to look at your blog…more so…lots of great stuff…thank you and yes I would love to do one of these with the idea of the front of a Jeep…a old style Military Jeep front with the grill, narrow body style…same issue finding flat fronts…great job…
Looks great! I love the vintage airplane theme. 🙂
xo-Kimberly {allons-y kimberly}
Um….wow!!! So, so fantastic!! really creative and perfect for your space, well done!! 🙂
Great idea! I might have to keep this in mind when we do our big boy room for our Little Pilot. 🙂
Hi! I blog at http://www.ajennuinelife.blogspot.com. I’m going to be starting a weekly linky party called Thrifty to Nifty Thursdays beginning in 2013. To try to promote the party I’m pitching a roundup post to Becky at Infarrantly Creative. I’d love to feature your great dresser redo. If it doesn’t make it to IC, I’d post it on my blog as inspiration for the linkup. Can I use your fab thrift store makeover?
Thanks,
Jenn – A Jennuine Life
They turned out really great and fantastic ……awesome blog.
Hotel furniture
Using negative space for the plane is genius!
Do you have this stencil/sticker available for sale? I didn’t see it in your etsy shop, but my son’s nursery is a biplane theme, and I’d love to use this!
Hi Christina!
I just sent you an email regarding this!
Thanks so much,
Mallory @ Classy Clutter
How were you able to print this in a sticker