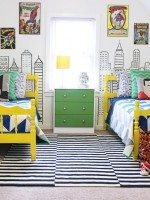
DIY Rustic Airplane Valance {Pottery Barn Knock Off)
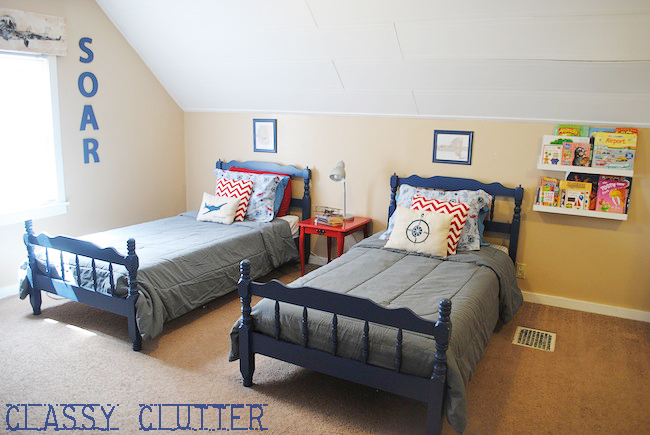
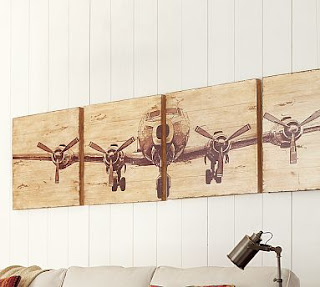
My little boys’ bedroom is an airplane theme if you missed my boys’ room reveal and a looooong time ago as I was gathering inspiration for this space, I saw this image via Pottery Barn and loved it at first sight, of course.
My boys’ room is an airplane theme you could say and this was too perfect! Then, if I remember correctly, I found out it is around $300, clicked out of the website and forgot about it… Until I saw this image on pinterest.
The pin took me to The Cre8tive Outlet where I found this fantastic wall art tutorial! Holy what?! How did I not know Mod Podge could be used as a medium for image transfer?!?? WHAT!? I know. I was shocked too. PS. I actually thought this was the same one from the catalog until I realized it was a DIY!
Problem was, I didn’t really need wall art at this point in the room decor but I really really really wanted to do this… really! Then, I also remember seeing this pin on pinterest for a barn wood valance.
Well, I didn’t have any barn wood laying around but I knew what I wanted and I did have some 2x6s and I got to work! Why is it that the projects I put together on the spot using only what I have on hand, end up being some of my FAVORITE projects? Probably a good thing but ironic if nothing else. 🙂
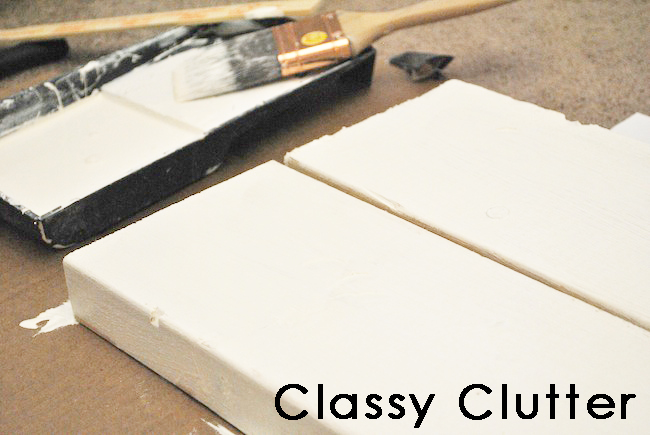
First, I took my wood planks, imperfect and unsanded and painted them white. Any ‘ole white will do.
Next, I put a good solid coat of Mod Podge on my mostly dry painted wood.
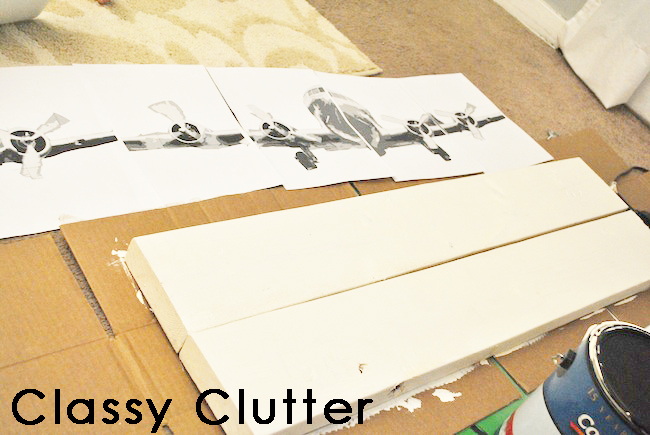
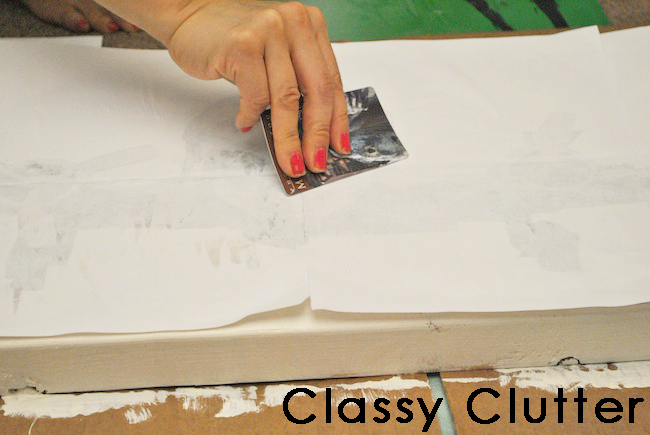
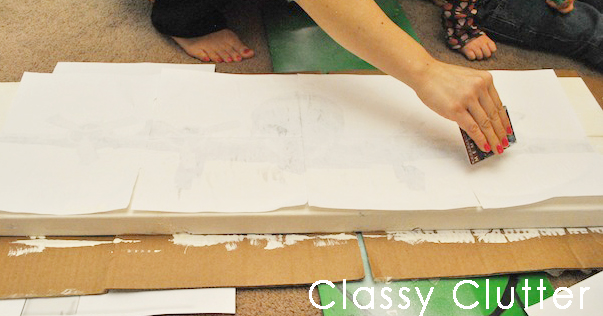
Then, lay your images face down (this will be a mirrored image of whatever you printed) and I used a credit card to adhere the paper to the wood. Note: my wood pieces were not nailed, glued, or stuck together in any way at this point, I just laid them right next to each other.
I found the credit card smoothing method worked well. Well, zoo card but whatev.
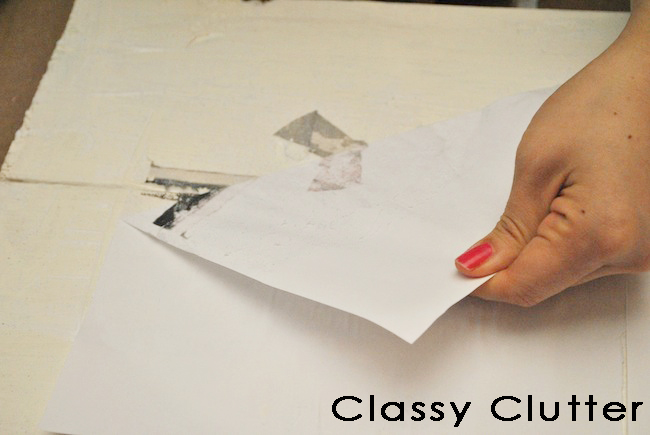
Next, you can start to peel off your printed pages. I was going for rustic look so I didn’t mind if the image transfered perfectly. I would suggest using a very smooth piece of wood and lots of mod podge if you want a clear image transfer. Just sayin’! 😉
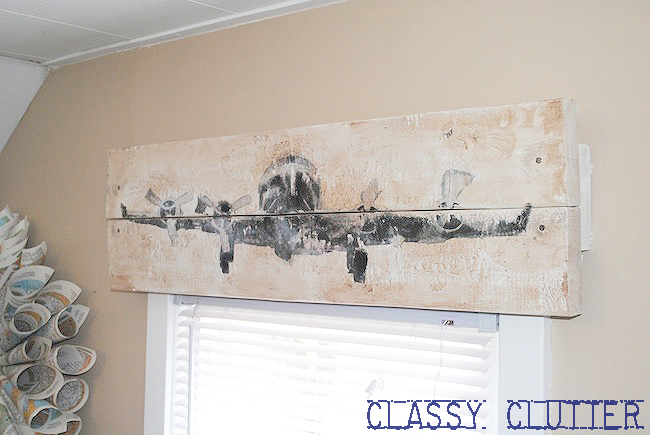
After I peeled it all (it took a little picking and scraping when some of the Mod Podge dried) I used a walnut stain and brushed it over to of the entire board to give it a worn look. I also took some acrylic craft paint and touched up a few areas that didn’t transfer well.
Finally, I nailed another 2×6 to the wall and nailed the two planks right onto that and voila! DONE!
You could totally get brackets or some other means of hanging it up but I used everything I had on hand since I was too tired and it was way too late to go to the store! Start to finish, you’re looking at about 1-2 hours for your project depending on size etc.
Cool huh!?
Here’s what you see as you come up the stairs. Sorry for the tiny pic.. Its zoomed in quite a bit so it was all pixely! Sorry!
A few of you asked for the tutorial so there you have it! My boys and I really love it! Hubby too! Pretty nice touch for free eh?
Check out our Party Time tab to see where we’re linking up!
I made it out of a road map book from the dollar store. I just rolled up the pages and hot glued them to a foam wreath form. Super easy and inexpensive!!!
You just made my day! I have been in love with that for so long! That pic from their catalog has been the desktop on my computer for months. I’m so happy to have found a way to make it myself! Yay, yay, YAY!
OMG… I just saw this in the PB catalog and thought to myself “I have to DIY that!!”. But the one part I was unsure of was how to make the airplane print! This is perfect! Thank you so much for sharing!! xoxo
I love what you did, super sweet. I wanted to know about the map wreath? Do you have a tutorial on that or can you take a close up pic and email it to me, at vanessa@homesweetbutterfly.com. Thanks
It’s fabulous! I saw her project before there was Pinterest….I think I need to go back and pin it…that too is where I learned that Mod Podge works as a transfer….cool right? A wet sponge is what helped me rolled off the paper…
Great job Mallory! It’s especially awesome you had everything on hand. I have the same question I saw several people ask; did you use an ink jet or laser printer?
By the way, I found you via Funky Junk Interiors Facebook page. I’m now following you!
Followed over from Funky Junk just to see that plane. I thought it was the expensive one I have been drooling over. I am sure everyone who has stopped by has fallen in love with this – your boys are lucky!
That was totally awesome! I have been wanting to do something similar using a ceramic tile. I want to transfer a pic onto the tile. You have given me great instructions and inspiration. Also, Love y’alls blog! Thank You So Very Much! Blessings, Betsy
I was wondering if you resized her print. I need it to fit a valance for my boys room. I love the way you did it but I think that I may need the airplane smaller. How do I do that? Love your blog BTW.
LOVE LOVE LOVE this!!! I’ve seen that art at PB as well and thought I could try it, but never have. LOVE it as a valance, and I need a window treatment for my office right now!
How did you get the image small enough? The link has 31 pages to print out but your tutorial only has 4. I really want to make this but don’t know how to get the image right. Thanks!!
Really want to try this! My little boy’s room has a vintage airplane theme as well, but the link to the picture requires 30-something pages!!! How did you size it down??
I’m so excited! I saw that wall art and I knew I needed it ! But $300 a bit high, so I’ve been racking my brain to find out how!! Thank you! I almost gave up!
Hi, I have a question about how you printed the images off photobucket when they are in 35 pieces (papers). YOu look to have only 5-7..?? I need to do that (smaller) how did you do it?
How did you print off the air plane to fit onto just (what looks like) 5 regular sized sheets of paper? When I click on the images, there are tons and tons of them. I would have to use like 20+ 11X8 sheets of paper…. It looks like Cre8tive outlet’s project was much much bigger than yours. I like what you did but like I said I don’t know how to print off the images on a smaller scale like you did… can you help??
I saw the images on the other blog but there are 35 images (11 across) which would make this plan over 7 feet wide, is this right? your window doesnt look 7 feet wide and it looks like you have 5-6 pages printed out. PLEASE help.


Did you print this on an inkjet printer? Fabulous project by the way – it looks stellar!
Peggy
Loved this idea…but can you tell me what the wreath in that room is made out of and possibly how to make it?
Hi Gina!
I made it out of a road map book from the dollar store. I just rolled up the pages and hot glued them to a foam wreath form. Super easy and inexpensive!!!
Thanks so much for stopping by!
XOXO,
Mallory @ Classy Clutter
This is seriously AMAZING!!! I love it! You are so super talented Mallory!
So awesome! I love the look!!
Thank you thank you! So great!!
This is a daunting project, but super!! Following. Linda
I love it, it looks amazing!
Oh my goodness, I really love this! Looks great:)
wonderful, so nice blog i’ll star following u
You girls are awesome! So thrilled to be your newest follower! Thanks for all the inspiration!
-Molly
thepoorsophisticate.blogspot.com
That valance turned out awesome! Would love if you stopped by and linked up to the Pomp Party!
http://jill-createcraftlove.blogspot.com/2012/04/pomp-party-15.html
Jill @ Create.Craft.Love.
This is so AWESOME!! I really need to do this for my boys!! Thanks so much for sharing!!!
You just made my day! I have been in love with that for so long! That pic from their catalog has been the desktop on my computer for months. I’m so happy to have found a way to make it myself! Yay, yay, YAY!
Wow, that is so cool! I want to do the same thing (only super heroes) for my boys room. What kind of printer did you use? Would a lazer printer work?
Hi Kimberly! I used an ink jet printer but I’m sure you could give the laser printer a try on a scrap piece of wood! Couldn’t hurt to try! 🙂
XO, Mallory @ Classy Clutter
OMG… I just saw this in the PB catalog and thought to myself “I have to DIY that!!”. But the one part I was unsure of was how to make the airplane print! This is perfect! Thank you so much for sharing!! xoxo
Very cool idea! I love it! And the whole room looks great, too, by the way! 😉
Wow! Pretty incredible project for on the fly. Who knew Modge Podge transferred? Did you have to use a laser printer or did ink jet work?
Such a wonderful job! You are so creative. I know the exact project I’m going to try this technique on.
Hi, Mallory
I love what you did, super sweet. I wanted to know about the map wreath? Do you have a tutorial on that or can you take a close up pic and email it to me, at vanessa@homesweetbutterfly.com. Thanks
Vanessa
Hi Vanessa!!
I used this tutorial from PRIMP http://micheleravendesigns.blogspot.com/2010/09/vintage-sheet-music-wreath-by-primp.html and I got the map pages from a map book at Dollar Tree. 🙂
Hope that helps, Mallory 🙂
Great idea! I didn’t know you could use it as a transfer medium either! Yours looks amazing ♥
It’s fabulous! I saw her project before there was Pinterest….I think I need to go back and pin it…that too is where I learned that Mod Podge works as a transfer….cool right? A wet sponge is what helped me rolled off the paper…
Now I have to pin this….great job:-)
Mallory that is awesome!!! My daughter’s baby room is vintage airplanes and that is perfect! Thank you for the wonderful tutorial!
This is all just wonderful!!!!!!!!!
Great job Mallory! It’s especially awesome you had everything on hand. I have the same question I saw several people ask; did you use an ink jet or laser printer?
By the way, I found you via Funky Junk Interiors Facebook page. I’m now following you!
Hi Jeanne! I’ve updated the post to say that I used an ink jet printer!
XOXO, Mallory
This looks amazing i love it xxx
I have always been in love with PB’s version so was thrilled to see your tutorial. Thanks for sharing that. Yours looks awesome!!
Followed over from Funky Junk just to see that plane. I thought it was the expensive one I have been drooling over. I am sure everyone who has stopped by has fallen in love with this – your boys are lucky!
Distressed Donna Down Home
That was totally awesome! I have been wanting to do something similar using a ceramic tile. I want to transfer a pic onto the tile.
You have given me great instructions and inspiration. Also, Love y’alls blog!
Thank You So Very Much!
Blessings,
Betsy
Visiting from UTTAD ,, this is awesome! Great job.
-Jacque
I was wondering if you resized her print. I need it to fit a valance for my boys room. I love the way you did it but I think that I may need the airplane smaller. How do I do that? Love your blog BTW.
LOVE LOVE LOVE this!!! I’ve seen that art at PB as well and thought I could try it, but never have. LOVE it as a valance, and I need a window treatment for my office right now!
Hey this is awesome! How do I print the pictures from photobucket? Thanks you are super crafty!!
How did you get the image small enough? The link has 31 pages to print out but your tutorial only has 4. I really want to make this but don’t know how to get the image right. Thanks!!
It looks fantastic! You’re like a PRO!
Crystelle
http://www.crystelleboutique.com/
How do I get the picture small enough??? I LOVE the piece, but the print is way to big!
Really want to try this! My little boy’s room has a vintage airplane theme as well, but the link to the picture requires 30-something pages!!! How did you size it down??
I’m so excited! I saw that wall art and I knew I needed it ! But $300 a bit high, so I’ve been racking my brain to find out how!! Thank you! I almost gave up!
Hi, I have a question about how you printed the images off photobucket when they are in 35 pieces (papers). YOu look to have only 5-7..?? I need to do that (smaller) how did you do it?
Thanks,
Alla
Can you please send me the images to my e mail tihutchison@hotmail.com. Thanks, Ivy
How did you print off the air plane to fit onto just (what looks like) 5 regular sized sheets of paper? When I click on the images, there are tons and tons of them. I would have to use like 20+ 11X8 sheets of paper…. It looks like Cre8tive outlet’s project was much much bigger than yours. I like what you did but like I said I don’t know how to print off the images on a smaller scale like you did… can you help??
Really i love this post and your great blog
I saw the images on the other blog but there are 35 images (11 across) which would make this plan over 7 feet wide, is this right? your window doesnt look 7 feet wide and it looks like you have 5-6 pages printed out. PLEASE help.
3 of the pics are missing, where can I find them
Hi Angela,
I got the images from the linked blog in the post. If they’re missing you can possibly contact the original blogger who posted the airplane tutorial.
Thanks so much, Mallory
where i can find the airplane sticker
Hi Olga! There is a link to the blog where I downloaded the images! Thanks!!!
Wow, what a creative and easy idea for a valance! I love the rustic look and the airplane theme. Great job!
Can you help me figure out how to print the airplane picture out like you did on just a few pages? Thank you
Could someone please email me the images?