
DIY Headboard {Remodelaholic Inspired!}
Well, I was browsing one of my FAVORITE DIY blogs Remodelaholic and found that I was having the same issue with wanting a new/cute headboard! I couldn’t find anything I loved that wouldn’t blow my budget! Remodelaholic to the rescue! I used her headboard tutorial for the most part. She used cabinet doors and I used an old window shutter so I, meaning my sweet hubby, had to make a few adjustments. I was excited to test my limits with the power tools and I had so much fun with this! I love it in my bedroom! It just adds the pop of color I needed (I used Krylon Cherry Red), since we are renting and I can’t really paint my walls 🙁
 |
| We started with this shutter that I bought from ReStore for $5! |
 |
| Building the frame |
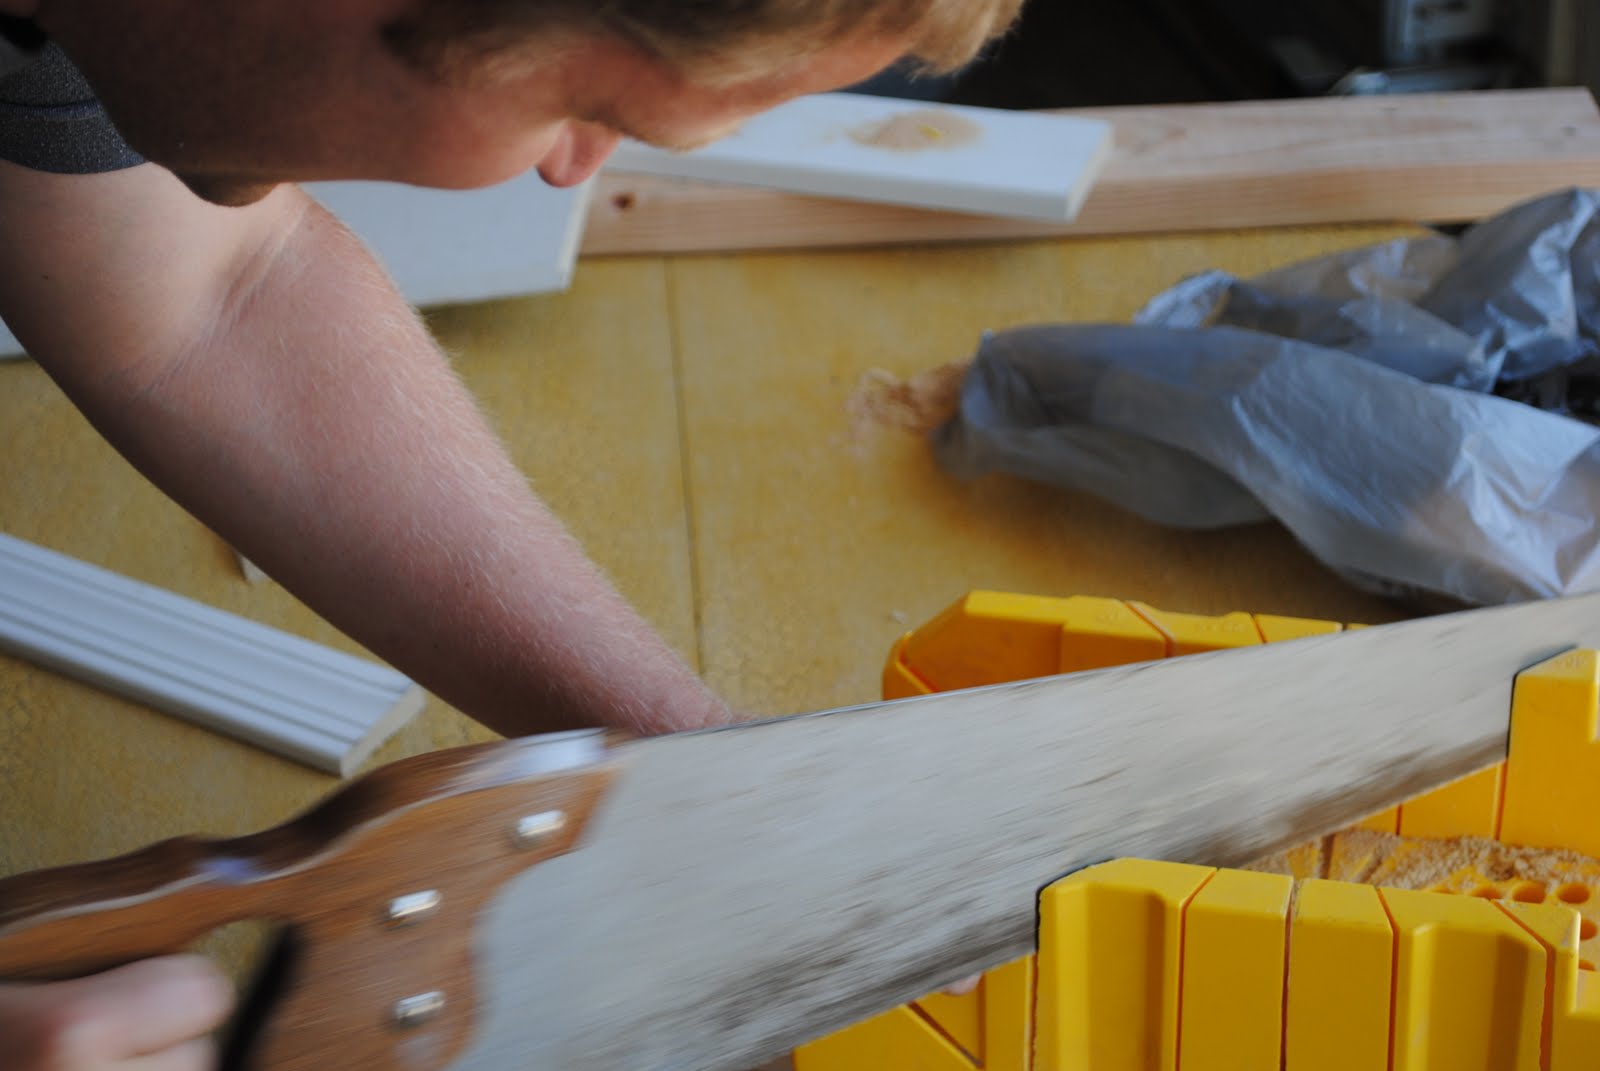 |
My sweet hubby, Craig, helping me make some cuts!
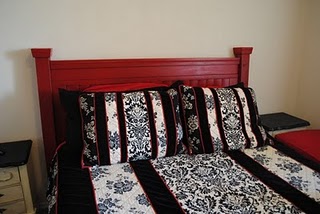
 Everything all put together 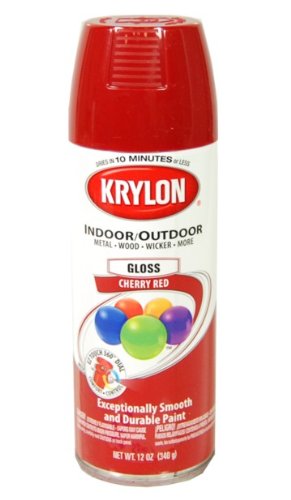 I used Krylon Cherry Red (I love Krylon spray paint!)
 After the first couple coats of paint
  close-up of the shutter  The final product! I love the red on the white wall since the landlords don’t want us to paint… (My pillows look a little sad and droopy! Time for new fluffier pillows!) What do you think?? |

Woweeeee! You did an awesome job! I’m always afraid of bright color, but this looks awesome against the white background! Your bedding is gorgeous too! I can’t believe you made an old shutter into a fantastic headboard! So creative!
wow! Hopped over from remodelaholic. I love the way this headboard looks! You did a great job.
gail
So creative. I have an old shutter just hanging out, great idea. How’d you get such a smooth finish with the spray paint?
what a clever idea!!!!
Saw your headboard on Remodelaholic and had to come compliment you on your work. It is stunning!
I saw you on Remodelaholic, and that makeover is a purely stunning!
THANK YOU ladies for the sweet comments! You are all so nice!!! 🙂
Pine Tree Home –
I was very nervous about using spray paint. My dresser (my first post) was my first time using spray paint on furniture and really there is no easier way to paint furniture! I learned how here… http://www.allthingsthrifty.com/2010/04/painting-furniture-101.html
Thanks for stopping by!
I love this headboard – maybe you would honor with a tutorial on how to make it. Awesome job!!!!
I love when people take something and re-invent it not for it’s intended use. Looks fantastic. Great creativity!
ohh I LOVE this!! great job!!! IT’s sooo cute!! Btw we have the same bed spread. 🙂 I love it!
Love this! Not only is it budget wise, it looks so good and the color with your bed linens is perfect. So very clever and resourceful of you.
Fabulous! The “how-to” instructions are terrific!! Love the red paint color you chose. You have created a treasure to be enjoyed for many, many years! Thanks for sharing!
Wow that is great! Who would have thought. Love it.
That is gorgeous! I love the color!!
I love your headboard, very cute! The color is great. Please stop over to my blog on Sunday for my Show Off Sunday Party. I would love for you to share this project with my followers.
http://houseofthriftydecor.blogspot.com/
what a great idea!
This looks Great!!!
You’ve been featured today at Sweet Peas and Bumblebees for our Fabulous Friday Finds. Your project is amazing!!!
http://www.sweetpeasandbb.blogspot.com/
fabulous! the frame around it is great!
That turned out great! LOVE the color!!
Sally
loveofhomes.blogspot.com