
DIY Christmas Tree – Savannah’s Pink Christmas Tree
I love to decorate Christmas Trees. Over the last few years I have decorated many Christmas Trees. Today I am going to teach you how to do a DIY Christmas Tree. I want to teach you a few simple steps that can help you decorate a Christmas Tree.
This post is sponsored by At Home. All ideas and opinions are my own, always.
Decorating a Christmas tree can be tricky. I am going to make it really simple and easy for you with just a few simple step.
How to decorate a Christmas Tree professionally
At Home has the most amazing Christmas Decor. It makes it really easy to do a DIY Christmas Tree.
Step 1: Shopping for your Christmas Tree
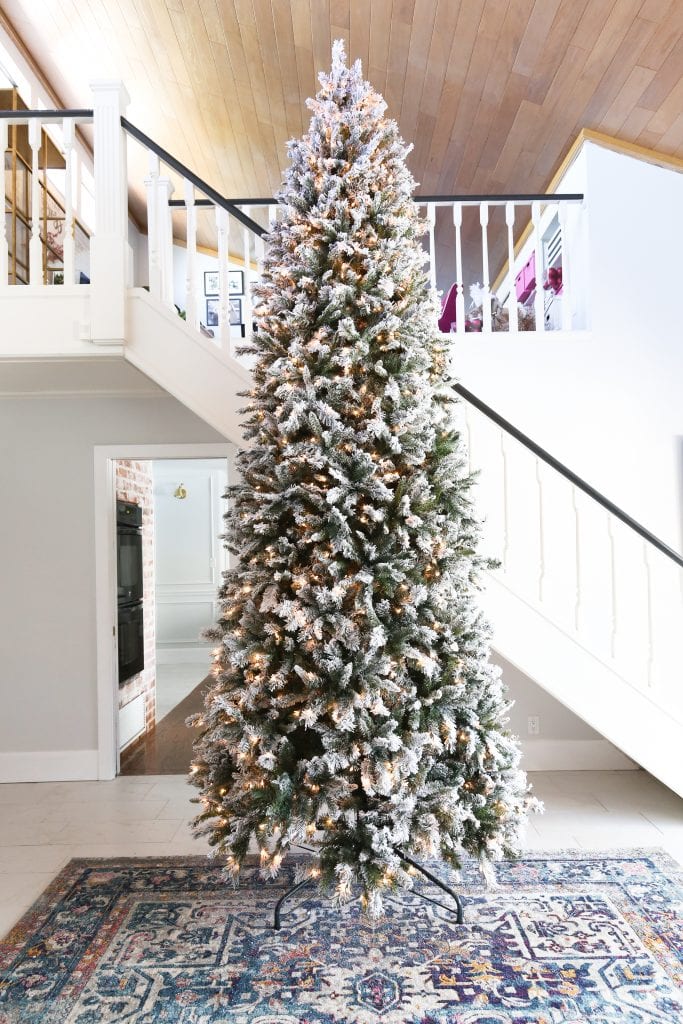
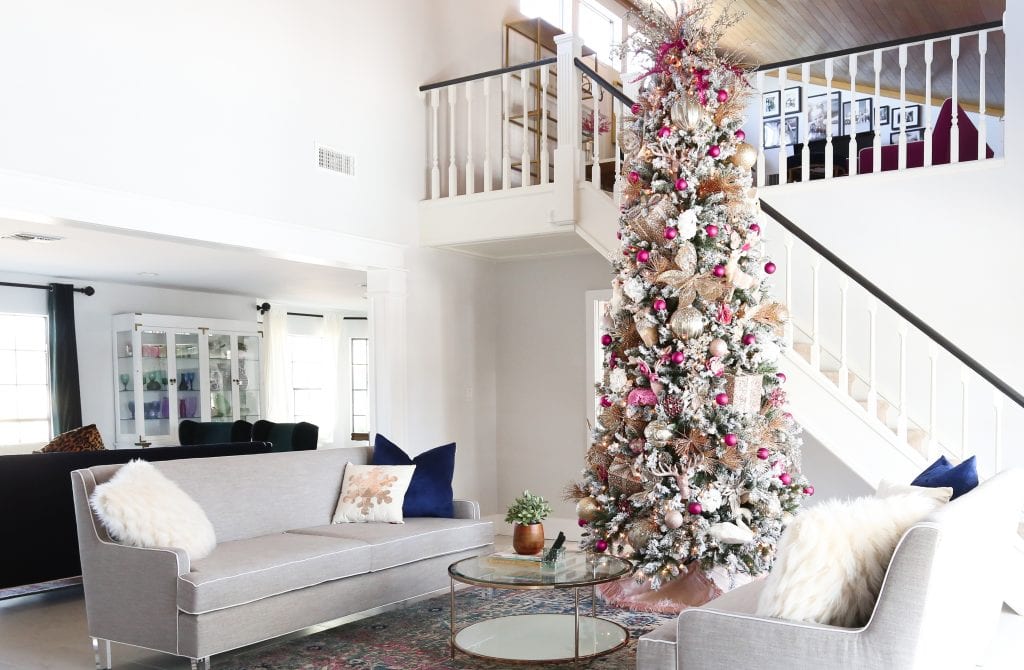
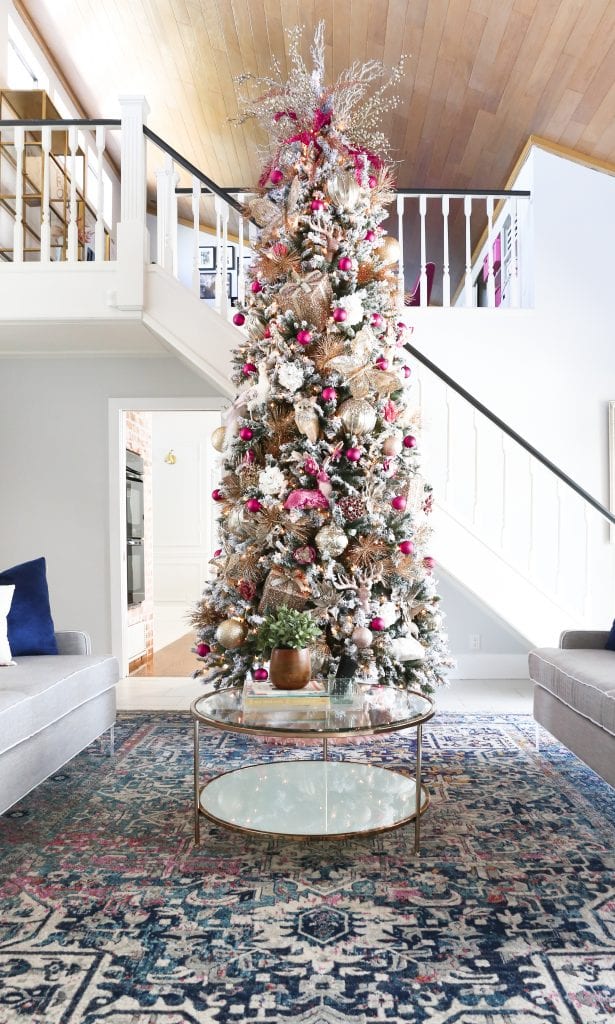
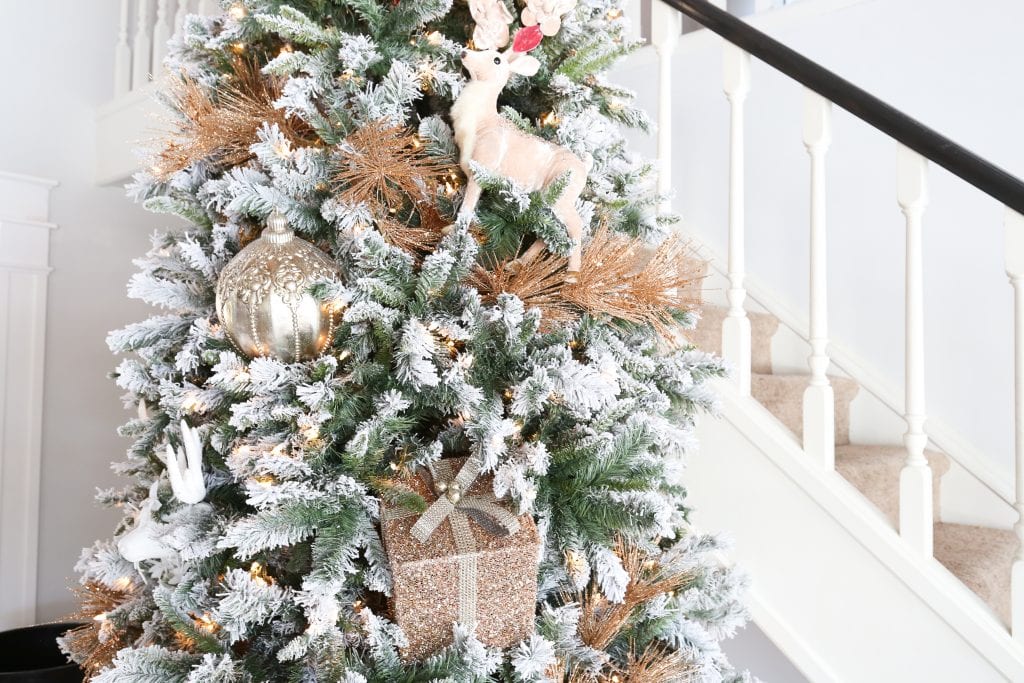
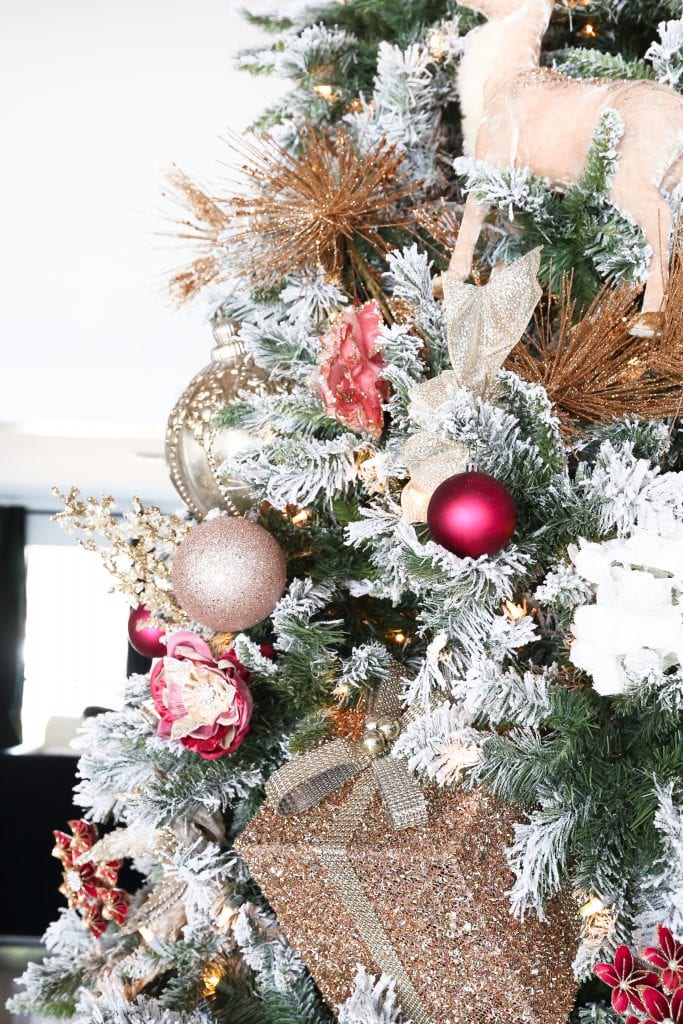
This year I wanted to do a flock Christmas Tree and I wanted to do a 12 foot Christmas tree and I found the perfect one. I got the 12ft Pre-Lit Keyser Flocked Pine Christmas Tree. I love this flocked Christmas Tree it is very full and the it’s a perfect size for this space.
Step 2: Shopping for Christmas Tree Decorations
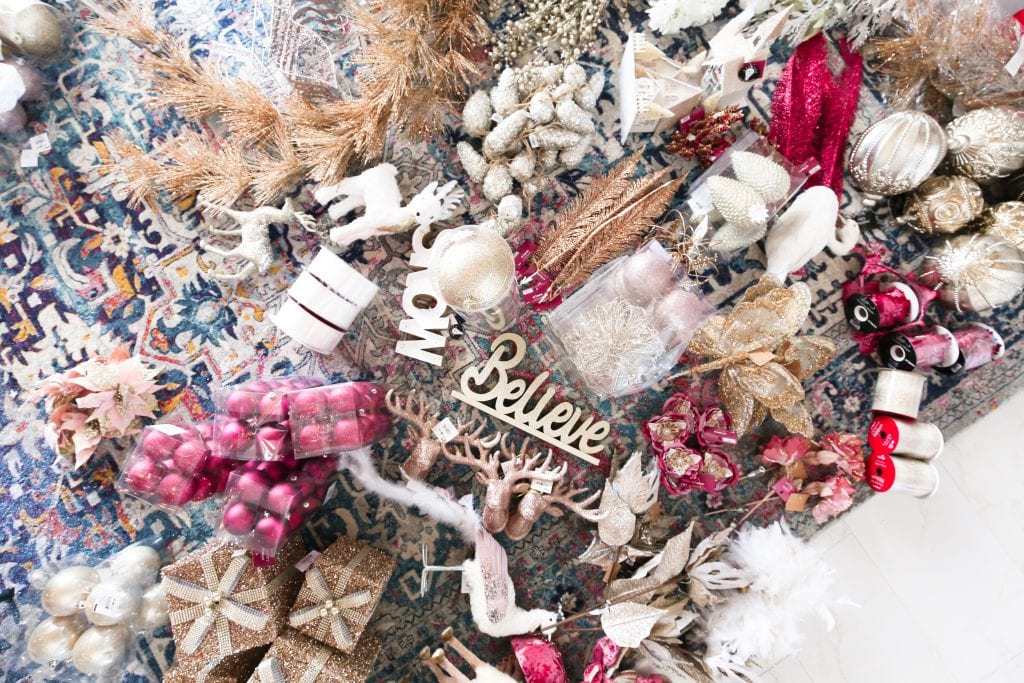
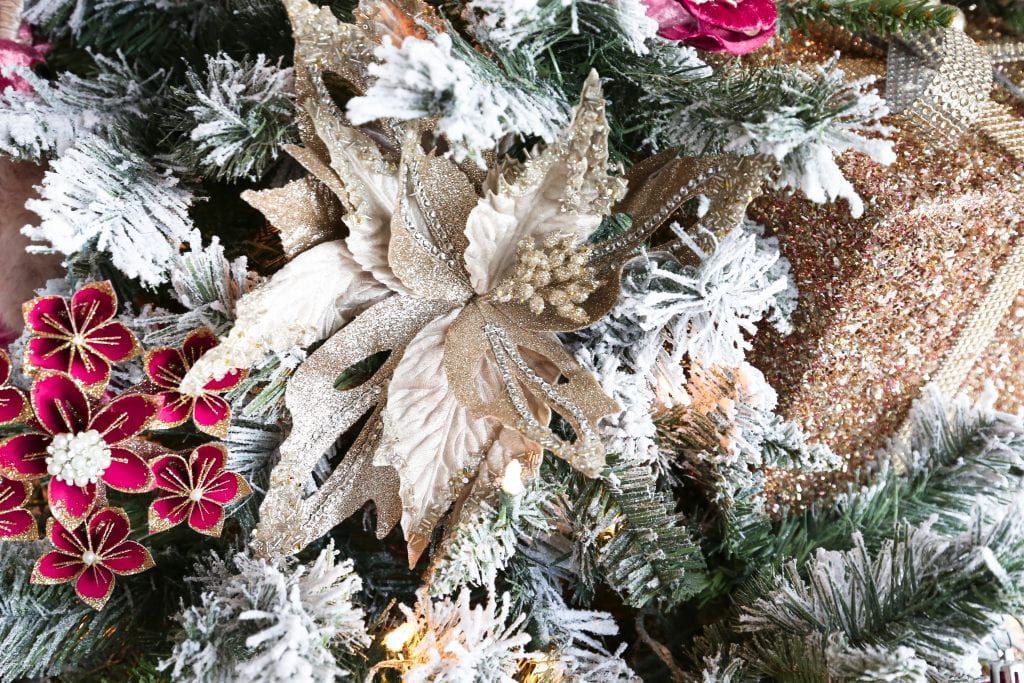
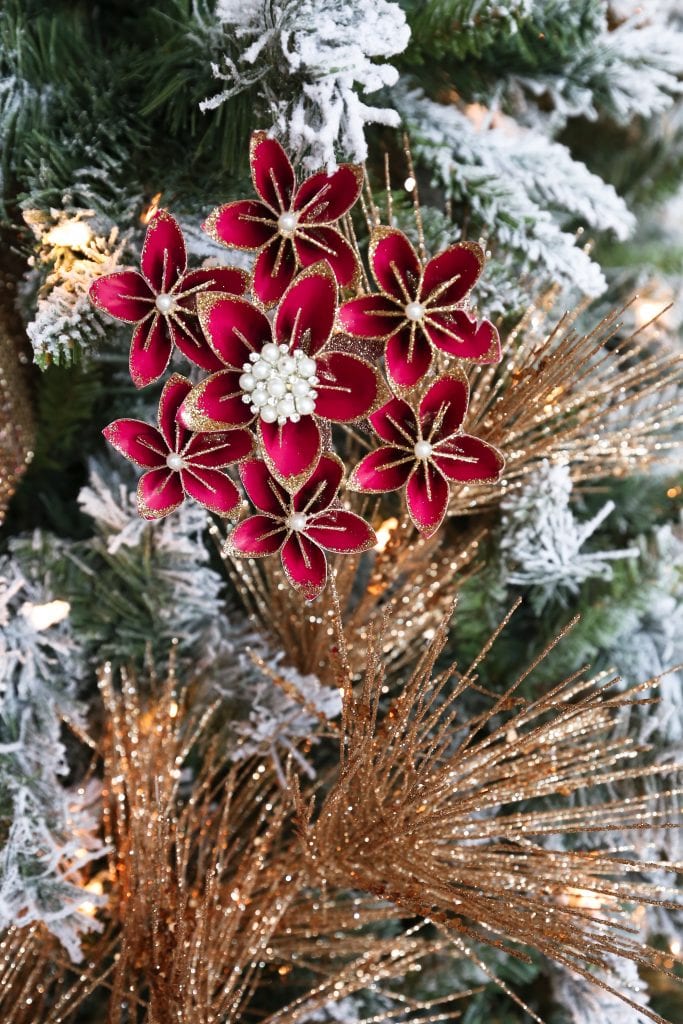
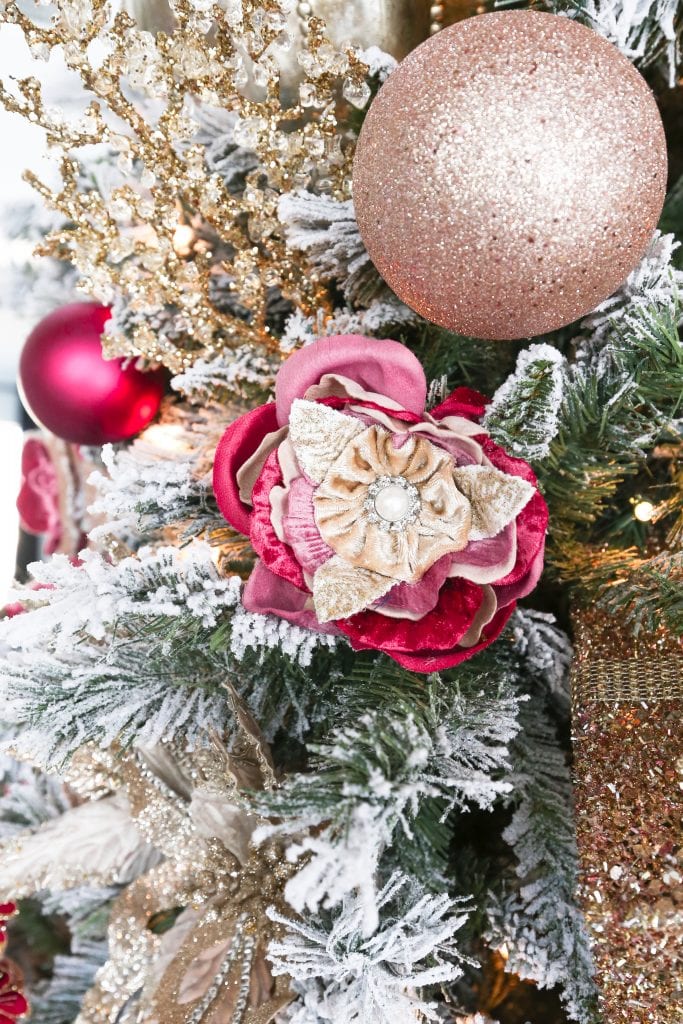
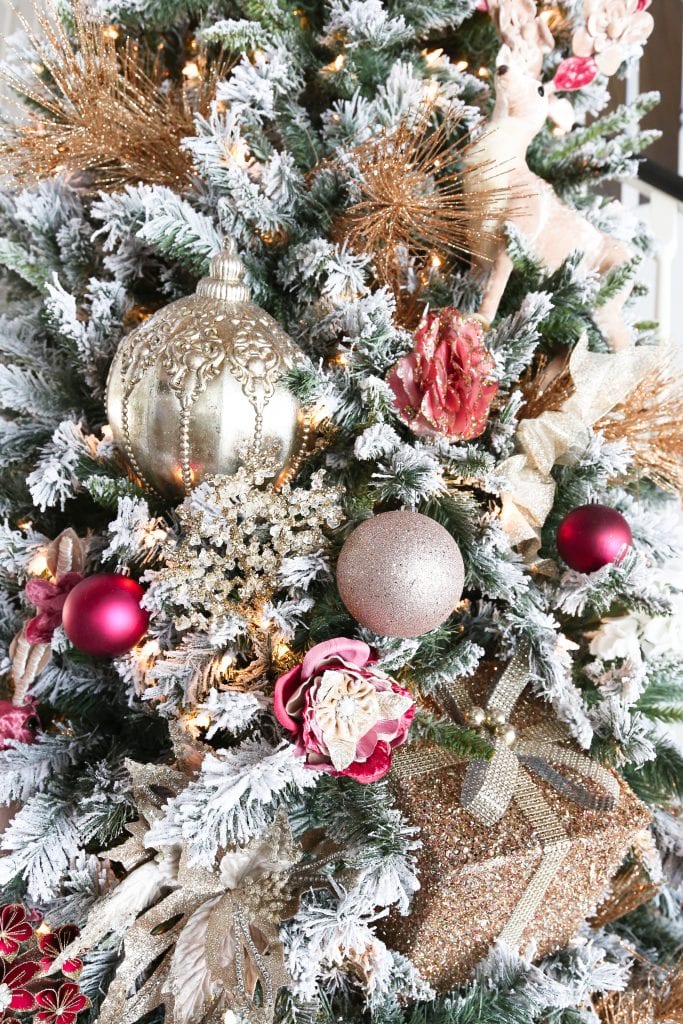
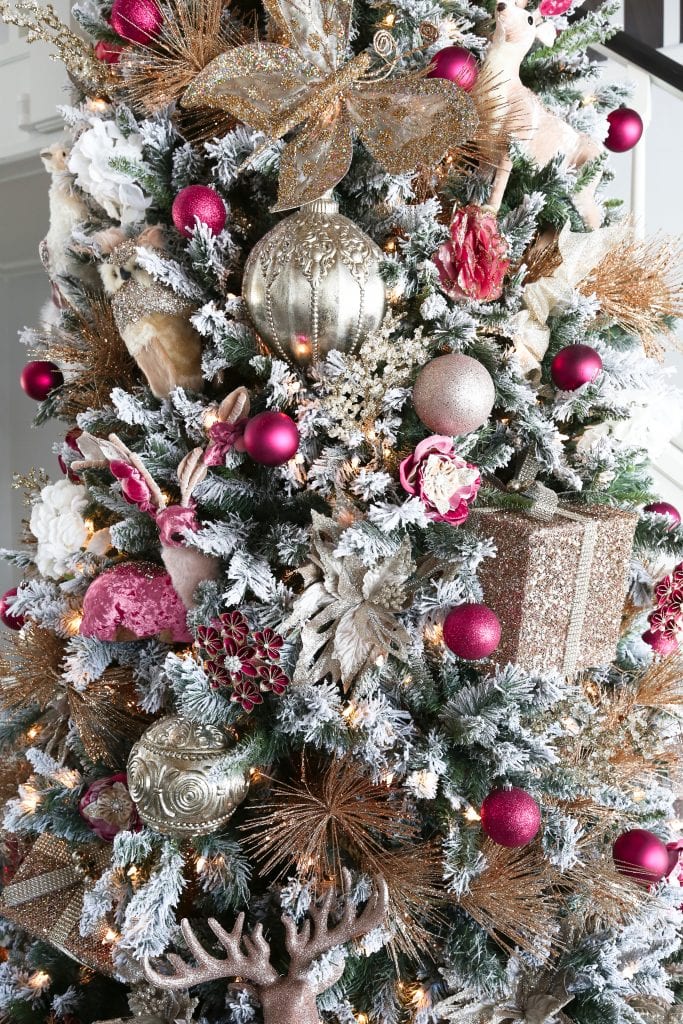
One of the best things about the At Home Store is that it is very easy to shop for Christmas tree decor. At Home stores are set up in different categories and different themes. For my living room Christmas Tree I wanted a fun pop of color and I love the Lavish & Luxe line.
Here are some of the decor items I got from the Lavish & Luxe Line:
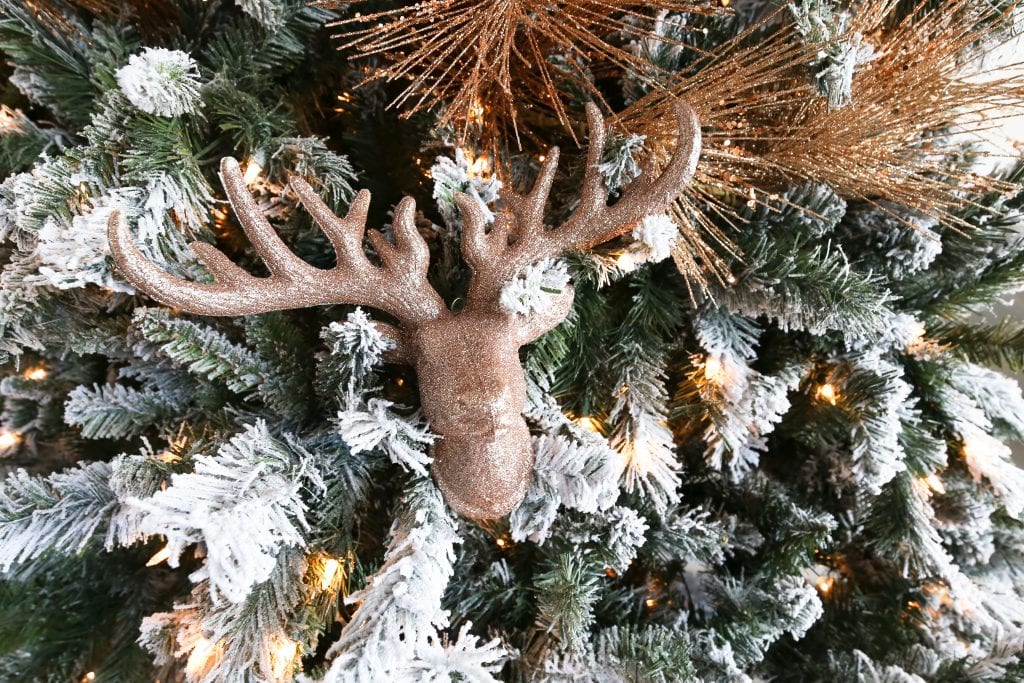
- PLASTIC DEER HEAD
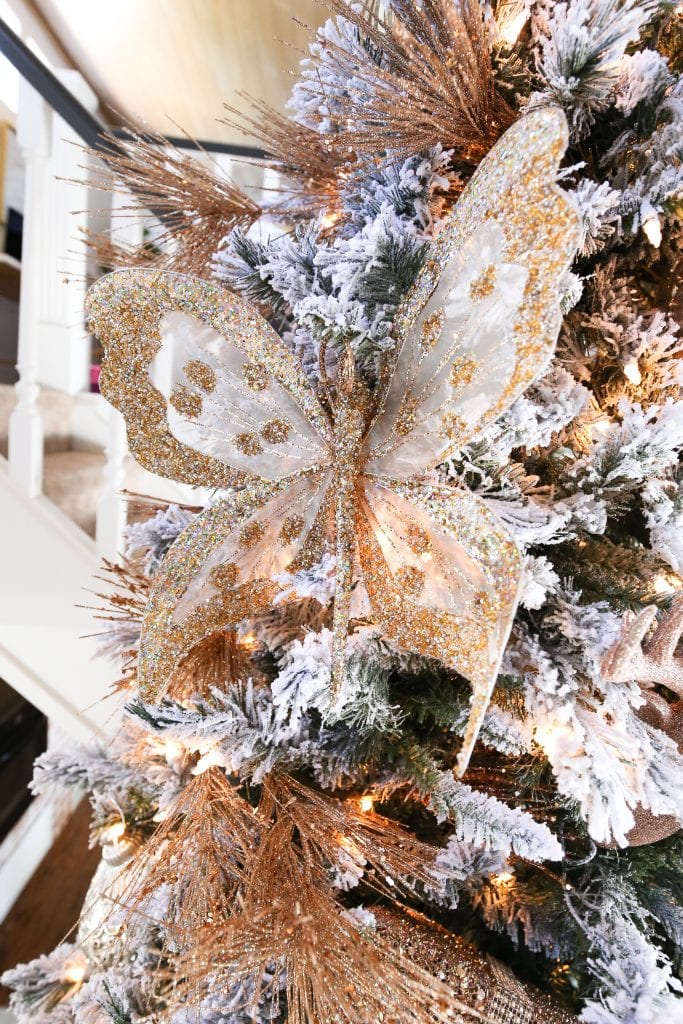
- 4.75IN RG GLTR BUTTERFLY CLIP
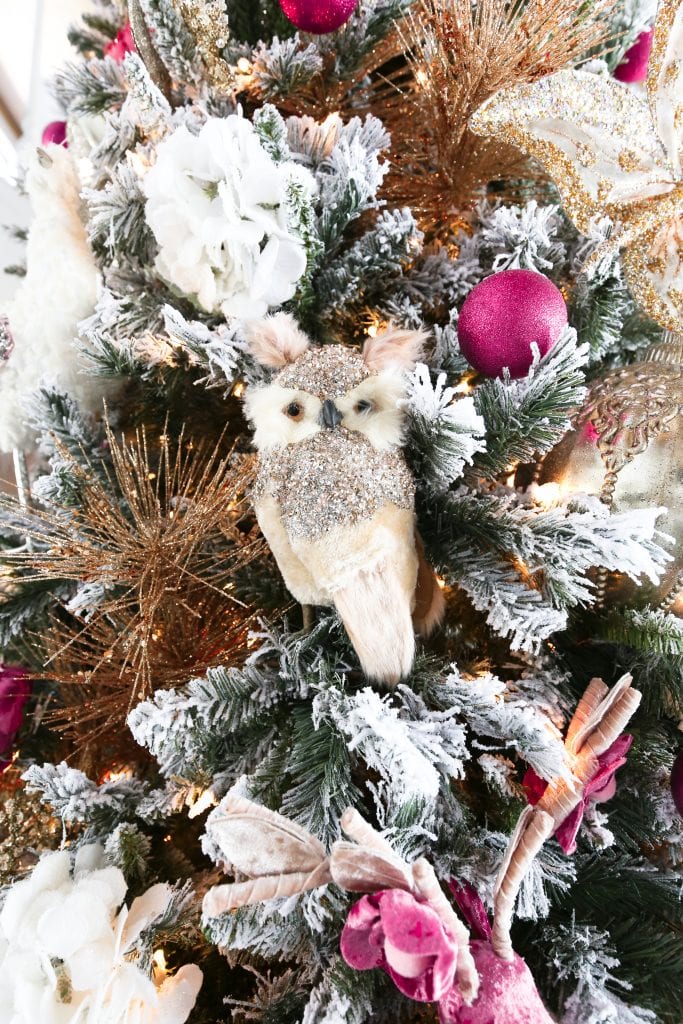
- 6.75IN STYROFOAM OWL
- 13.5IN SLEIGH TABLE
- 10IN STYROFOAM OWL TABLE DECOR
- 10.5IN PNK VELVET SITTING DEER
- 15IN PEACOCK CLIP ORN
- 5IN FBRC FLWR W/JEWEL CENTER
- 14IN PNK VEVLET STANDING DEER
- 5.5IN FLOWER SNOWFLAKE ORN
- 13.5IN POLYESTER ROSE STEM
- 10.5IN CHMP VLVT SITTING DEER
- 14IN CHMP VLVT STANDING DEER
- Champagne Glitter Sheer Ribbon- 4-in x 5-yd
- White Swan- Large
- 14IN STYROFOAM PEACOCK
- Gold Gift Decor Box- 8-in
- Champagne Glitter Crown Topper
- White and Gold Battery Operated LED Glitter Church
- 15 X 5-in Battery Operated LED Lit Snow
- Gold Gift Decor Box- 6-in
- 70MMX16CT CHAMPAGNE GLITTER
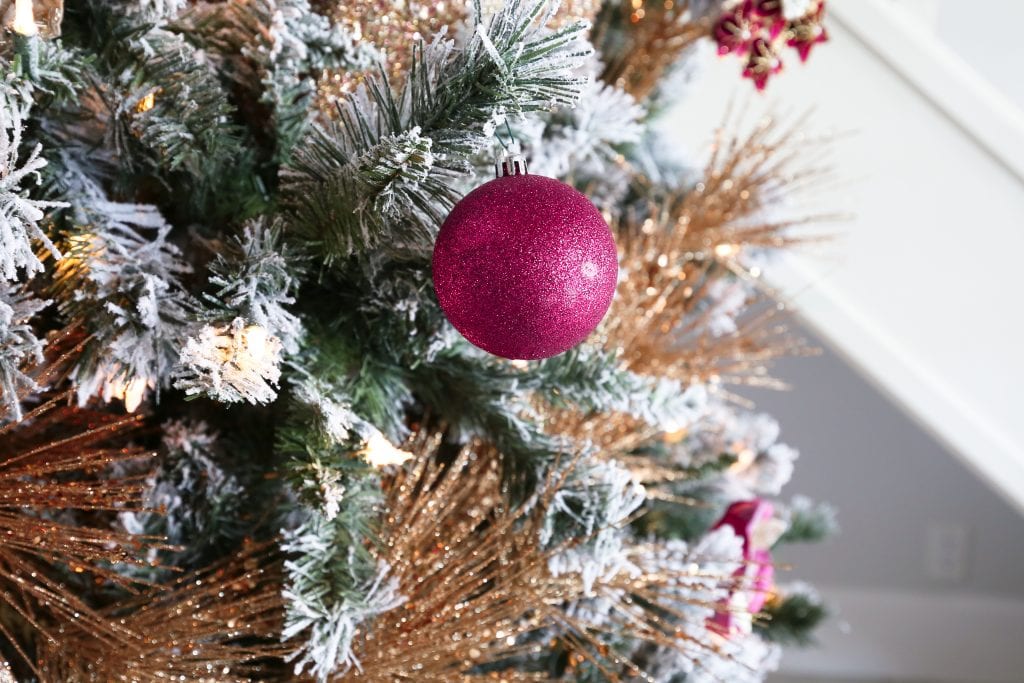
- 16CT 70MM DK RD PINK MATTE
- 16IN ICED TWIG ORNAMENT
- 6IN PLASTIC KISMIT/BALL ORN
- 8IN PLASTIC BALL ORN
- 11IN SHEER BUTTERFLY W/CLIP
- Champagne Flower Burst- Large
Step 3: Set up your Christmas Tree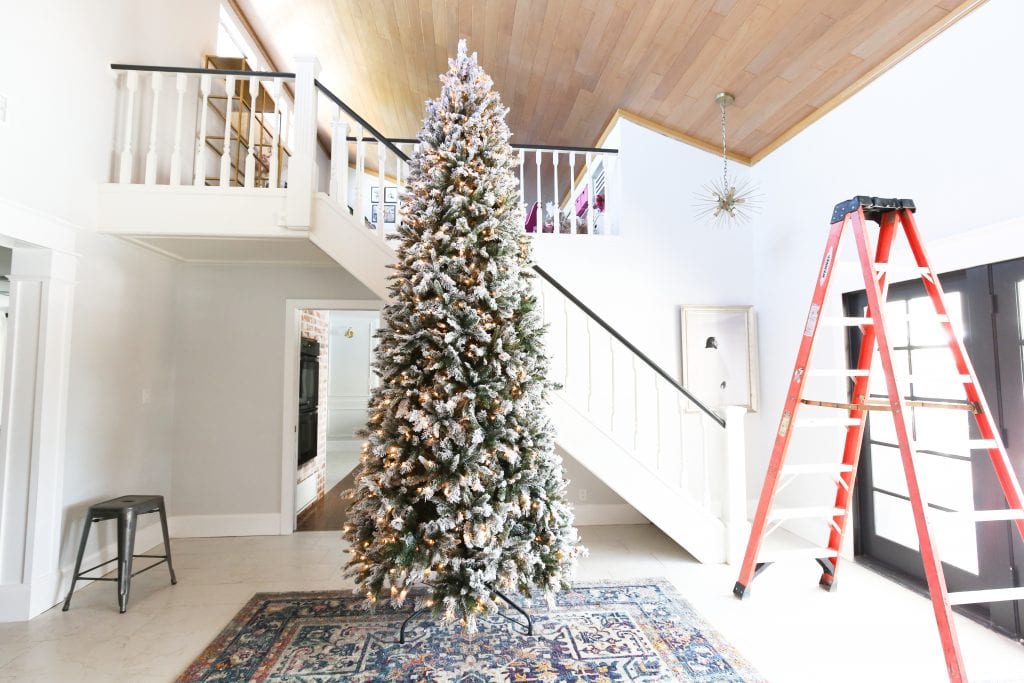
When you are setting up your Christmas Tree be sure to make sure you fluff it. I did need a 8 foot ladder to decorate this Christmas Tree.
Step 4: Big Items in the tree first
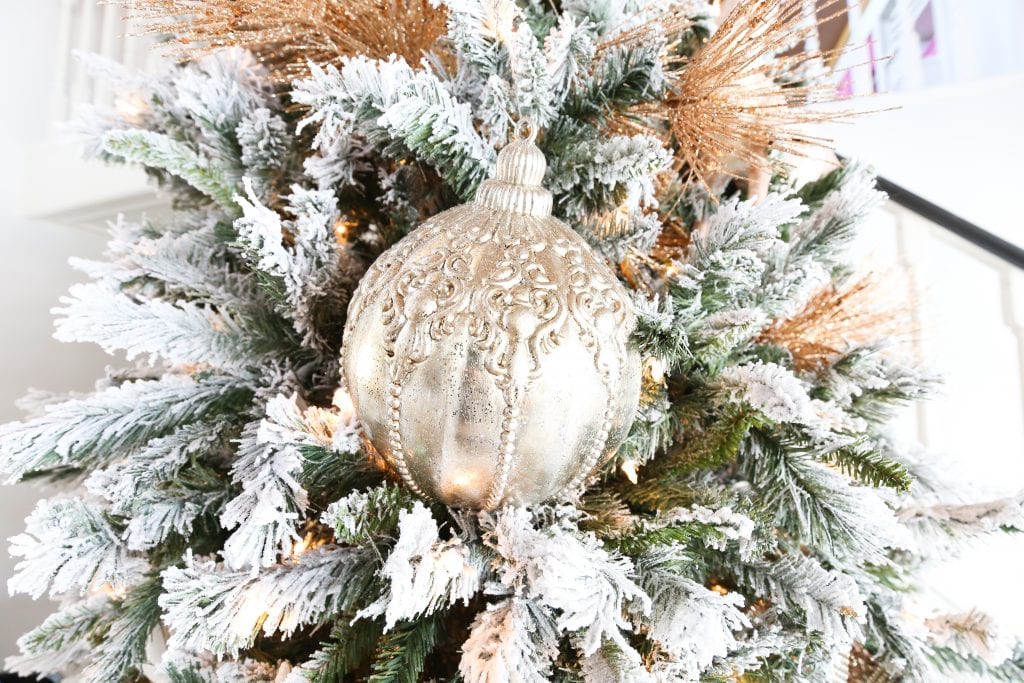
I love all these different size and shape large items that I got to put through out the tree. Some of my favorites are the 6IN PLASTIC KISMIT/BALL ORN, 8IN PLASTIC BALL ORN, 11IN SHEER BUTTERFLY W/CLIP, Champagne Flower Burst- Large.
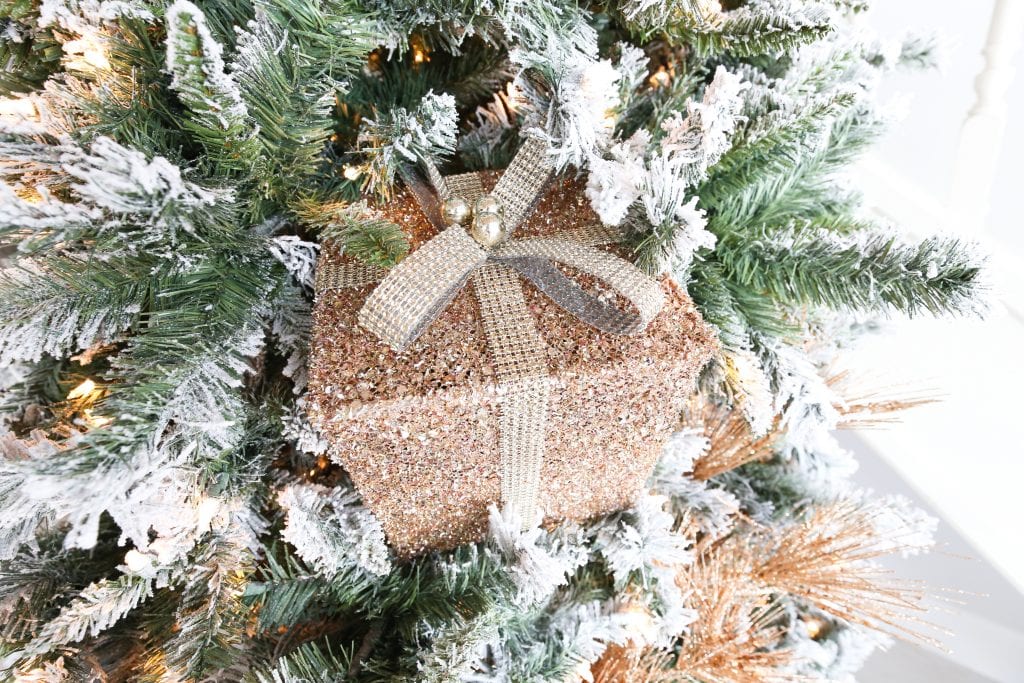
I also love this Gold Gift Decor Box.
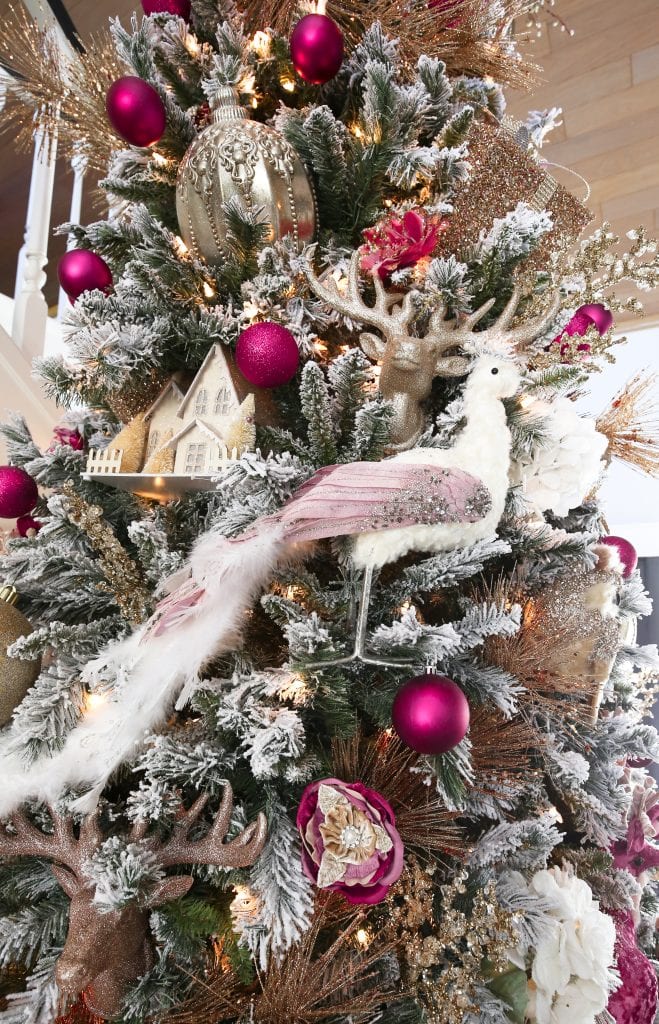
Step 5: Medium Size Items
I like to get at least 3 of each of the medium size items. I love these different medium size Christmas Decor because they are all different shapes and they all have a very different look but they still all work really good together.
Step 6: Add Filler items and Ornaments
To fill in some of the random holes in the tree I like to use filler products. Filler products can be boxes of ornaments, ribbon or different items that are only a few inches in size.
Step 7: Top of the tree

I like to use stems and branches on the top of my Christmas Tree. I think it adds so much. It will make your DIY Christmas tree look like a professional did it.
Step 8: Finish off your Christmas Decorations
To finish up your DIY Christmas tree be sure to add in some Christmas decorations.You want to make sure that you’re space is totally complete.
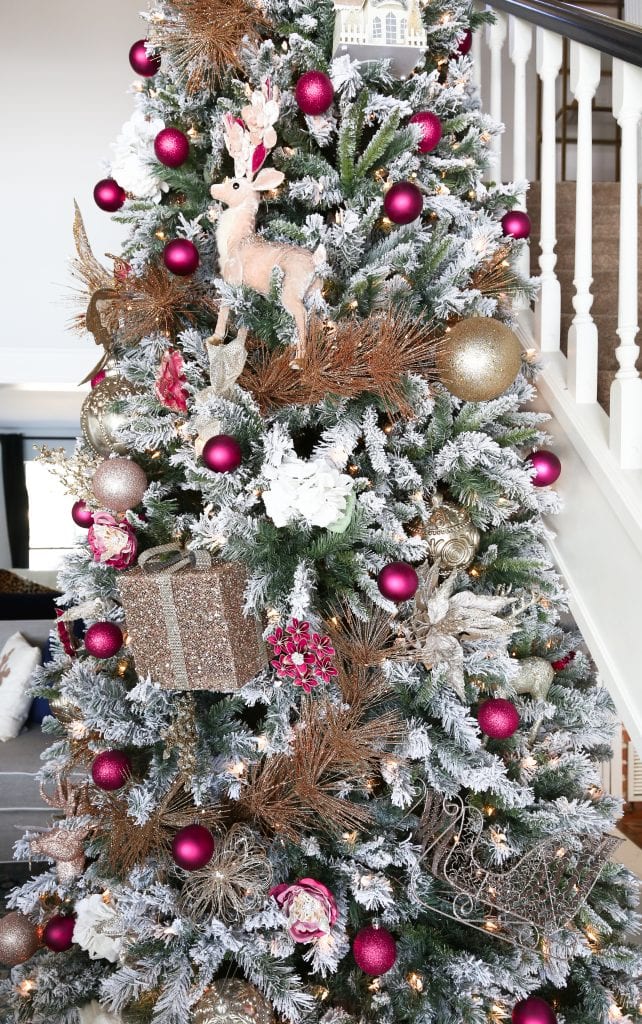
I love how this years tree turned out! What is your favorite thing about my living room DIY Christmas Tree?
For more Christmas decorating ideas, check out:
It’s absolutely beautiful just like you! I love the pink! ?Happy Holidays