
DIY Campaign Style Nightstand – Ikea Rast Hack
This DIY Campaign Style Nightstand tutorial is an easy DIY nightstand that anyone can make. I swear ever Ikea Rast Hack is so cute and fun! This Ikea Rast nightstand is inexpensive to buy and customize for your own home!

This is probably the easiest way to dress up a plain ole’ Ikea Rast Campaign style Nightstand, other than just painting it. I really like these DIY nightstands because they provide a good amount of storage. Six, good sized, extra drawers for 2 DIY nightstands is pretty impressive and definitely helped us when trying to find storage in this small bedroom. Also, for $34.99, they can’t be beat.
Ikea Rast Hack
The only problem with the Ikea Rast Nighstand is they’re not very cute when you buy them, enter easy Ikea Rast Hack. They need some dressing up for sure. Today I’m going to show you have to make your own campaign style nightstand ikea rast hack super cute! Don’t worry this Ikea Rast Hack is super easy!
 DIY Nightstand Materials:
- Ikea Rast Chest of Drawers
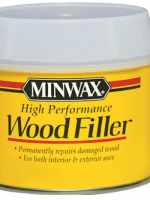
- Wood Filler
- Sandpaper
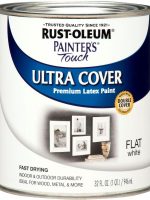
- Paint
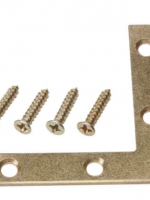
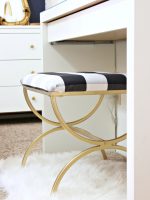
- 12 – 2″ Corner Braces*
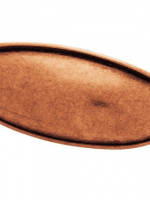
- 3 – Cup Drawer/Cabinet Pulls*
**If your corner braces and drawer pulls don’t match for your DIY nightstand, spray paint them to match. I did that because I wanted mine gold, obviously.
Ikea Rast Hack Instructions:
- 1. First, assemble your Ikea Rast nightstand according to the directions. Do not install the drawer pulls that it comes with.
- 2. Use wood filler (according to the directions on the bottle) and fill the predrilled holes on the drawer fronts. When dry, sand them smooth with sandpaper.
- 3. Paint your nightstand whatever color you’d like. I used white and poured a little bit of Behr’s Canton Jade into the white to give it just a hint of mint color.
- 4. When the paint is completely dry, install your corner braces. This was the most time consuming part, believe it or not because there are 48 screws! Sheesh!
- 5. Measure for the center of the drawer and install your drawer pulls. We drilled holes for the screws after measuring where the center was and installed them pretty quickly.

As you can see up close, we got a little lazy on the second night stand and realized the braces stay fine without all 48 screws. I dunno about you but I’m cool with skipping a few of the 96 screws on 2 nightstands. 😉 Here’s what they look like on either side of my bed. I really just love them!

I just bought a 3rd Ikea Rast Nightstand to dress up for my boys’ room makeover that I’m working on. I took a little different approach on that one. Can’t wait to show you!
If you liked this DIY Nightstand / Ikea Rast Hack or want more details on this room, check out:


Super cute! Love that color and the gold accents!
We recently revamped a RAST dresser ourselves! 😀 Made is look mid century in style by staining the outside in Kona brown stain and painting the drawer fronts white. We added tapered legs.
Forgot the link in the first post. D’oh!
http://www.pinterest.com/pin/130041507965236791/
Wow!!!! LOVE the addition of the legs Jess!!! Well done!
So fun! Sadly my nearest Ikea is about 1 1/2 hours from my house—can you believe I have never been to one 🙁 I’ll have to check out some yard sales for a new dresser to redo!
Katie! I drive to Canada to my Ikea which is an 1.5 hours away too!!! You have GOT to make the trip! I go like every other month! XO – Mallory
I love everything that got do with gold . So naturally I love this! I like the handles you choose it makes it totally different. Worth it too drive to Canada wow !
You have done an amazing job!!! such a classy dresser now 🙂 I’m currently putting a page together on gold color accessories and I love to add your room and link it from there….
Love that lamp! Were did you get it?
Hi Sandy! It’s from Home Goods!
I love it! Can I ask where you got the lamp on top of the nightstand?
Hi Julie! It’s from HomeGoods! 🙂
Is the wall in the back wallpaper? If so, where did you get it?
Hi Blair!
No it’s actually made with a gold paint pen with hand cut wood scallops applied over the wall. You can see the tutorial here:
https://www.classyclutter.net/2014/05/diy-wood-scalloped-wall-tutorial.html
Thanks!!
Hi there I love your diy dresser and can’t wait to make my own!! Where is the hanging light from? Thanks!!!
Hi could you please tell me what kind of paint you used please x
This is completely amazing! Great work.
Love the night stands! Could you tell me where you go the chandelier? Beautiful!
I’m so in love with this!! Quick question though: what type of paint did you use? Semi gloss? High gloss? I can’t wait to do this for baby #2 nursery!!!! Cheers!
Hi Kate! I always use Satin or Semi Gloss on my furniture. This is semi-gloss. I recommend it for kids’ rooms because it wipes clean easily!
Thanks!!!
Love the chests/nightstands and I’m crazy about your wall treatment. I clicked over to the tutorial and it sounds easy that I’m seriously considering trying it. Thanks and Great Job !! = )
This is awesome! I was thinking of getting overlays, but they cost more than the rast! Thanks for sharing, I’m copying it for sure for my daughters nursery drawers!
hey when you say “you added a little of the jade color to the white” how much is that exactly? cause i definitely want JUST a tint ha
I just added a few tablespoons at a time and stirred until I liked it. I don’t know exactly. 🙂
Hello, I stumbled across your blog and I really love it! Can you tell me whether or not you had to sand the surface of the dresser before painting it?
Yes, we did sand the dresser before painting it!
I have two of these dressers ill be redoing soon so was excited to see yhis post. Where did you get lamps from? They are gorgeous!
Thanks so much! The lamps are from Home Goods
I like this blog too much, You just picking very new Ideas Which making this blog so interesting, thanks
Yes, the gold backdrop for the shoes does give it a classy look. It says a lot about a person, attention to detail.
Amazing…!!!!