
Dining Set Makeover + Plastic Plate Wall
My friend here in New York asked me for some help on redoing her existing dining table and decorating the wall it sits against. You know me, I jumped at the chance to do a fun furniture makeover/decorating project! She is renting a darling house but her landlord won’t let her paint or do much to the home other than general decorating. Luckily, she has cute paint colors, gorgeous wood floors and a fun layout in her home.
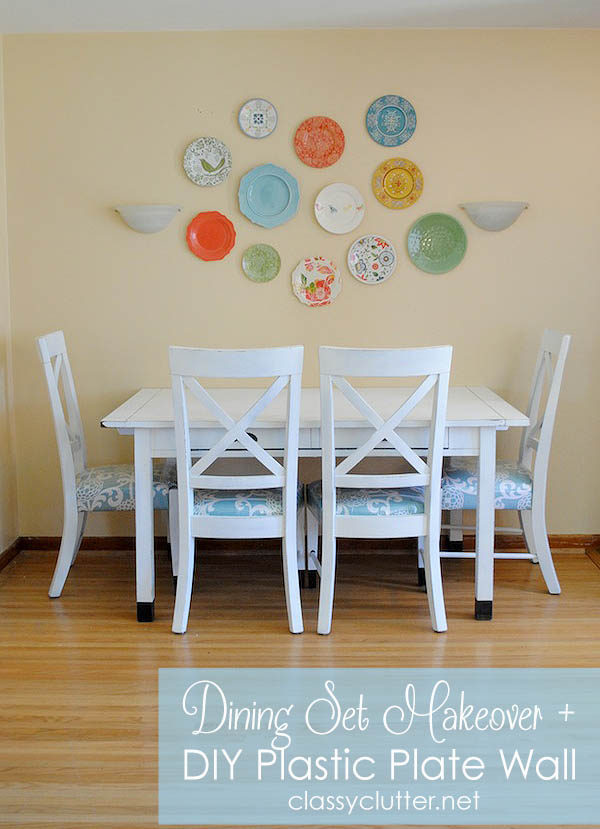
We started with this mission style table that my friend wanted to update. It’s a great, solid wood table with comfy, sturdy chairs.

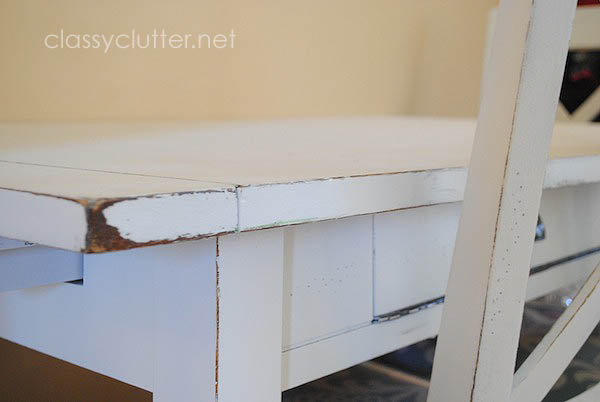
First, I sanded it, primed it (with Spray Kilz primer) painted it with Behr Swiss Coffee in Semi gloss. Whenever you paint a table top, I suggest at least semi gloss sheen so it wipes off easily. Then, seal it with Polycrylic. I don’t like to use Polyurethane on white because it can yellow over time and no one wants that. 😉 Then, we distressed the entire table and chairs. Distressing is awesome (especially when you have kids!) because if it gets dinged or scratched over time, it’s totally not noticeable!
The chair fabric came from Joann’s home decor fabric. (purchased April 2013) and we used a staple gun to cover the original fabric and batting. We also added clear vinyl over the chairs so they don’t get stained. A MUST have with little ones in the house.
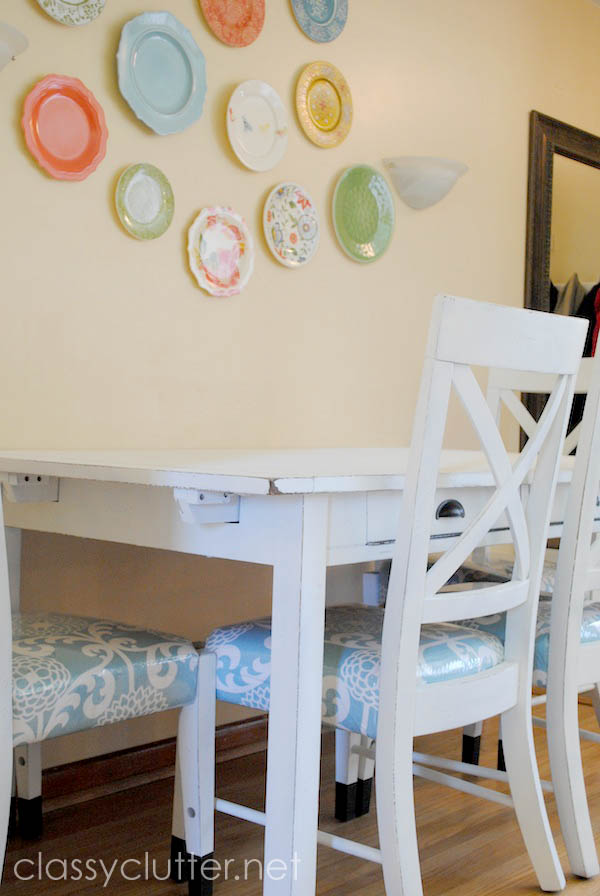
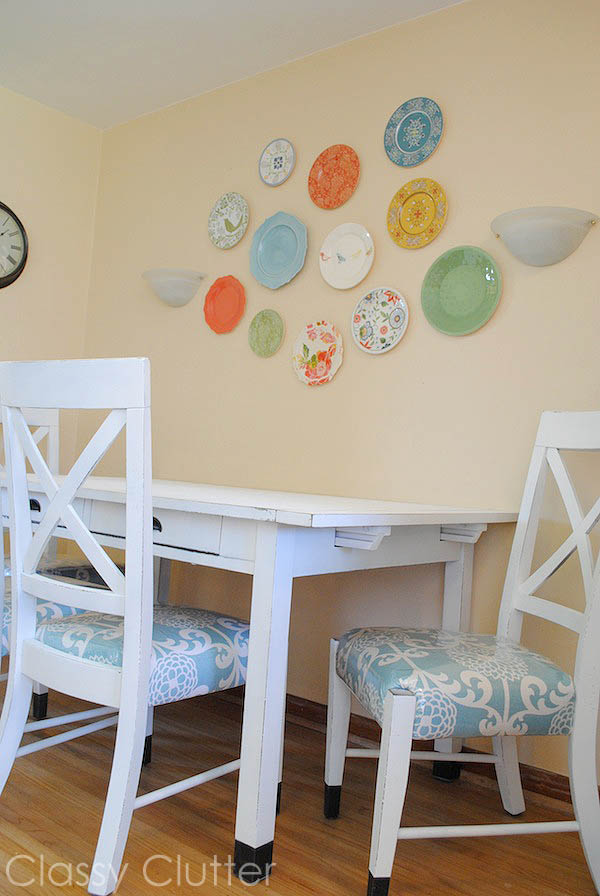
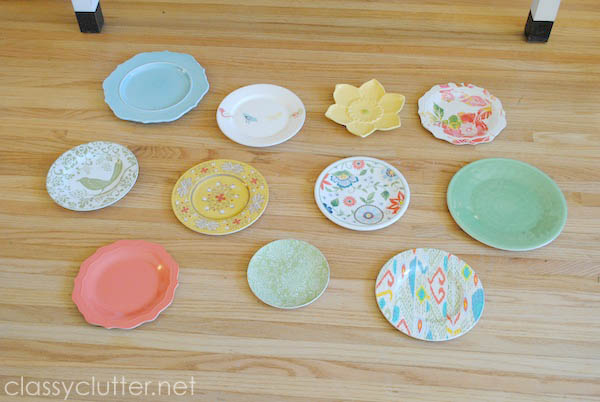
Once the table was done, we laid the plates out on the floor to get an idea of how we would hang them. Kwynne bought the plates from Target (and 1 or 2 from Pier 1). All except two of these plates are plastic! You totally can’t tell. They look so rich and beautiful. She got them on Clearance at Target, making for a pretty inexpensive (adorable!) plate wall.
We used 3M Command strips to adhere them to the wall. Landlords don’t like a million holes in their walls. 😉 The 3M strips worked beautifully, even on the 2 ceramic plates that were a little bit heavier than the plastic ones. This was the easiest way and we didn’t need nails or plate hangers. We began at the top and hung the plates one by one. The sconces were a little awkward to work around so we just made minor adjustments as we went.
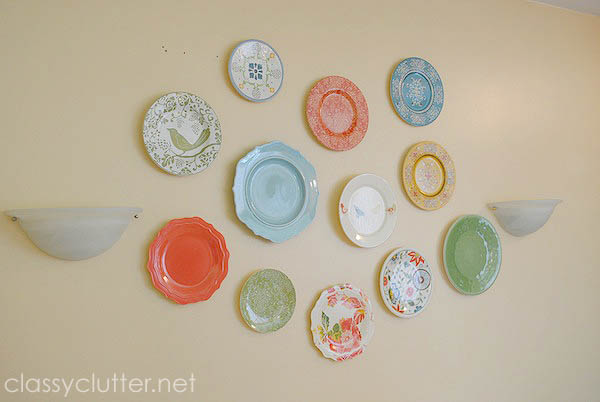
We later added a white vinyl “H” to the blue plate to personalize it a bit for her family and it is super cute! I’m sad I didn’t snap a photo of it.
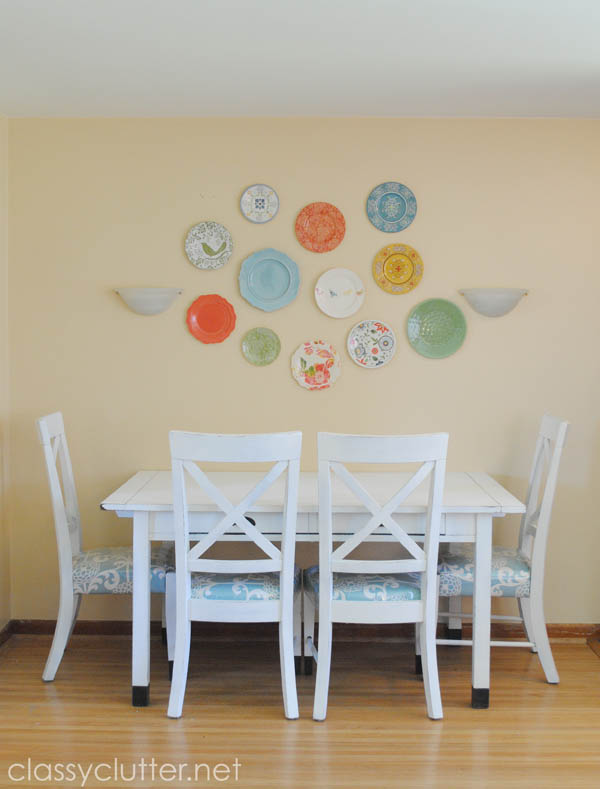
We both really love how it turned out and it makes her whole dining area look so much brighter and fun!

Doesn’t it look great!? What color is your dining room table?


This is SO CUTE! I’ve had a big broken clock on the wall by my dining room table and I’ve been wanting to throw it away but didn’t want a huge empty spot on the wall…I just might have to do this! Target has the cutest plates! Thanks for sharing this, I’m not a DIYer but I think I can pull this look off! I love the brown to white table, too! It opens up the space so much! Nice work Mallory!
Hugs!
Jen @ Yummy Healthy Easy
cute idea!
kisses
Love the table and chairs and the plate wall is amazing. How fun is this. Love it. Hugs, Marty
What a cute idea. I’m always picking up plastic plates at end of season sales but I never know what to do with them. Now I have an idea. Water Damage Menifee CA
So cute, Mallory! Love it!
Love the table makeover and the plate display! The whole space just looks fabulous now!
I noticed the wall the table/chairs is on is a nice neutral color now, what a difference to go with the white table/chairs. Great difference in many ways. The plate wall sure makes a pretty focal point. love the plates, colors and patterns. It’s hard when you rent to be able to decorate without painting walls, been in that position for too many years before we finally were able to buy.
Course now I’m waiting to get my walls painted in our mfg. home, for almost 7 yrs. I’m not able to or they’d be painted, we have the paint. Think this subject is better left alone, lol.
You did great job redoing the table/chairs. Love the fabric on the seats, so clean looking and bright.I’ll have to look for that fabric at our Jo-Ann’s. Happy week
We provide service furniture made in Canada and promise that you will be completely satisfied with your purchase on Dining set, Living Room chairs, Sofa beds upholstery beds, upholstery chairs, tv cabinets, cabinets, office desks, office chairs, dressers, sofas, sectionals, armchairs, chairs, dining chairs, dining set, and bed. Just Click and Visit our site http://www.forgali.com
What a stunning transformation! I can’t believe that is the same table. The plate wall is gorgeous, I never thought to use plastic plates, I will keep my eye out for pretty plates. If you get a chance, please share this on my linky party: http://suburbsmama.blogspot.com/2013/06/sunday-linky-party-12.html
LOVE LOVE LOVE those plates! and the table…and the chairs. OBSESSED!
LOVE this DIY!! I follow Kwynne on IG– and totally recognized this post immediately 😉 Great job ladies— and super smart idea for the clear vinyl on the chairs to “kiddie” proof it too!!
How cool! Kwynne is the best!!! Thanks for stopping by our blog! 🙂
Love, love this makeover! What kind if command strips did you use?
This is an awesome little project! I think it turned out so beautiful and I love that you were able to use command strips instead of covering the wall with a bunch of nails. My favorite is definitely the beautiful distressed table, it is great for having messy kids! Thanks for sharing!