Bake Craft Sew Decorate: DIY Buffalo Check Pillow
Welcome back to our month long Bake Craft Sew DECORATE series! If you’re new or haven’t visited in a while, we will be having Christmas and Holiday decorating ideas here on Classy Clutter!! We will be teaming up with our blogging friends Cindy, Mique, and Leigh Anne! Cindy will be doingsewing ideas on SkiptomyLou, while Mique from Thirty Handmade Days, will be posting craft ideas, and Leigh Anne from Homebased Mom will be posting delicious edible gift recipes. We’re super excited about it so come back every day in November for another Holiday decorating idea!
Hi friends! I’m Rebecca from The Crafted Sparrow, I’m super stoked to be visiting my sweet friends Mallory & Savannah today for this fun series!
Creating Christmas and holiday decor is one of my most favorite things to do, I love coming up with fun new ideas each year to match whatever theme I’ve chosen…it’s kind of my way of making sure I get the custom look I want while not breaking the bank to decorate.
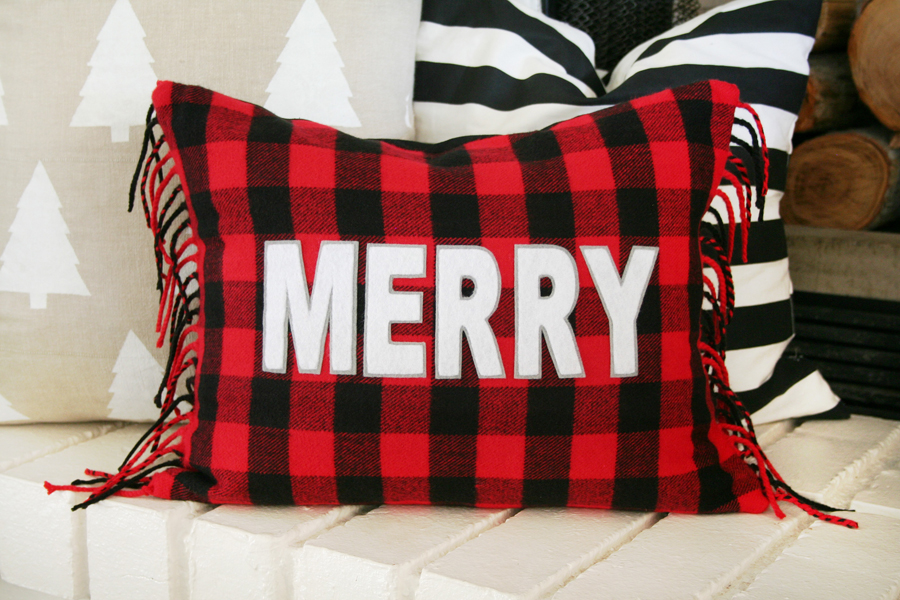
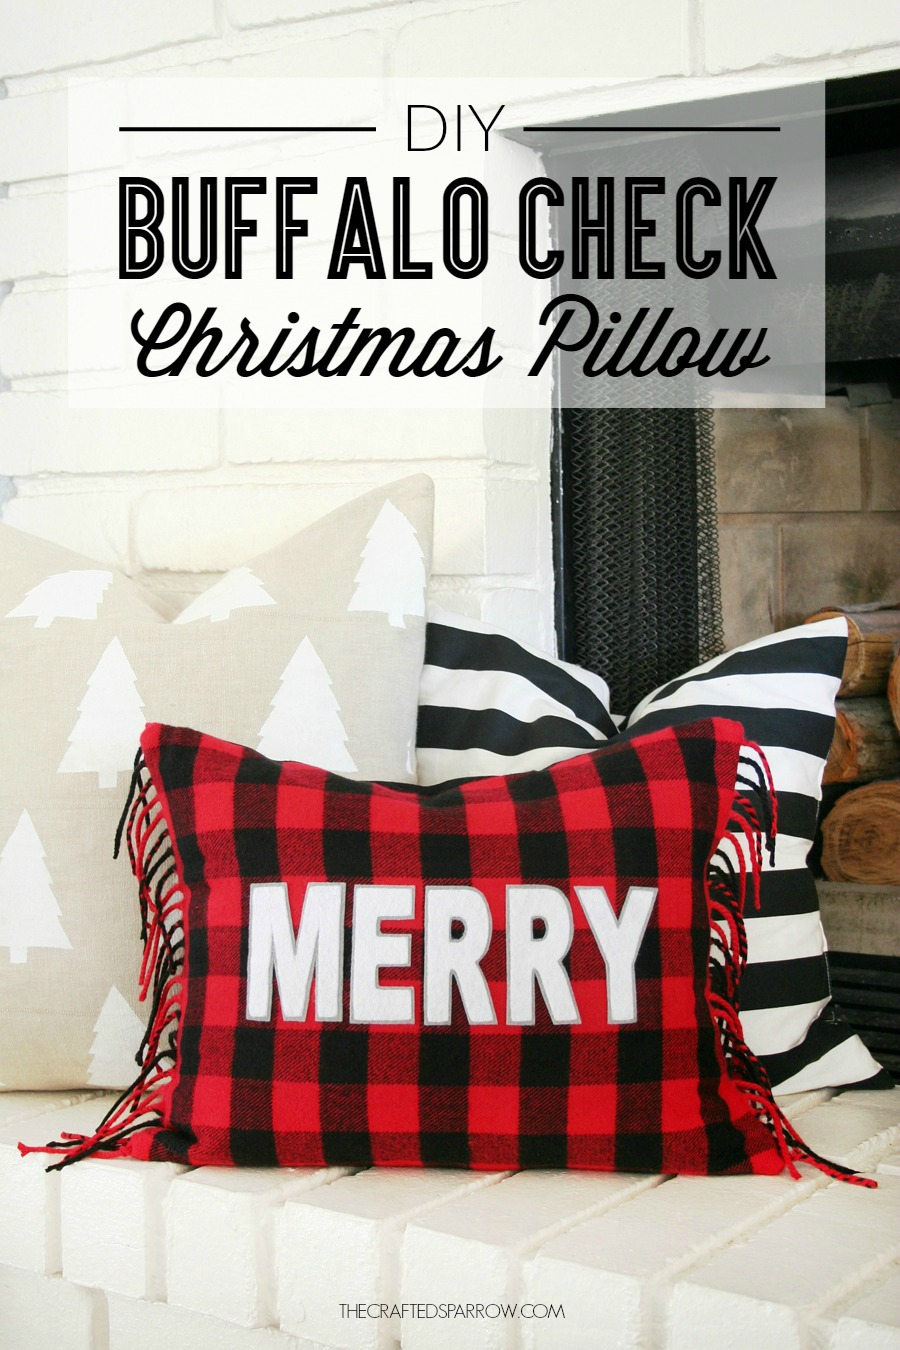 Today’s project is the perfect example of taking something a little unexpected and transforming it to fit a decor need. I so excited to show you how I transformed an inexpensive scarf I ordered online last year into this awesome DIY Buffalo Check Christmas Pillow.
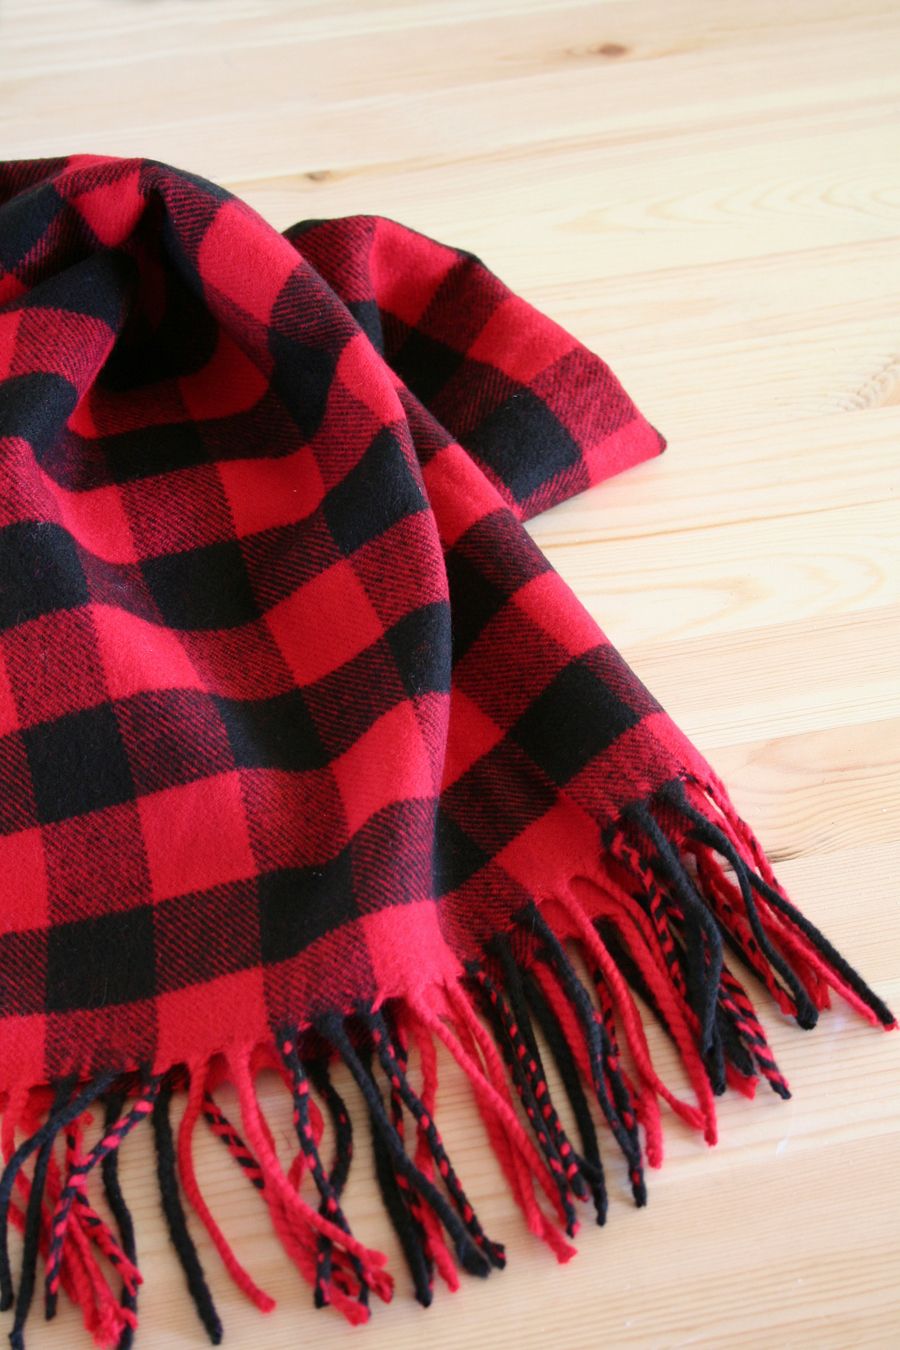
That’s right…I could have gone out and purchased some fabric for this project, but I’ve had this awesome cashmere-like scarf lying around for the past year because it was too short for me to wear as an actual scarf. I’ve been plotting all year on how to re-purpose it and I finally decided to create a pillow with it. I love creating pillow covers to coordinate with my yearly holiday themes so it was perfect, especially since plaid is such a hot trend right now in home decor.
Supplies:
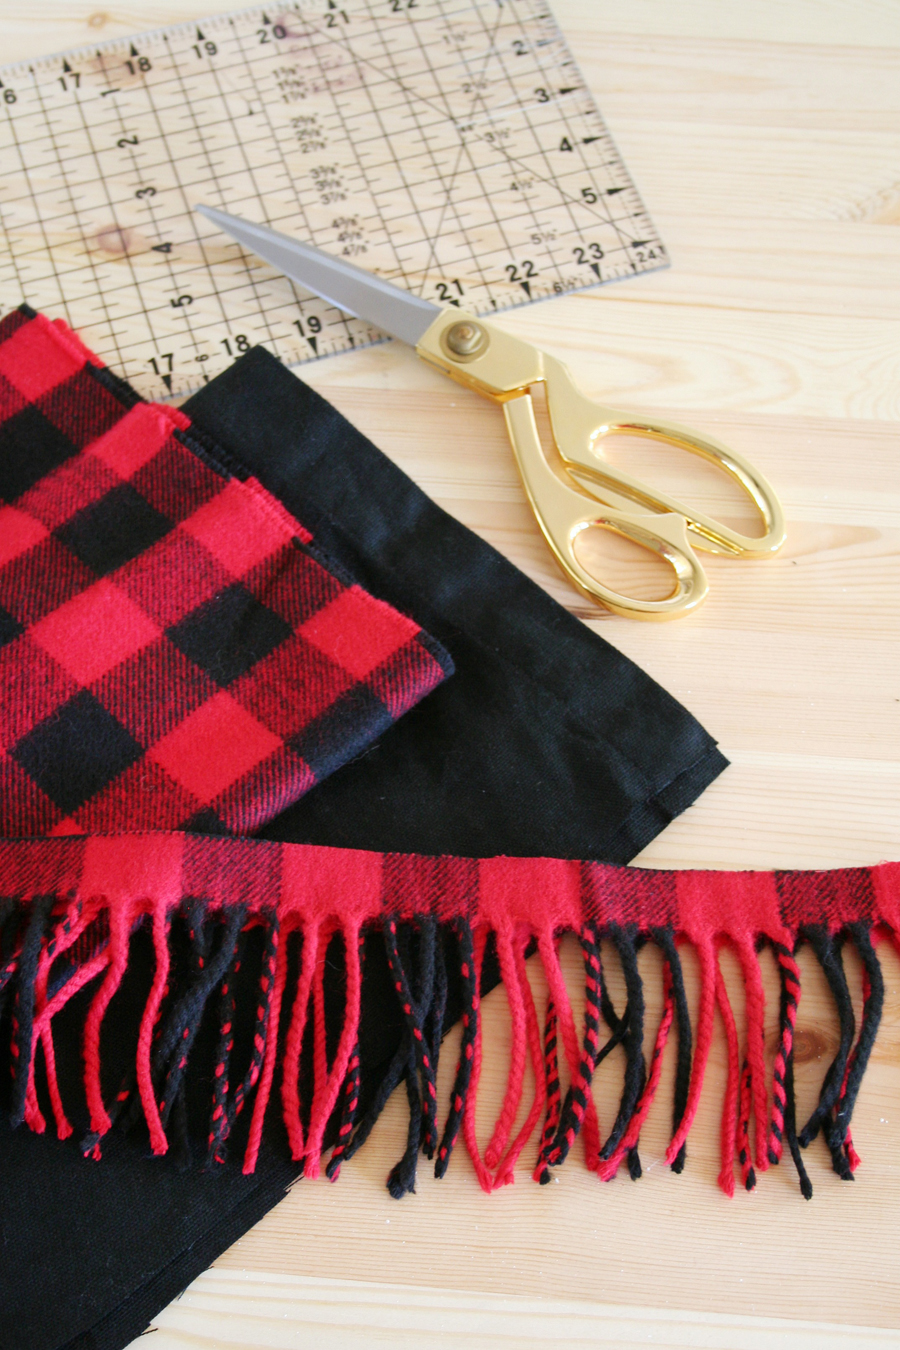
Buffalo check fabric, 1 piece cut to 13.5 x 17″
Black fabric (I love using duck cloth or canvas), 2 pieces cut to 9 x 17″
12 x 16″ Pillow form, found HERE
Scissors
Sewing machine
Ruler
Matching thread
Felt, white and gray
Cutting machine
Heat n’ Bond Ultrahold
Iron
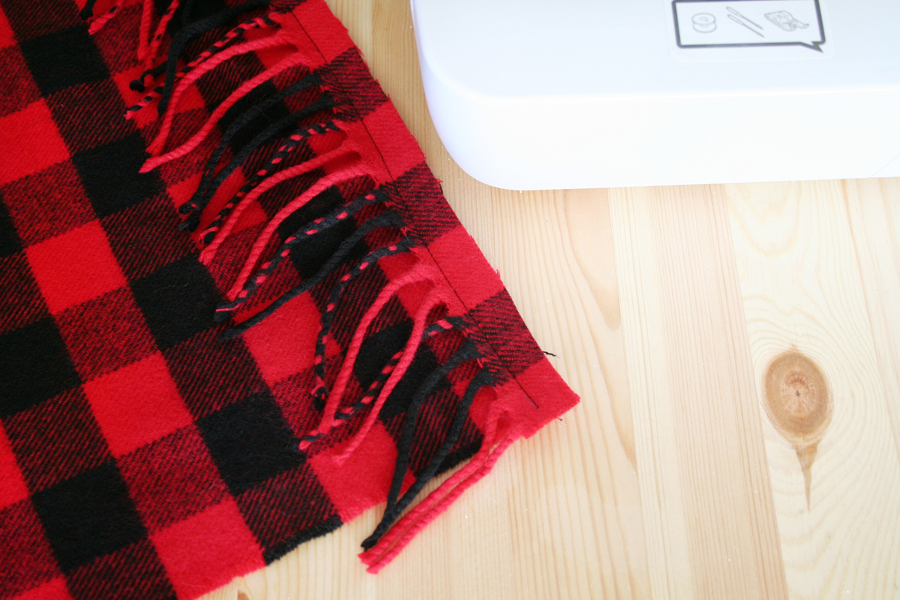
Since my buffalo check fabric was a scarf it had a really great fringed edge on each side. I decided that I wanted to use that fringe detail on my pillow to give it a little extra something special. I cut the fringe trim off each end of the scarf, making sure to leave approximately a 1/2″ edge to it. We are going to sew it back on in a second.
 After you’ve cut your black fabric (you should have 2 – 9 x 17″ pieces) you will need to sew a 1″ rolled clean seam on one end of each piece, your sewing along the long edge. These pieces are the back of your pillow cover. I love to check local thrift shops for old canvas curtains, they are usually in great condition and already have the edges sewn for you and make it one less step.
To see more details on sewing your pillow cover go HERE for full instructions.
This next step is totally optional, if you choose to add a fringe of some sort of trim you will want to sew it back on now. Lay your trim on each short side of the pillow front and pin in place. You will need to be sure that the trim is facing in towards the center of the pillow cover.
Lay your two black pieces of fabric face down on top of the buffalo check. This is where you’ll pin and sew the rest of the pillow cover, but click the link above for the detailed instructions on how to do that.
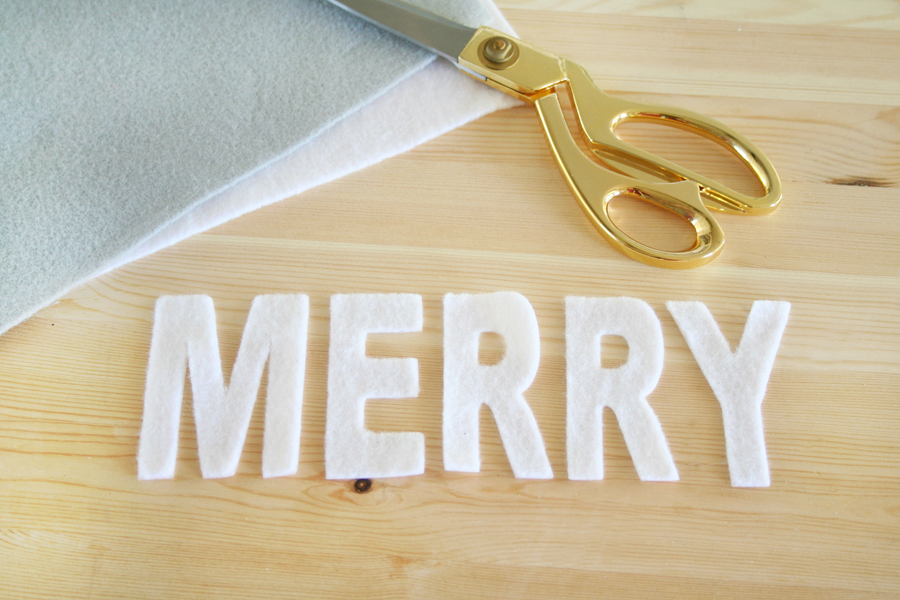
 I grabbed a piece of white felt and ironed on some Heat n’ Bond Ultrahold to the back following package instructions. Be sure to always place a thin towel over the felt when ironing, felt will melt.
Next, I created a template in my cutting machine software and placed the felt with backing on my cutting mat. I cut the felt using my cutting machine, then removed the paper Heat n’ Bond backing from each letter.
 I then ironed each letter on to some gray felt that also had Heat n’ Bond Ultrahold added to the back of it.
Using a very sharp pair of scissors I cut out each letter leaving a small gray border, this was way easier than trying to resize the wording with my cutting machine.
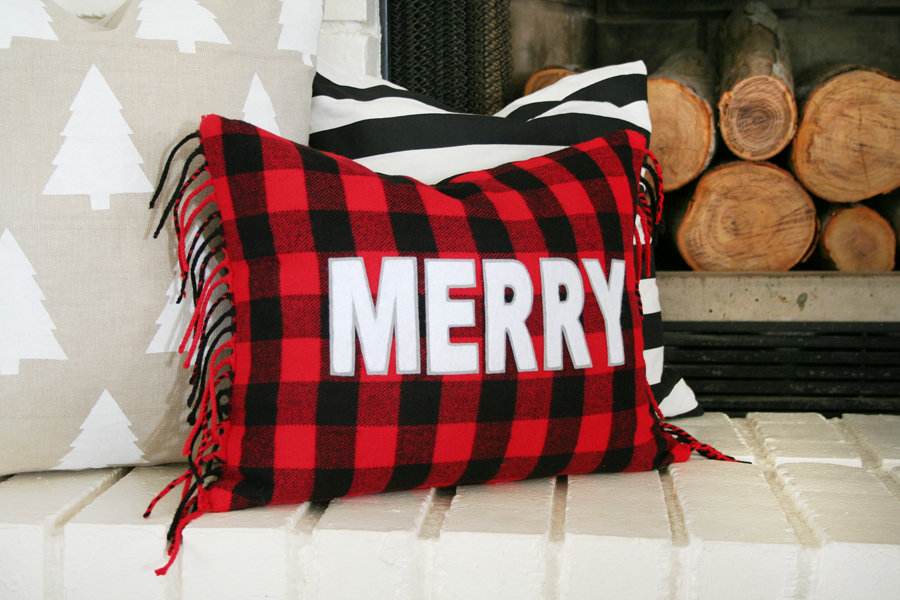
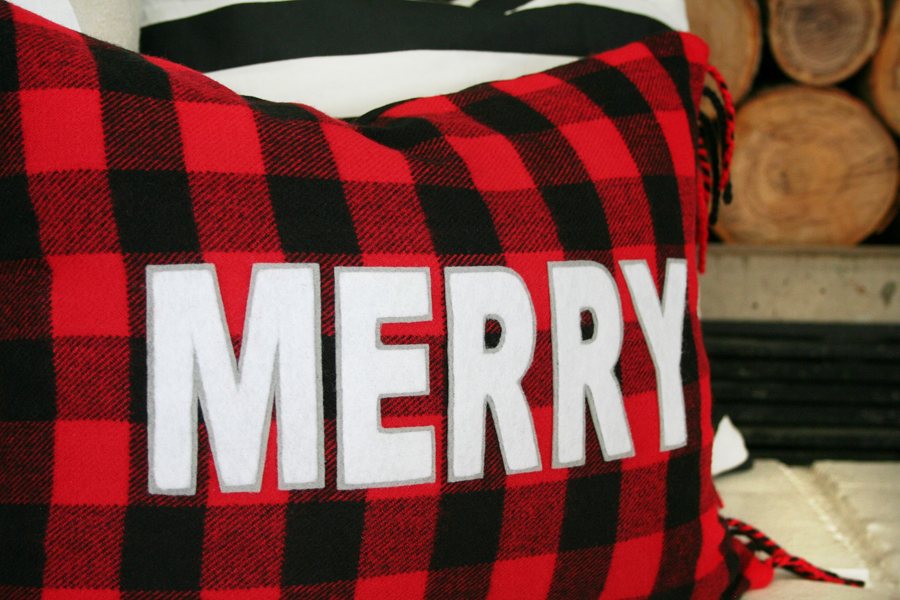
Once you’ve got your whole pillow cover sewn it’s time to iron on the felt letters. I used the hottest setting my iron will allow, making sure it has no water in it or it will steam. You don’t want steam, just a super hot dry heat. Center your felt letters onto the pillow cover and place a thin towel carefully over the wording and press firmly with the iron. Hold in place for several seconds at a time being sure to go over each letter for at least one minute. You want to be sure the Heat n’ Bond really holds and adheres.
If you want this pillow cover to be machine washable I suggest going a step further and sewing the letters on for extra durability. I will only be spot cleaning mine so I stuck with just ironing it on.
 Isn’t it so fun?! I absolutely LOVE how this pillow turned out, it’s going to be perfect with my decor this year. Best part is that it cost me nothing to make, I had the scarf – black duck cloth fabric, pillow form and felt in my craft stash!
 Looking for more Christmas ideas? Be sure to check out these awesome ideas:
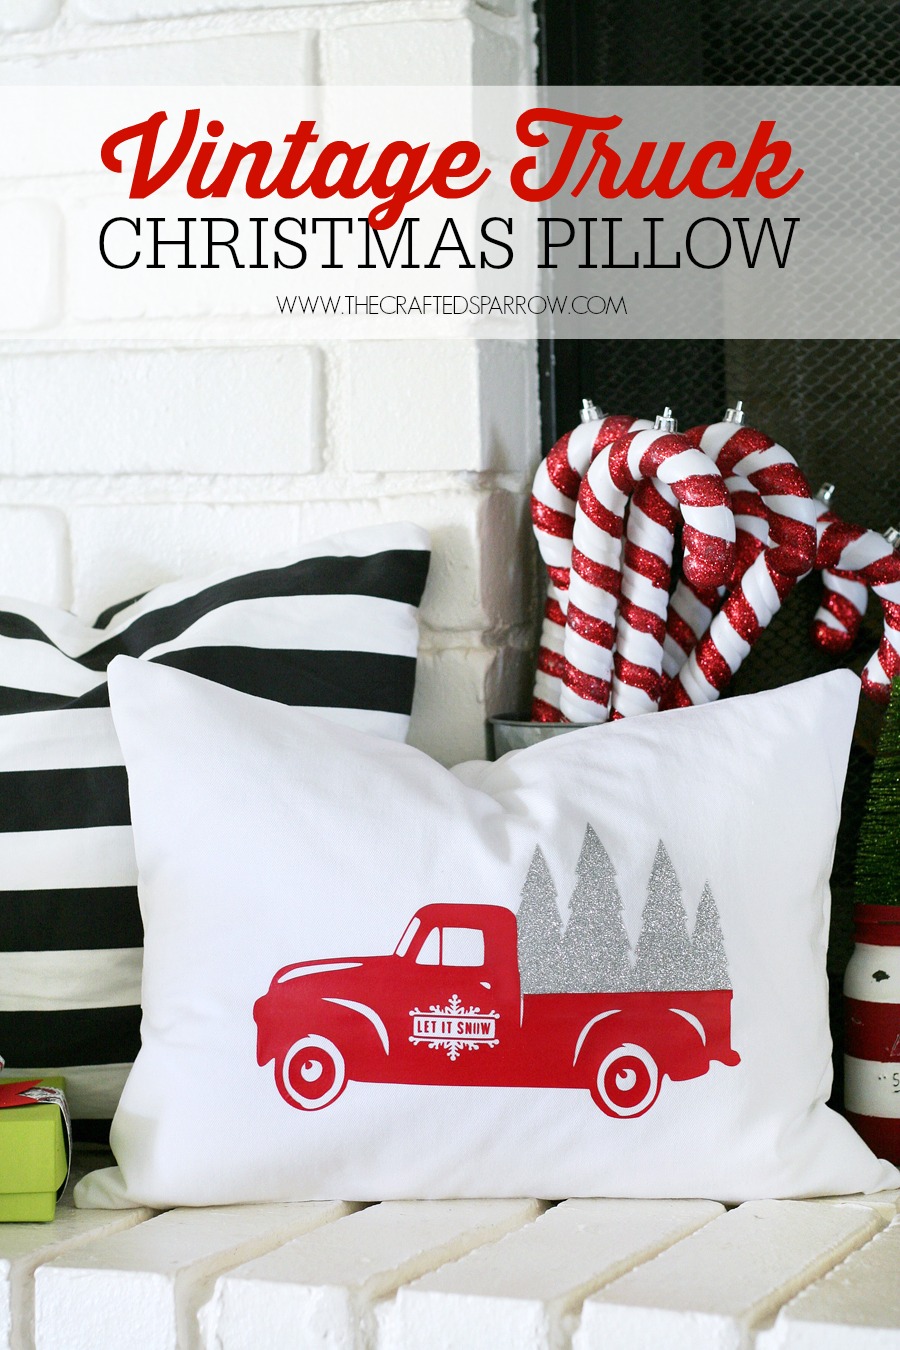
Vintage Truck Christmas Pillow

Vintage Inspired Christmas Pillow
Vintage Inspired Christmas Decor

Thank you SO much for sharing Rebecca! You are so talented and this pillow is so adorable!!! Be sure to follow Rebecca on her blog, The Crafted Sparrow and on Facebook, Instagram and Pinterest.