
DIY Planter Box (Paver Planter) Tutorial
Whatever your skill level with power tools, building and DIYing, this DIY Planter Box is for you! We’ve teamed up with The Home Depot and invite you to come build this awesome DIY Paver Planter Box out of pavers from Home Depot!

Have you heard of a DIH workshop? Every month, Home Depot hosts a DIH (Do It Herself) workshop that will help you to grab the skills and confidence you need to create some really amazing projects from simple builds, Home Decor projects and even Home Improvement Projects. You’ll work along side other women and DIY professionals to help you every step of the way! How awesome is that? Excited yet? Check out more Home Depot workshops here.
DIY Planter Box Project Tools:
- A Circular Saw
- Power Drill
- A caulking gun
- Utility Knife
- Sandpaper Block
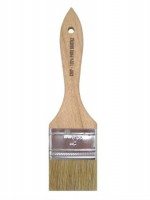
- Paint Brush
- 2 Bungee Cords
- Tape Measure
- Pencil
- Gloves
- Safety Googles
Paver Planter Materials:
- Four 12×12 pavers
- Two 8 foot 2x2s
- A bag of moisture control soil
- small roll of landscape fabric
- box of 3″exterior deck screws
- stain and polyurethane
- newspaper or dropclocth
- construction adhesive
Pro Tip: If using your DIY Planter Box outdoors, select pressure treated wood, cedar or redwood.
How to DIY Planter Box
Cut and sand wood
First, you’ll need to cut your 2x2s. I had the guys at The Home Depot do this for me. They’re always super helpful if you are not comfortable using a saw or if you don’t own one. You’ll need (4) 16″ pieces and (8) 12″ pieces. After you’re done cutting, sand any rough edges using your sanding block.

Stain Wood
Apply a stain and polyurethane to your wooden pieces. I like to wear disposable gloves because stain can really stain your hands. Go figure. 😉
Pro Tip: If you do get stain on your hands, scrub your hands with some vegetable oil and a pinch of sugar and it rinses right off. I used Minwax Jacobean for this project. It’s my current favorite stain color. I love how rich it is.

Assemble
For the next step, grab your 3″ deck screws. The ones I purchased from The Home Depot do not require pre-drilling. Drill and countersink the 2×2 pieces together, with the 16 ̋ pieces forming the legs, and the 12 forming the support between the legs. Apply some wood glue, and then screw in the 12 ̋support pieces in 12 ̋ down the legs. Make sure to allow for the pavers to be flush around the entire top. I held my paver into place to make sure if fit snugly before gluing and drilling.

Next, grab your remaining four 12 inch 2x2s, drill, apply some wood glue, and space them evenly across the bottom and screw them into the frame. One of mine got a little crooked when I drilled it in but no worries, no one will see the supports.

Finally, run a thick bead of construction adhesive around the inside perimeter of the frame. Carefully place each paver inside the frame then secure with bungee cords until the adhesive dries.

Optional: I wanted to spruce mine up a bit and since our house numbers on our home are difficult to see, I thought it’d be fun to add them to the planter that sits next to my front door. I used the same construction adhesive and glued address numbers to the paver on the bottom right. You can really get creative here!
Plant flowers or Plants
Last step, line your planter with landscape fabric and potting soil then add your plants. I chose these beautiful pink hydrangeas I found at The Home Depot. You all know I love a pop of pink and these were perfect for springtime.

That’s it! I’m ready to build a second one for the other side of my front door! They’re so welcoming!

If you make this DIY Planter box, Tag @classyclutter on Instagram and add the hashtag #classycluttermademedoit so we can see your handy work and cute paver planter.
If you liked this DIY Planter Box, check out these OUTDOOR projects:
For more Home DIY Projects, Check out:
 Tutorial")


Love yours! I love the dark stain and the house number. We did ours with a bit lighter stain and shorter. It’s fun to see each person’s interpretation!
http://modpodgerocksblog.com/2015/04/how-to-build-a-paver-planter.html
About how much would this project cost?
It was so long ago, I honestly can’t remember but it was not expensive! 🙂
Really beautiful dark stain and the house number! I should try it as soon as possible. The color is really awesome too look. Now, I am going to share this article on my twitter page to see my followers. Thanks anyway!
Thanks Charlotte!
Do you think you could make these taller? Maybe use two pavers high on each side?
For Sure! You’ll just want to test it and make sure they’re secure if you stack them! 🙂
It’s a beautiful touch adding your door number to the front, I did try to think of other decal ideas to add.
If you had a stencil of some sort you could paint some nice detail on the paving slabs, or, some fake ivy glued to the side I think would look great too!
Thanks for the heads up on the Homedepot DIH workshops, they sound awesome!
I love your post you have shared here on your site. I would like to share it with my friends on all my social media accounts. Thanks for writing such an informative content.
Wow! Just nice & beautiful. Smart thinking also. Thanks for sharing.
Such a nice touch to use your door number! I was looking for some ideas since I’m redecorating my cottage, so I’d like to say thanks for sharing your tutorial! Added to my list. And if you don’t mind, I would like to play with the original idea – add some painting accents (simple white ornament, for instance). But I’m not sure, which paint I should use.
There is nothing that makes your more proud of your home than building and constructing things yourself. You get a nice feeling every time you see it. Thanks for sharing this tip.