
DIY Capiz Shell Chandelier for under $10
Holy friggin cow! Is it possible to be in love with a faux light fixture? I kind of am. Don’t worry Craiggy, I still love you most! 😉
I got this wild idea that I could make my very own chandelier for my Master Bedroom after seeing some pretty amazing ones here and here. Not to mention, save myself about $100-200!

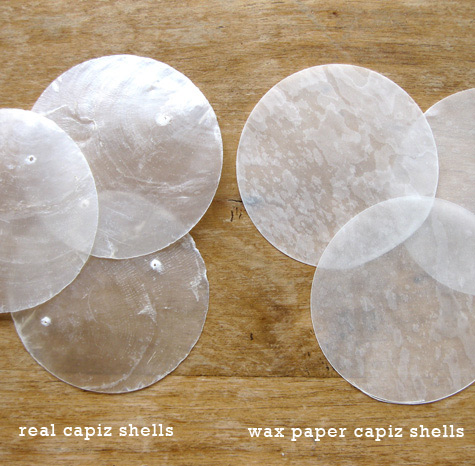
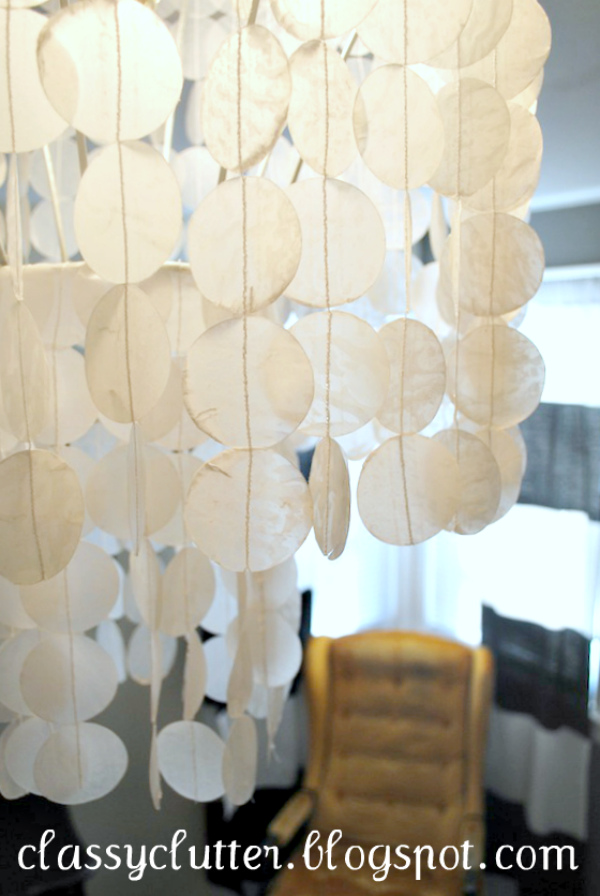
When I saw how close the real capiz shells look compared to the wax paper shells, I knew this would be the perfect touch to my bedroom! I almost like the look of the wax better! AND the wax paper shells aren’t fragile and noisy when hanging!
Here’s how it all went down…
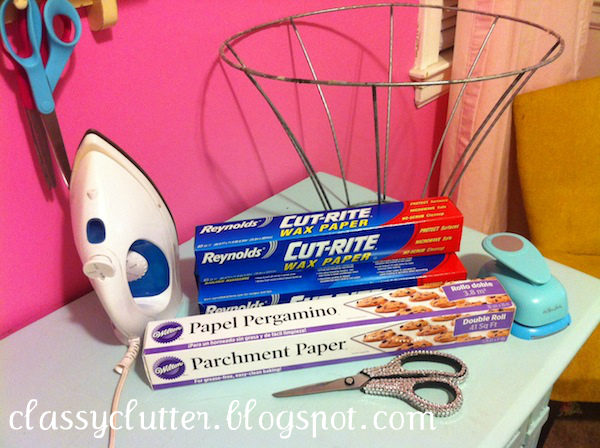
You’ll need:
2-3 rolls of wax paper
about 42″ of parchment paper
scissors
iron
hot glue gun/glue
2-2.5″ circle punch
old lamp shade
optional:
sewing machine
spray paint
First, remove the old fabric from your used lampshade (get one from a thrift store for a couple bucks! – you can find super ugly ones for super cheap that will work perfectly.) Spray paint the frame of your old lampshade if you want. I sprayed mine white.

1. Make a parchment paper and wax paper sandwich. Parchment paper is your bread and 3 sheets of wax paper is your PB&J. I used ~18″ sheets of wax paper and 20″ sheets of parchment paper.
2. Lay your paper sandwich on a flat surface
3. Iron on low setting – this melts the 3 sheets of wax paper together to make one fatty piece of wax paper.
4. Remove your parchment paper and repeat, repeat, repeat. You will need lots! I probably did like 8-10 18″ sheets.

Next, I cut my wax paper into 2.5(ish) strips. Mine is a 2″ punch from Hobby Lobby. I got it while it was on sale for 50% off. I think it ended up being like $3-4 after the discount.
BIG GIANT TIP!!!! When punching your circles out, do FOUR strips at a time. if you do less.. your punch will do this to your wax paper.

Total nightmare. Seriously.
I then separated my circles into a muffin pan. I used 8 circles per strand for the top tier and 6 circles per strand for my bottom tier.
Then, sew (or hot glue) your circles into strands. I loved the look of the stitching down the center of the circles as a sewed them so I just ran mine through my sewing machine. I put my tension at 4 to sew through the paper. It worked perfectly! I used the video on Freshly Picked to show me how to sew them together.
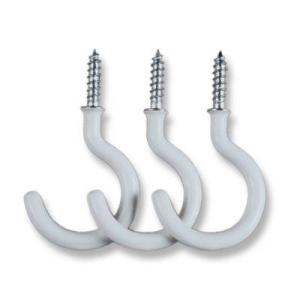
Finally, hot glue your strands to your lampshade and hang it up! I hung mine right over the existing fixture using these hooks available at Home Depot. I already had some on hand.
Then stand back and admire! OHHHHH my HECK I love love love it! Even my husband came in our room and saw it and said “Babe! That is AWESOME!” I may or may not have had a big juicy giddy smile on my face! It’s perfect for this room! YAY!
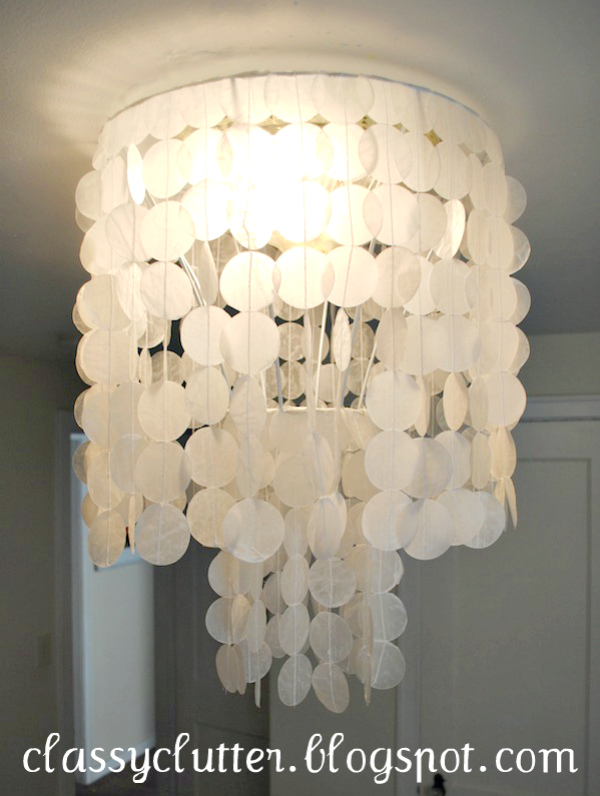
Such an improvement to your typical builder grade light fixtures!
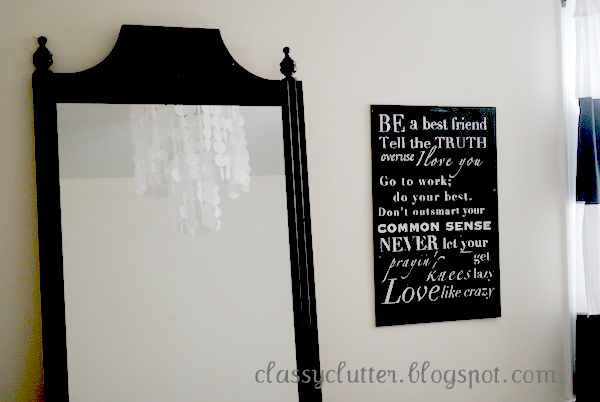
Love like crazy sign tutorial coming soon! 🙂

Like my new mustard yellow wing back chair!? That’s a new find!
Alright my bloggity friends! What do you think!? Like? Love??
I think I need one in every room! lol!

See my full master bedroom post here.


Love this Mal!!!
I love it!! But I am sure you know i am a big fan period! I love classy Clutter!
Well I just love it! I am putting it on my list as a possibility for my daughter’s room Thanks for the tutorial!
This is FANTABULOUS!!!! I am doing this, I am doing this, I am doing this!!! Did I mention I am doing this?!!!!! Thank you so much for the tutorial, again FANTABULOUS!!!
WOW!!!! THis looks amazing! Even prettier than the real thing! Great job & happy Friday!
This is sooooo AWESOME! If only I had overhead light fixtures in rooms besides the kitchen, bathroom, and dining room… 🙁
Oh WOW! What a great idea, soooo pinning this!
Oh my goodness! This is amazing! I can’t believe how good it looks. I really want to do it for my guest room! Great tutorial!
I love this!!
OMG!! That is amazing. Thank you for the great tutorial. I’m hosting a GIVEAWAY on DIY Home Sweet Home. Would love you to check it out.
http://diyhshp.blogspot.com/2011/11/giveaway-shabby-apple-dress.html
I LOVE it!! If I can only convince my husband to love it I’ll be set 🙂 My style and his style of decor are extremely different. Maybe I could put it in my daughter room.
LOVE IT!! great job!!
You are awesome so I featured you at my Hookin Up with HoH Party!
Feel free to stop by for a button if you’d like. 🙂
xoxo
Allison @ House of Hepworths
Will you come and make me one of these? This is fantastic!
LOVE the colors-I think you and I were cut from the same cloth. I found you through HOH and just had to see more! I just redid both our Master Bathroom using a lot of the same colors that you did!:
http://www.potholesandpantyhose.com/2011/11/the-master-bathroom-remodel-part-deux/
And Master Bedroom:
http://www.potholesandpantyhose.com/2011/10/the-master-bedroom-remodel/
Stop by sometime and say hi, if you get bored!
Turned out INCREDIBLE!!! I’m your newest follower! I’d love you to come over for a visit!!!
Aimee from ItsOverflowing.com
LOVE this room! I’m going to have to go snag one of those circle punchers at Hob Lob! This room is REALLY great!….and that’s coming from someone who is picky about rooms! Fantastic job!
–Katie
http://www.blah2beautiful.blogspot.com
Creatively Living
Awesome! Will do it. Thank you!
I love this! I’ve been wanting/needing light covers for my craft room/office for years and have wanted a small chandelier, but they are so expensive for what they are! This is a perfect fix that should work for all 3 of my fixtures in my pretty purple craft room/office. Thank you so much for posting!
I love this! It looks amazing! Thank you so much for the tutorial 🙂
This is so cool. I will be making this for my bedroom. Thanks so much for sharing.
so stinkin clever!!
So pretty! This would be perfect in my daughters room. Cost effective yet stunning. Love it.
This looks wonderful. I love Capiz Shells. They are so elegant. I especially love them in a non nautical themed room! Very chic. Great job!
How sweet! Love the room. It’s super cute!
How cool is that?! Glad to find you via the TT&J link up!
So cute! My daughter would love this! Found you via TT&J and visiting from dirtroaddamsel.blogspot.com. Pinning this for future reference!
Wow.. awesome idea! Love it!
Found you on TT&J! 😉 Would love for you to come by my party to link this up.. or any other projects you may have.
http://www.littleinspiration.com/2012/02/create-inspire-party.html
Thanks,
Angie from A Little Inspiration
P.S New follower of your lovely blog!
Wow you did an outstanding job on this!
I bought mine in the fall and yours is just as beautiful!
What patience you have!!
Love it!
Deborah xoxo
Wow, nice job on the chandy and that room looks gorgeous!
OH MY GOD…I have been dreaming of a capiz chandelier for years now, and was always on the lookout for a capiz shell curtain that I could cut up and make a light out of…but this…ohhhh I love this idea…I am heading to the store right now to stock up on wax paper! Thank you!!!! 😀
This is so amazing!
NO WAY! That is totally awesome! I’ve always loved the one from West Elm all those years ago!!! This is awesome!!
I was looking to buy one but we are limited on money and when i saw this i was like HOLY COW!!!!!!!
I nearly fell off my chair when I read what this is really made from! Awesome! I would love it if you would come link up with Busy Monday (Monday through Thursdays) at A Pinch of Joy, a linky party for ideas that make life better, easier and more fun!
Well done! I bought one just like it for $80 at World Market… wish I’d seen your tutorial first. 🙂
this turned out awesome!! love it!
I love, love this. I am just wondering how well it’s holding up? Are the “shells” still sticking together after all this use? I was wondering if they would start to peel apart at the edges where they weren’t sewn? I realize they’re waxed together, but is that sufficient to hold up? Thanks 🙂 Beth
BEAUTIFUL!!!! Y’all are so creative, I love this idea, will continue to blog-stalk you 🙂
Tanya
This tutorial made a follower out of me! 🙂 Way to go on this light fixture…it’s beautiful and so smartly done. I may have to try this as we have SEVERAL builder grade fixtures in our house. 🙂
Gorgeous! I will be attempting this ASAP: possibly for a guest bath!
Great idea! Love it.
Super cute. I love it.This will be pinned for sure. I would love if you came and linked up some of your great posts to my link party @ Show Off Monday on Kampen Lane. http://www.kampenlane.com/2012/06/show-off-monday-9.html
~Taylor-Ann
Wow! Fabulous and I love how great your tutorial is! I think I may give this a try. Thank you so much for sharing. Found you through TT&J party!!
Cheers!
Cyndy
I’m in love with this and thank you so much for the detailed tutorial!
I just googled capiz shell chandeliers to buy, and you are absolutely my new hero!!!
Found you through Thrifty Decor Chick, and I am SO glad I did!! This looks ah.ma.zing!! I would love to upgrade some of the light fixtures in our house, but we’re renting right now and I don’t want to spend money on retail priced fixtures and then have to get them installed. This is a really awesome alternative!
Steph
This is a great project! It fits perfectly in your room:)
Love this but so irritated! I bought the exact same puncher & it only worked for about 10 mins and the stopped cutting whole circles! Waste of money!
Wow! Wow! Wow! Thank you for the detailed tutorial. This project is definitely on my list!
Too cool! I love capiz shells, they remind me of my grandparents house- they used to have a bunch of stuff made with them. Thanks for the trip down memory lane!
Stacia@ http://feathersandsunshine.blogspot.com
I love your tutorial! I had the same problem as Meagan, though. I had a different 2″ hole punch that stopped working after maybe 10-15 punches so I bought the same one from your post and now THAT one has stopped working! So frustrating! I tried cutting them out by hand but my hand is not steady enough to make a perfect circle. You probably wouldn’t be able to tell once it’s hung up but that’s a lot of time and hand crampage for a not perfect result!
This would look great in my closet! Couldn’t do the bedroom… need my ceiling fan!
I know this is an old post, but I just saw it linked on tt&j and I just had to tell you that I thought this was beyond fabulous! I’m adding this to my to do list…I can’t believe how amazing this looks!
And it is way more eco-friendly! windowpane mussels (capiz) are overharvested in many parts of the world.
hello- I was super inspired by this project & am trying it on my own. However, I’m having a lot of trouble getting the holes to punch. I’ve tried, one-four sheets of wax paper one to four sheets thick and they all come out ragged or jam the punch (tried with 2 different types of brand new punches as well.) Any tips?
WOW! This is so gorgeous! If you get a chance, please link up to my link party: http://suburbsmama.blogspot.com/2013/08/sunday-linky-23.html
I had spoke experience using a paper punch, even adhering to the instructions here. I used a borrowed punch, however, so I wonder if anew lunch would be sharper. I ended up having a friend who has a cameo silhouette, cut the circles out for me…that was slick! Thanks for posting the tutorial though!
Found your post. 30 min of supply gathering at grocery store, hobby lobby and goodwill, then 2 hours of laughter filled Nana and Granddaughter time later and perfect chandlier. I have the real thing at my home and honestly…the look is identical. Thanks.
This makes me SO happy Cari!!! Thanks for commenting and I hope you guys had so much fun with the project! xoxo Mallory
Any way to hang this without making holes in the ceiling?
Hi Sarah!
You can probably use 3M Command Hooks! Hope that helps!!
Mallory